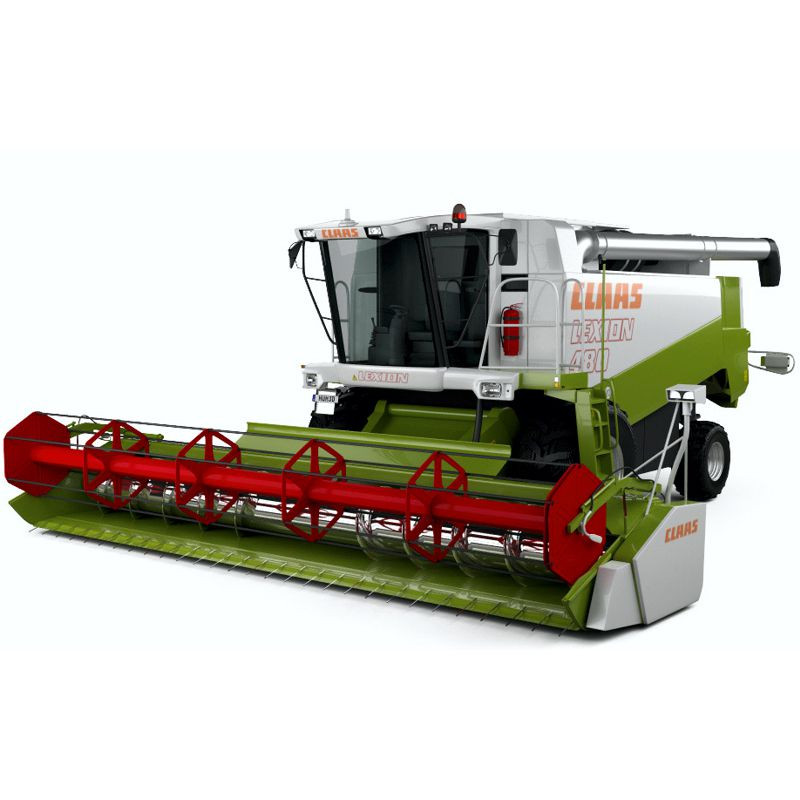
CLAAS LEXION 480 - WORKSHOP, SERVICE, REPAIR MANUAL
- English Service Manual / Repair Manual, for combine harvester Claas Lexion 480.
CONTENTS:
GENERAL INFORMATION
-General
- Introduction
- Introduction to the CLAAS Repair Manual
- Key to symbols
-Safety Rules
- Important notice
- Identification of warning and danger signs
- Correct use of the machine
- General safety and accident prevention regulations
- Leaving the machine
- Compressor-type air conditioner
- Maintenance
- Basic rule
- Pressure accumulator
-General repair information
- Reason of damage
- Spare parts
- Engine
- Gearboxes
- Alternator
- Tensioning the steel roller chains
- Taper ring fasteners
- Self-locking bolts
- Liquid locking compound
- Correct installation of lock collar bearings
- Correct installation of adapter sleeve bearings
- Ferrule fittings on hydraulic lines
- Progressive ring fittings on hydraulic lines
- Taper fittings on hydraulic lines
- Welding
- Some advice for speedy and correct repair work:
-Tightening torques
- Bolts
- Hydraulic fittings
- Brake line screw joints
- Wheel bolts
- Safety features
-Specifications
- Lubricants chart
- Hydraulic pressure values
-Sectional view of machine
-Drive diagram
- Drive diagram, left-hand
- Drive system diagram, right-hand side
OPERATOR'S PLATFORM
-Air conditioner
- Important instructions regarding the compressor-type air conditioning system
- Important instructions regarding the installation of parts in the compressor-type air conditioner
- Air conditioning system – Topping up refrigerant
- Checking / topping up the refrigerant oil level at the air conditioner compressor
- Topping up refrigerant oil
- Removing the condenser
- Refitting the condenser
- Removing the air conditioner compressor
- Installing the air conditioner compressor
- Removing the air conditioner compressor electro-magnetic clutch
- Air conditioner compressor Sanden Sd 7h 15, disassembled
- Installing the air conditioner compressor electro-magnetic clutch
- Removing the air conditioner compressor cylinder head / cylinder head gasket
- Installing the air conditioner compressor cylinder head / cylinder head gasket
- Removing the air conditioner compressor shaft seal
- Installing the air conditioner compressor shaft seal
- Removing the expansion valve
- Air conditioning system (cab side), disassembled
- Installing the expansion valve
- Removing the thermostat
- Installing the thermostat
- Removing the evaporator
- Installing the evaporator
- Removing the filter receiver drier
- Filter receiver drier, disassembled
- Installing the filter receiver drier
-Steering
- Scenes of failures on the Orbitrol steering unit
- External leaks
- Internal leaks
- Removing the steering column
- Disassembling the steering column
- Steering column, disassembled:
- Assembling the steering column
- Installing the steering column
- Removing the valve block from the Orbitrol
- Installing the valve block on the Orbitrol
- Removing the Orbitrol
- Orbitrol, disassembled
- Installing the Orbitrol
-Parking brake
- Removing the parking brake
- Installing the parking brake
-Foot brake
- Removing the master brake cylinder
- Master brake cylinder, disassembled
- Assembling the master brake cylinder
- Installing the master brake cylinder
- Adjusting the master brake cylinder
-Engine electric system
- Alternator
THRESHING MECHANISM
-Feed rake conveyor
- Removing the feed rake conveyor
- Installing the feed rake conveyor
- Removing the intercepting piece
- Installing the intercepting piece
- Removing the feed rake conveyor suction blower
- Disassembling the feed rake conveyor suction blower
- Feed rake conveyor suction blower, disassembled:
- Assembling the feed rake conveyor suction blower
- Installing the feed rake conveyor suction blower
- Removing the top feed rake shaft
- Feed rake top shaft, disassembled
- Installing the feed rake top shaft
- Removing the bottom feed rake roller
- Bottom feed rake roller, disassembled
- Assembling the bottom feed rake roller
- Installing the bottom feed rake roller
- Replacing the wooden ledges
- Removing the intermediate floor
- Installing the intermediate floor
- Replacing the runners
- Removing the intermediate drive shaft
- Intermediate drive shaft, disassembled
- Installing the intermediate drive shaft
- Removing the reverser drive
- Reverser drive, disassembled
- Installing the reverser drive
- Replacing the feeder chains
-Threshing concave
- Removing the stone trap
- Installing the stone trap
- Removing the preconcave
- Preconcave, disassembled
- Installing the preconcave
- Removing the main concave
- Main concave, disassembled
- Installing the main concave
- Basic concave setting
- Adjusting the concave potentiometer
- Learning the limit stops
- Learning the limit stops
-Accelerator
- Removing the bearing assembly and the shaft on the right-hand side
- Disassembling the right-hand bearing assembly
- Assembling the right-hand bearing
- Installing the right-hand bearing assembly and shaft
- Removing the bearing assembly on the left-hand side
- Disassembling the left-hand bearing assembly
- Assembling the left-hand bearing assembly
- Installing the left-hand bearing assembly
- Replacing the accelerator caps
- Removing the accelerator
- Accelerator, disassembled
- Installing the accelerator
-Threshing drum
- Removing the right-hand drum bearing assembly
- Disassembling the right-hand drum bearing
- Right-hand drum bearing, disassembled:
- Installing the right-hand drum bearing
- Removing the left-hand drum bearing assembly
- Disassembling the left-hand drum bearing
- Left-hand drum bearing assembly, disassembled:
- Installing the left-hand drum bearing assembly
- Removing the threshing drum
- Threshing drum, disassembled
- Renewing the beater bars
- Removing the threshing drum shaft
- Installing the threshing drum shaft
- Installing the threshing drum
-Impeller
- Removing the right-hand impeller bearing
- Installing the right-hand impeller bearing
- Removing the left-hand impeller bearing
- Installing the left-hand impeller bearing
- Removing the impeller
- Installing the impeller
- Removing the flanged shaft (from serial no. ...)
- Impeller disassembled (from serial no. ...)
- Installing the flanged shaft
- Removing the impeller shaft (up to serial no. ...)
- Impeller disassembled (up to serial no. ...)
- Installing the impeller shaft (up to serial no. ...)
-Axial rotors
- Removing the separation grates
- Installing the separation grates
- Removing the separating jacket
- Installing the separating jacket
- Removing the axial rotor supporting arm
- Disassembling the axial rotor supporting arm
- Supporting arm, disassembled:
- Installing the axial rotor supporting arm
- Removing the axial rotor
- Installing the axial rotor
- Removing the hybrid unit completely
- Installing the hybrid unit
CLEANING UNIT
-Return pan
- Lowering the return pan (from serial no. ...)
- Raising and installing the return pan (from serial no. ...)
- Removing the return pan
- Rear rocker arm, disassembled
- Installing the return pan
-Sieve pan
- Removing and installing the sieves
- Removing the upper sieves (from serial no. ...)
- Removing the lower sieves (from serial no. ...)
- Installing the sieves (from serial no. ...)
- Tightening torques of axial mountings for the upper and lower sieves (from serial no. ...)
- Sieves – Basic setting (electric sieve adjustment – from serial no. ...)
- Removing the upper sieves (up to serial no. ...)
- Removing the lower sieves (up to serial no. ...)
- Installing the sieves (up to serial no. ...)
- Tightening torques of axial mountings for the upper and lower sieves (up to serial no. ...)
- Sieves – Basic setting (electric sieve adjustment – up to serial no. ...)
- Removing the 3-D upper sieve frame
- 3-D upper sieve frame, disassembled
- Installing the 3-D upper sieve frame
- Removing the sieve pan
- Sieve pan, disassembled
- Installing the sieve pan
- Checking and adjusting the alignment of preparation floor and sieve pan
-Preparation floor
- Removing the preparation floor
- Preparation floor, disassembled
- Installing the preparation floor
-3-D sieve pan control system
- Adjusting the 3-D sieve pan control system
- Adjusting pivot arm (A) with the “3-D gauge”
-Rocker arm drive
- Removing the intermediate drive shaft for the rocker arm drive
- Intermediate drive shaft for rocker arm drive, disassembled
- Installing the intermediate drive shaft for the rocker arm drive
-Cleaning fan
- Removing the bearings of the cleaning fan
- Cleaning fan bearing, disassembled
- Installing the cleaning fan bearing
- Removing the cleaning fan shaft
- Removing the centre cleaning fan bearing
- Centre cleaning fan bearing, disassembled
- Installing the cleaning fan shaft
- Removing the cleaning fan rotors
- Installing the cleaning fan rotors
- Removing the cleaning fan housing
- Installing the cleaning fan housing
GRAIN DELIVERY
-Returns elevator
- Removing the returns elevator chain
- Installing the returns elevator chain
- Removing the top returns auger
- Installing the top returns auger
- Removing the returns elevator
- Disassembling the returns elevator
- Assembling the returns elevator
- Installing the returns elevator
- Removing the returns elevator boot
- Installing the returns elevator boot
- Removing the lower returns auger
- Installing the lower returns auger
-Grain elevator
- Removing the clean grain elevator chain
- Installing the clean grain elevator chain
- Removing the clean grain elevator head
- Dismantling the clean grain elevator head
- Clean grain elevator head, disassembled:
- Assembling and installing the clean grain elevator head
- Removing the clean grain elevator shaft
- Installing the grain elevator shaft
- Removing the clean grain elevator boot
- Installing the clean grain elevator boot
- Removing the clean grain auger
- Installing the clean grain auger
- Removing the grain tank filler auger
- Removing the grain tank filler auger angle drive
- Disassembling the grain tank filler auger angle drive
- Grain tank filler auger, disassembled:
- Installing the grain tank filler auger
-Grain tank unloading
- Removing the grain tank cross auger
- Grain tank cross augers, disassembled
- Installing the grain tank cross auger
- Removing the vertical grain tank unloading auger
- Installing the vertical grain tank unloading auger
- Removing the horizontal grain tank unloading auger
- Installing the horizontal grain tank unloading auger
- Removing the lower grain tank unloading angle drive (from serial no. ...)
- Disassembling the lower grain tank unloading angle drive (from serial no. ...)
- Lower grain tank unloading angle drive, disassembled: (from serial no. …)
- Assembling the lower grain tank unloading angle drive (from serial no. ...)
- Installing the lower grain tank unloading angle drive (from serial no. ...)
- Removing the lower grain tank unloading angle drive (up to serial no. ...)
- Disassembling the lower grain tank unloading angle drive (up to serial no. ...)
- Lower grain tank unloading angle drive, disassembled: (up to serial no. …)
- Assembling the lower grain tank unloading angle drive (up to serial no. ...)
- Installing the lower grain tank unloading angle drive (up to serial no. ...)
- Removing the upper grain tank unloading angle drive
- Disassembling the upper grain tank unloading angle drive
- Upper grain tank unloading angle drive, disassembled:
- Assembling the upper grain tank unloading angle drive
- Installing the upper grain tank unloading angle drive
- Removing the grain tank unloading tube
- Refitting the unloading auger tube
- Removing the grain tank unloading tube elbow
- Installing the grain tank unloading tube elbow
- Removing the vertical unloading auger tube
- Installing the vertical unloading auger tube
STRAW DISCHARGE
-Straw chopper
- Removing the right-hand straw chopper bearing
- Right-hand straw chopper bearing assembly, disassembled
- Installing the right-hand straw chopper bearing
- Removing the left-hand straw chopper bearing
- Left-hand straw chopper bearing assembly, disassembled
- Installing the left-hand straw chopper bearing
- Removing the cutting cylinder
- Cutting cylinder, disassembled
- Installing the cutting cylinder
- Replacing the free-swinging knives
-Uni-spreader
- Removing the fan blade bearings
- Assembling and installing the fan blade bearing
DRIVES
-Drive belts
- General Information
-Drive diagram
- Drive diagram, left-hand
- Drive system diagram, right-hand side
-Left-hand drive belts
- Removing the cutterbar drive belt (1) (Cutterbar drive without variable-speed drive)
- Installing and adjusting the cutterbar drive belt (1) (Cutterbar drive without variable-speed drive)
- Removing the cutterbar drive belt (2) (Cutterbar drive with variable-speed drive)
- Installing and adjusting the cutterbar drive belt (2) (Cutterbar drive with variable-speed drive)
- Removing the cutterbar variable-speed drive belt (3)
- Installing and adjusting the cutterbar variable-speed drive belt (3)
- Removing the impeller drive belt (4)
- Installing and adjusting the impeller drive belt (4)
- Removing the cutterbar intermediate drive belt (5)
- Installing and adjusting the cutterbar intermediate drive belt (5)
- Removing the uni-spreader hydraulic pump drive belt (6)
- Installing and adjusting the uni-spreader hydraulic pump drive belt (6)
- Removing the main intermediate drive belt (7)
- Installing and adjusting the main intermediate drive belt (7)
- Removing the grain tank unloading intermediate drive belt (8)
- Installing and adjusting the grain tank unloading intermediate drive belt (8)
- Removing the straw chopper intermediate drive belt (9)
- Installing and adjusting the straw chopper intermediate drive belt (9)
- Removing the straw chopper drive belts (10 and 11)
- Installing and adjusting the straw chopper drive belts (10 and 11)
- Removing the uni-spreader intermediate drive belt (12)
- Installing and adjusting the uni-spreader intermediate drive belt (12)
- Removing the sieve pan intermediate drive belt (13)
- Installing and adjusting the sieve pan intermediate drive belt (13)
- Removing the sieve pan intermediate drive belt (14)
- Installing and adjusting the sieve pan intermediate drive belt (14)
- Removing the sieve pan drive belt (15)
- Installing and adjusting the sieve pan drive belt (15)
- Removing the uni-spreader drive belt (16)
- Installing and adjusting the uni-spreader drive belt (16)
- Removing the grain tank unloading drive chain (17)
- Installing and adjusting the grain tank unloading drive chain (17)
-Right-hand drive belts
- Adjusting the axial rotor step drive (18)
- Adjusting the axial rotor intermediate drive (19)
- Removing the fan intermediate drive belt (20)
- Installing and adjusting the fan intermediate drive belt (20)
- Removing the fan drive belt (21)
- Installing and adjusting the fan drive belt (21)
- Removing the threshing mechanism variable-speed drive belt (22)
- Installing and adjusting the threshing mechanism variable-speed drive belt (22)
- Removing the threshing drum drive belt (23)
- Installing and adjusting the threshing drum drive belt (23)
- Removing the accelerator drive belt (24)
- Installing and adjusting the accelerator drive belt (24)
- Removing the radiator chaff screen intermediate drive belt (25)
- Installing and adjusting the rotary chaff screen intermediate drive belt (25)
- Removing the radiator chaff screen drive belt (26)
- Installing and adjusting the rotary chaff screen drive belt (26)
- Removing the fan drive belt (27)
- Installing and adjusting the fan drive belt (27)
- Removing the suction blower drive belt (28)
- Installing and adjusting the suction blower drive belt (28)
- Removing the air conditioner compressor drive belt (29)
- Installing and adjusting the air conditioner compressor drive belt (29)
- Removing the compressed-air compressor drive belt (30)
- Installing and adjusting the compressed-air compressor drive belt (30)
- Removing the alternator drive belt (31)
- Installing and adjusting the alternator drive belt (31)
- Removing the feed rake conveyor suction blower drive belt (34)
- Installing and adjusting the feed rake conveyor suction blower drive belt (34)
- Removing the straw spreader drive belt (36)
- Installing and adjusting the straw spreader drive belt (36)
-Cutterbar drive
- Removing the front pulley of cutterbar drive (1)
- Installing the front pulley of cutterbar drive (1)
- Removing the deflection pulley of cutterbar drive (1)
- Deflection pulley of cutterbar drive (1), disassembled
- Installing the deflection pulley of cutterbar drive (1)
- Removing the slip clutch of cutterbar drive (1)
- Installing the slip clutch of cutterbar drive (1)
- Replacing the slip clutch linings of cutterbar drive (1)
- Slip clutch of cutterbar drive (1), dismantled
- Removing the jockey pulley of cutterbar drive (1)
- Jockey pulley of cutterbar drive (1), disassembled
- Removing the rear pulley of cutterbar drive (1) (up to serial no. ...)
- Dismantling the rear pulley of cutterbar drive (1) (up to serial no. ...)
- Rear pulley of cutterbar drive (1), disassembled: (up to serial no. ...)
- Assembling the rear pulley of cutterbar drive (1) (up to serial no. ...)
- Installing the rear pulley of cutterbar drive (1) (up to serial no. ...)
- Removing the rear pulley of cutterbar drive (1) (from serial no. ...)
- Dismantling the rear pulley of cutterbar drive (1) (from serial no. ...)
- Rear pulley of cutterbar drive (1), disassembled: (from serial no. ...)
- Assembling the rear pulley of cutterbar drive (1) (from serial no. ...)
- Installing the rear pulley of cutterbar drive (1) (from serial no. ...)
- Removing the cutterbar variable-speed pulley assembly (spring-loaded)
- Disassembling the cutterbar variable-speed pulley assembly (spring-loaded)
- Cutterbar variable-speed pulley assembly (spring-loaded), disassembled:
- Assembling the cutterbar variable-speed pulley assembly (spring-loaded)
- Installing the cutterbar variable-speed pulley assembly (spring-loaded)
- Removing the cutterbar drive V-belt pulley when a cutterbar variable-speed drive is fitted
- Disassembling the cutterbar drive V-belt pulley when a cutterbar variable-speed drive is fitted
- Cutterbar drive V-belt pulley with a cutterbar variable-speed drive fitted, disassembled:
- Assembling the cutterbar drive V-belt pulley with a cutterbar variable-speed drive fitted
- Installing the cutterbar drive V-belt pulley with a cutterbar variable-speed drive fitted
- Removing and disassembling the cutterbar drive deflection pulley (2) with a cutterbar variable-sp...
- Assembling and installing the cutterbar drive deflection pulley (2) with a cutterbar variable-spe...
- Removing the cutterbar variable-speed pulley assembly (hydraulic)
- Disassembling the cutterbar variable-speed pulley assembly (hydraulic)
- Cutterbar variable-speed pulley assembly (hydraulic), disassembled:
- Assembling the cutterbar variable-speed pulley assembly (hydraulic)
- Installing the cutterbar variable-speed pulley assembly (hydraulic)
- Removing the cutterbar clutch
- Cutterbar clutch, disassembled
- Installing the cutterbar clutch
-Left-hand threshing mechanism drive
- Removing the threshing mechanism drive pulley assembly
- Threshing mechanism drive pulley assembly, disassembled
- Installing the threshing mechanism drive pulley assembly
-Right-hand threshing mechanism drive
- Removing the threshing drum variable-speed pulley assembly (hydraulic)
- Disassembling the threshing drum variable-speed pulley assembly (hydraulic)
- Threshing drum variable-speed pulley assembly (hydraulic), disassembled:
- Assembling the threshing drum variable-speed pulley assembly (hydraulic)
- Installing the threshing drum variable-speed pulley assembly (hydraulic)
- Removing the threshing drum variable-speed pulley assembly (spring-loaded)
- Disassembling the threshing drum variable-speed pulley assembly (spring-loaded)
- Threshing drum variable-speed pulley assembly (spring-loaded), disassembled:
- Assembling the threshing drum variable-speed pulley assembly (spring-loaded)
- Installing the threshing drum variable-speed pulley assembly (spring-loaded)
- Removing the threshing mechanism drive pulley
- Disassembling the threshing mechanism drive pulley
- Threshing mechanism drive pulley, disassembled:
- Assembling the threshing mechanism drive pulley
- Installing the threshing mechanism drive pulley
-Threshing drum reduction gearbox
- Removing the threshing drum reduction gearbox
- Disassembling the threshing drum reduction gearbox
- Threshing drum reduction gearbox, disassembled:
- Assembling the threshing drum reduction gearbox
- Installing the threshing drum reduction gearbox
-Threshing mechanism intermediate drive
- Removing the right-hand intermediate drive shaft bearing
- Installing the right-hand intermediate drive shaft bearing
- Removing the left-hand intermediate drive shaft bearing
AND MORE....