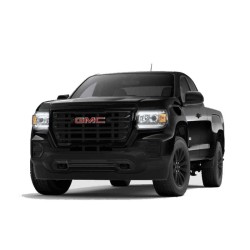
GMC Sierra GMT-900 Service & Repair Manual with Wiring Diagrams
Service and repair documentation with separately identifiable electrical circuit or wiring information as shown in the source contents. Coverage is limited to the indexed models and systems.
Index highlights: Engine Cooling; Antilock Brake System; Automatic Transmission - 4L60-E, 4L65-E, 4L70-E.
Languages stated in the original listing: English.
Original technical index
- CONTENTS:
- SERVICE MANUAL
- - Antilock Brake System
- - Automatic Transmission - 4L60-E, 4L65-E, 4L70-E
- - Automatic Transmission - 6L50, 6L80, 6L90
- - Automatic Transmission - Allison
- - Bumpers and Fascias
- - Cellular, Entertainment, and Navigation
- - Clutch
- - Cruise Control
- - Disc Brakes
- - Displays and Gages
- - Drum Brakes
- - Engine Cooling
- - Engine Electrical
- - Engine Exhaust
- - Engine Mechanical - 4.3L
- - Engine Mechanical - 4.8L, 5.3L, 6.0L, 6.2L, 7.0L
- - Engine Mechanical - 6.2L
- - Engine Mechanical - 6.6L
- - Fixed and Moveable Windows
- - Frame and Underbody
- - Front Drive Axle
- - Front Suspension
- - Heating, Ventilation, and Air Conditioning
- - Horns
- - HVAC - Manual
- - Hydraulic Brakes
- - Interior Trim and Paneling
- - Lighting
- - Maintenance and Lubrication
- - Manual Transmission - Tremec 5-Speed (M96)
- - Manual Transmission - Tremec 5-Speed (TZ0)
- - Mirrors
- - Park Brake
- - Power Seats
- - Power Steering
- - Propeller Shaft
- - Rear Drive Axle
- - Rear Suspension
- - Seat Heating and Cooling
- - Steering Linkage
- - Sunroof
- - Supplemental Inflatable Restraints
- - Trailer Brake Controls
- - Transfer Case - BW 4485-NR3
- - Transfer Case - MP 1222, 1225, 1226-NQG
- - Transfer Case - MP 1625, 1626-NQF
- - Transfer Case - MP 3023, 3024-NQH
- - Trouble Shooting - Basic Procedures
- - Vehicle Access
- - Wheel Drive Shafts
- - Wipers and Washers
- BODY REPAIR MANUAL
- - Bolted Exterior Body Panels and Closures
- - Collision Repair
- - Exterior Trim
- - Instrument Panel and Console Trim
- - Interior Trim and Paneling
- - Plastic Panel Information and Repair
- ELECTRICAL WIRING DIAGRAMS
- GMC Sierra 1500
- - 1: Automatic A/C Circuit (1 of 3)
- - 2: Automatic A/C Circuit (2 of 3)
- - 3: Automatic A/C Circuit (3 of 3)
- - 4: Compressor Circuit
- - 5: Manual A/C Circuit (1 of 3)
- - 6: Manual A/C Circuit (2 of 3)
- - 7: Manual A/C Circuit (3 of 3)
- - 8: Anti-Lock Brake Circuit, W/ JL4 (1 of 2)
- - 9: Anti-Lock Brake Circuit, W/ JL4 (2 of 2)
- - 10: Anti-Lock Brake Circuit, W/O JL4
- - 11: Trailer ABS Circuit
- - 12: Anti-theft Circuit
- - 13: Body Control Modules Circuit (1 of 3)
- - 14: Body Control Modules Circuit (2 of 3)
- - 15: Body Control Modules Circuit (3 of 3)
- - 16: Computer Data Lines Circuit (1 of 2)
- - 17: Computer Data Lines Circuit (2 of 2)
- - 18: Cooling Fan Circuit
- - 19: 4.3L VIN X, Cruise Control Circuit
- - 20: 4.8L VIN C, Cruise Control Circuit
- - 21: 5.3L VIN 0, Cruise Control Circuit
- - 22: 5.3L VIN 3, Cruise Control Circuit
- - 23: 5.3L VIN J, Cruise Control Circuit
- - 24: 5.3L VIN M, Cruise Control Circuit
- - 25: 6.0L VIN Y, Cruise Control Circuit
- - 26: 6.2L VIN 8, Cruise Control Circuit
- - 27: Heated Mirrors Circuit, W/ AN3/DL3
- - 28: Heated Mirrors Circuit, W/O AN3/DL3
- - 29: Rear Defogger Circuit
- - 30: 4.3L VIN X, Engine Performance Circuit (1 of 4)
- - 31: 4.3L VIN X, Engine Performance Circuit (2 of 4)
- - 32: 4.3L VIN X, Engine Performance Circuit (3 of 4)
- - 33: 4.3L VIN X, Engine Performance Circuit (4 of 4)
- - 34: 4.8L VIN C, Engine Performance Circuit (1 of 5)
- - 35: 4.8L VIN C, Engine Performance Circuit (2 of 5)
- - 36: 4.8L VIN C, Engine Performance Circuit (3 of 5)
- - 37: 4.8L VIN C, Engine Performance Circuit (4 of 5)
- - 38: 4.8L VIN C, Engine Performance Circuit (5 of 5)
- - 39: 5.3L VIN 0, Engine Performance Circuit (1 of 4)
- - 40: 5.3L VIN 0, Engine Performance Circuit (2 of 4)
- - 41: 5.3L VIN 0, Engine Performance Circuit (3 of 4)
- - 42: 5.3L VIN 0, Engine Performance Circuit (4 of 4)
- - 43: 5.3L VIN 3, Engine Performance Circuit (1 of 4)
- - 44: 5.3L VIN 3, Engine Performance Circuit (2 of 4)
- - 45: 5.3L VIN 3, Engine Performance Circuit (3 of 4)
- - 46: 5.3L VIN 3, Engine Performance Circuit (4 of 4)
- - 47: 5.3L VIN J, Engine Performance Circuit (1 of 5)
- - 48: 5.3L VIN J, Engine Performance Circuit (2 of 5)
- - 49: 5.3L VIN J, Engine Performance Circuit (3 of 5)
- - 50: 5.3L VIN J, Engine Performance Circuit (4 of 5)
- - 51: 5.3L VIN J, Engine Performance Circuit (5 of 5)
- - 52: 5.3L VIN M, Engine Performance Circuit (1 of 5)
- - 53: 5.3L VIN M, Engine Performance Circuit (2 of 5)
- - 54: 5.3L VIN M, Engine Performance Circuit (3 of 5)
- - 55: 5.3L VIN M, Engine Performance Circuit (4 of 5)
- - 56: 5.3L VIN M, Engine Performance Circuit (5 of 5)
- - 57: 6.0L VIN Y, Engine Performance Circuit (1 of 5)
- - 58: 6.0L VIN Y, Engine Performance Circuit (2 of 5)
- - 59: 6.0L VIN Y, Engine Performance Circuit (3 of 5)
- - 60: 6.0L VIN Y, Engine Performance Circuit (4 of 5)
- - 61: 6.0L VIN Y, Engine Performance Circuit (5 of 5)
- - 62: 6.2L VIN 8, Engine Performance Circuit (1 of 5)
- - 63: 6.2L VIN 8, Engine Performance Circuit (2 of 5)
- - 64: 6.2L VIN 8, Engine Performance Circuit (3 of 5)
- - 65: 6.2L VIN 8, Engine Performance Circuit (4 of 5)
- - 66: 6.2L VIN 8, Engine Performance Circuit (5 of 5)
- - 67: Backup Lamps Circuit
- - 68: Exterior Lamps Circuit (1 of 3)
- - 69: Exterior Lamps Circuit (2 of 3)
- - 70: Exterior Lamps Circuit (3 of 3)
- - 71: Trailer Tow Circuit
- - 72: Ground Distribution Circuit (1 of 6)
- - 73: Ground Distribution Circuit (2 of 6)
- - 74: Ground Distribution Circuit (3 of 6)
- - 75: Ground Distribution Circuit (4 of 6)
- - 76: Ground Distribution Circuit (5 of 6)
- - 77: Ground Distribution Circuit (6 of 6)
- - 78: Headlights Circuit
- - 79: Horn Circuit
- - 80: Instrument Cluster Circuit (1 of 2)
- - 81: Instrument Cluster Circuit (2 of 2)
- - 82: Courtesy Lamps Circuit, W/ AN3/DL3
- - 83: Courtesy Lamps Circuit, W/O AN3/DL3
- - 84: Instrument Illumination Circuit (1 of 2)
- - 85: Instrument Illumination Circuit (2 of 2)
- - 86: Adjustable Pedal Circuit
- - 87: Driver"s Memory Seat Circuit (1 of 2)
- - 88: Driver"s Memory Seat Circuit (2 of 2)
- - 89: Navigation Circuit, W/ Y91 & W/ UQA (1 of 3)
- - 90: Navigation Circuit, W/ Y91 & W/ UQA (2 of 3)
- - 91: Navigation Circuit, W/ Y91 & W/ UQA (3 of 3)
- - 92: Navigation Circuit, W/ Y91 & W/O UQA (1 of 3)
- - 93: Navigation Circuit, W/ Y91 & W/O UQA (2 of 3)
- - 94: Navigation Circuit, W/ Y91 & W/O UQA (3 of 3)
- - 95: Navigation Circuit, W/O Y91 & W/ UQA (1 of 3)
- - 96: Navigation Circuit, W/O Y91 & W/ UQA (2 of 3)
- - 97: Navigation Circuit, W/O Y91 & W/ UQA (3 of 3)
- - 98: Navigation Circuit, W/O Y91 & W/O UQA (1 of 3)
- - 99: Navigation Circuit, W/O Y91 & W/O UQA (2 of 3)
- - 100: Navigation Circuit, W/O Y91 & W/O UQA (3 of 3)
- - 101: Parking Assistant Circuit
- - 102: 4.3L VIN X, Power Distribution Circuit (1 of 6)
- - 103: 4.3L VIN X, Power Distribution Circuit (2 of 6)
- - 104: 4.3L VIN X, Power Distribution Circuit (3 of 6)
- - 105: 4.3L VIN X, Power Distribution Circuit (4 of 6)
- - 106: 4.3L VIN X, Power Distribution Circuit (5 of 6)
- - 107: 4.3L VIN X, Power Distribution Circuit (6 of 6)
- - 108: 4.8L VIN C, Power Distribution Circuit (1 of 6)
- - 109: 4.8L VIN C, Power Distribution Circuit (2 of 6)
- - 110: 4.8L VIN C, Power Distribution Circuit (3 of 6)
- - 111: 4.8L VIN C, Power Distribution Circuit (4 of 6)
- - 112: 4.8L VIN C, Power Distribution Circuit (5 of 6)
- - 113: 4.8L VIN C, Power Distribution Circuit (6 of 6)
- - 114: 5.3L VIN 0, Power Distribution Circuit (1 of 6)
- - 115: 5.3L VIN 0, Power Distribution Circuit (2 of 6)
- - 116: 5.3L VIN 0, Power Distribution Circuit (3 of 6)
- - 117: 5.3L VIN 0, Power Distribution Circuit (4 of 6)
- - 118: 5.3L VIN 0, Power Distribution Circuit (5 of 6)
- - 119: 5.3L VIN 0, Power Distribution Circuit (6 of 6)
- - 120: 5.3L VIN 3, Power Distribution Circuit (1 of 6)
- - 121: 5.3L VIN 3, Power Distribution Circuit (2 of 6)
- - 122: 5.3L VIN 3, Power Distribution Circuit (3 of 6)
- - 123: 5.3L VIN 3, Power Distribution Circuit (4 of 6)
- - 124: 5.3L VIN 3, Power Distribution Circuit (5 of 6)
- - 125: 5.3L VIN 3, Power Distribution Circuit (6 of 6)
- - 126: 5.3L VIN J, Power Distribution Circuit (1 of 6)
- - 127: 5.3L VIN J, Power Distribution Circuit (2 of 6)
- - 128: 5.3L VIN J, Power Distribution Circuit (3 of 6)
- - 129: 5.3L VIN J, Power Distribution Circuit (4 of 6)
- - 130: 5.3L VIN J, Power Distribution Circuit (5 of 6)
- - 131: 5.3L VIN J, Power Distribution Circuit (6 of 6)
- - 132: 5.3L VIN M, Power Distribution Circuit (1 of 6)
- - 133: 5.3L VIN M, Power Distribution Circuit (2 of 6)
- - 134: 5.3L VIN M, Power Distribution Circuit (3 of 6)
- - 135: 5.3L VIN M, Power Distribution Circuit (4 of 6)
- - 136: 5.3L VIN M, Power Distribution Circuit (5 of 6)
- - 137: 5.3L VIN M, Power Distribution Circuit (6 of 6)
- - 138: 6.0L VIN Y, Power Distribution Circuit (1 of 6)
- - 139: 6.0L VIN Y, Power Distribution Circuit (2 of 6)
- - 140: 6.0L VIN Y, Power Distribution Circuit (3 of 6)
- - 141: 6.0L VIN Y, Power Distribution Circuit (4 of 6)
- - 142: 6.0L VIN Y, Power Distribution Circuit (5 of 6)
- - 143: 6.0L VIN Y, Power Distribution Circuit (6 of 6)
- - 144: 6.2L VIN 8, Power Distribution Circuit (1 of 6)
- - 145: 6.2L VIN 8, Power Distribution Circuit (2 of 6)
- - 146: 6.2L VIN 8, Power Distribution Circuit (3 of 6)
- - 147: 6.2L VIN 8, Power Distribution Circuit (4 of 6)
- - 148: 6.2L VIN 8, Power Distribution Circuit (5 of 6)
- - 149: 6.2L VIN 8, Power Distribution Circuit (6 of 6)
- - 150: Power Door Locks Circuit, Base
- - 151: Power Door Locks Circuit, Premium
- - 152: Electrochromic Mirror Circuit
- - 153: Power Mirrors Circuit, Manual Foldiing Mirror
- - 154: Power Mirrors Circuit, Power Foldiing Mirror (1 of 2)
- - 155: Power Mirrors Circuit, Power Foldiing Mirror (2 of 2)
- - 156: Adjustable Pedal Circuit
- - 157: Driver Power Seat Circuit
- - 158: Heated Seats Circuit (1 of 2)
- - 159: Heated Seats Circuit (2 of 2)
- - 160: Heated Steering Wheel Circuit
- - 161: Passenger Power Seat Circuit, 6-Way Power Seat
- - 162: Passenger Power Seat Circuit, 8-Way Power Seat
- - 163: Power Top/Sunroof Circuit
- - 164: Power Windows Circuit, W/ AN3/DL3
- - 165: Power Windows Circuit, W/O AN3/DL3
- - 166: Sliding Rear Window Circuit
- - 167: Radio Circuit, W/ Y91 & W/ UQA (1 of 3)
- - 168: Radio Circuit, W/ Y91 & W/ UQA (2 of 3)
- - 169: Radio Circuit, W/ Y91 & W/ UQA (3 of 3)
- - 170: Radio Circuit, W/ Y91 & W/O UQA (1 of 3)
- - 171: Radio Circuit, W/ Y91 & W/O UQA (2 of 3)
- - 172: Radio Circuit, W/ Y91 & W/O UQA (3 of 3)
- - 173: Radio Circuit, W/O Y91 & W/ UQA (1 of 3)
- - 174: Radio Circuit, W/O Y91 & W/ UQA (2 of 3)
- - 175: Radio Circuit, W/O Y91 & W/ UQA (3 of 3)
- - 176: Radio Circuit, W/O Y91 & W/O UQA (1 of 3)
- - 177: Radio Circuit, W/O Y91 & W/O UQA (2 of 3)
- - 178: Radio Circuit, W/O Y91 & W/O UQA (3 of 3)
- - 179: Shift Interlock Circuit
- - 180: 4.3L VIN X, Charging Circuit
- - 181: 4.3L VIN X, Starting Circuit
- - 182: 4.8L VIN C, Charging Circuit
- - 183: 4.8L VIN C, Starting Circuit
- - 184: 5.3L VIN 0, Charging Circuit
- - 185: 5.3L VIN 0, Starting Circuit
- - 186: 5.3L VIN 3, Charging Circuit
- - 187: 5.3L VIN 3, Starting Circuit
- - 188: 5.3L VIN J, Charging Circuit
- - 189: 5.3L VIN J, Starting Circuit
- - 190: 5.3L VIN M, Charging Circuit
- - 191: 5.3L VIN M, Starting Circuit
- - 192: 6.0L VIN Y, Charging Circuit
- - 193: 6.0L VIN Y, Starting Circuit
- - 194: 6.2L VIN 8, Charging Circuit
- - 195: 6.2L VIN 8, Starting Circuit
- - 196: Supplemental Restraints Circuit (1 of 2)
- - 197: Supplemental Restraints Circuit (2 of 2)
- - 198: A/T Circuit (1 of 2)
- - 199: A/T Circuit (2 of 2)
- - 200: Transfer Case Circuit, 2-Speed Automatic
- - 201: Transfer Case Circuit, 2-Speed Manual
- - 202: Warning Systems Circuit, W/ AN3/DL3 (1 of 2)
- - 203: Warning Systems Circuit, W/ AN3/DL3 (2 of 2)
- - 204: Warning Systems Circuit, W/O AN3/DL3 (1 of 2)
- - 205: Warning Systems Circuit, W/O AN3/DL3 (2 of 2)
- - 206: Moisture Sensor Circuit
- - 207: Windshield Washer Solvent Heater Circuit
- - 208: Wiper/Washer Circuit
- GMC Sierra 2500 HD
- - 1: Automatic A/C Circuit (1 of 3)
- - 2: Automatic A/C Circuit (2 of 3)
- - 3: Automatic A/C Circuit (3 of 3)
- - 4: Compressor Circuit
- - 5: Manual A/C Circuit (1 of 3)
- - 6: Manual A/C Circuit (2 of 3)
- - 7: Manual A/C Circuit (3 of 3)
- - 8: Anti-Lock Brake Circuit, W/ JL4 (1 of 2)
- - 9: Anti-Lock Brake Circuit, W/ JL4 (2 of 2)
- - 10: Anti-Lock Brake Circuit, W/O JL4
- - 11: Trailer ABS Circuit
- - 12: Anti-theft Circuit
- - 13: Body Control Modules Circuit (1 of 3)
- - 14: Body Control Modules Circuit (2 of 3)
- - 15: Body Control Modules Circuit (3 of 3)
- - 16: Computer Data Lines Circuit (1 of 2)
- - 17: Computer Data Lines Circuit (2 of 2)
- - 18: Cooling Fan Circuit
- - 19: 6.0L VIN K, Cruise Control Circuit
- - 20: 6.6L VIN 6, Cruise Control Circuit
- - 21: Heated Mirrors Circuit, W/ AN3/DL3
- - 22: Heated Mirrors Circuit, W/O AN3/DL3
- - 23: Rear Defogger Circuit
- - 24: 6.0L VIN K, Engine Performance Circuit (1 of 4)
- - 25: 6.0L VIN K, Engine Performance Circuit (2 of 4)
- - 26: 6.0L VIN K, Engine Performance Circuit (3 of 4)
- - 27: 6.0L VIN K, Engine Performance Circuit (4 of 4)
- - 28: 6.6L VIN 6, Engine Performance Circuit (1 of 5)
- - 29: 6.6L VIN 6, Engine Performance Circuit (2 of 5)
- - 30: 6.6L VIN 6, Engine Performance Circuit (3 of 5)
- - 31: 6.6L VIN 6, Engine Performance Circuit (4 of 5)
- - 32: 6.6L VIN 6, Engine Performance Circuit (5 of 5)
- - 33: Backup Lamps Circuit
- - 34: Exterior Lamps Circuit (1 of 3)
- - 35: Exterior Lamps Circuit (2 of 3)
- - 36: Exterior Lamps Circuit (3 of 3)
- - 37: Trailer Tow Circuit
- - 38: Ground Distribution Circuit (1 of 6)
- - 39: Ground Distribution Circuit (2 of 6)
- - 40: Ground Distribution Circuit (3 of 6)
- - 41: Ground Distribution Circuit (4 of 6)
- - 42: Ground Distribution Circuit (5 of 6)
- - 43: Ground Distribution Circuit (6 of 6)
- - 44: Headlights Circuit
- - 45: Horn Circuit
- - 46: Instrument Cluster Circuit (1 of 2)
- - 47: Instrument Cluster Circuit (2 of 2)
- - 48: Courtesy Lamps Circuit, W/ AN3/DL3
- - 49: Courtesy Lamps Circuit, W/O AN3/DL3
- - 50: Instrument Illumination Circuit (1 of 2)
- - 51: Instrument Illumination Circuit (2 of 2)
- - 52: Adjustable Pedal Circuit
- - 53: Driver"s Memory Seat Circuit (1 of 2)
- - 54: Driver"s Memory Seat Circuit (2 of 2)
- - 55: Navigation Circuit, W/ Y91 & W/ UQA (1 of 3)
- - 56: Navigation Circuit, W/ Y91 & W/ UQA (2 of 3)
- - 57: Navigation Circuit, W/ Y91 & W/ UQA (3 of 3)
- - 58: Navigation Circuit, W/ Y91 & W/O UQA (1 of 3)
- - 59: Navigation Circuit, W/ Y91 & W/O UQA (2 of 3)
- - 60: Navigation Circuit, W/ Y91 & W/O UQA (3 of 3)
- - 61: Navigation Circuit, W/O Y91 & W/ UQA (1 of 3)
- - 62: Navigation Circuit, W/O Y91 & W/ UQA (2 of 3)
- - 63: Navigation Circuit, W/O Y91 & W/ UQA (3 of 3)
- - 64: Navigation Circuit, W/O Y91 & W/O UQA (1 of 3)
- - 65: Navigation Circuit, W/O Y91 & W/O UQA (2 of 3)
- - 66: Navigation Circuit, W/O Y91 & W/O UQA (3 of 3)
- - 67: Parking Assistant Circuit
- - 68: 6.0L VIN K, Power Distribution Circuit (1 of 6)
- - 69: 6.0L VIN K, Power Distribution Circuit (2 of 6)
- - 70: 6.0L VIN K, Power Distribution Circuit (3 of 6)
- - 71: 6.0L VIN K, Power Distribution Circuit (4 of 6)
- - 72: 6.0L VIN K, Power Distribution Circuit (5 of 6)
- - 73: 6.0L VIN K, Power Distribution Circuit (6 of 6)
- - 74: 6.6L VIN 6, Power Distribution Circuit (1 of 5)
- - 75: 6.6L VIN 6, Power Distribution Circuit (2 of 5)
- - 76: 6.6L VIN 6, Power Distribution Circuit (3 of 5)
- - 77: 6.6L VIN 6, Power Distribution Circuit (4 of 5)
- - 78: 6.6L VIN 6, Power Distribution Circuit (5 of 5)
- - 79: Power Door Locks Circuit, Base
- - 80: Power Door Locks Circuit, Premium
- - 81: Electrochromic Mirror Circuit
- - 82: Power Mirrors Circuit, Manual Foldiing Mirror
- - 83: Power Mirrors Circuit, Power Foldiing Mirror (1 of 2)
- - 84: Power Mirrors Circuit, Power Foldiing Mirror (2 of 2)
- - 85: Adjustable Pedal Circuit
- - 86: Driver Power Seat Circuit
- - 87: Heated Seats Circuit (1 of 2)
- - 88: Heated Seats Circuit (2 of 2)
- - 89: Heated Steering Wheel Circuit
- - 90: Passenger Power Seat Circuit, 6-Way Power Seat
- - 91: Passenger Power Seat Circuit, 8-Way Power Seat
- - 92: Power Top/Sunroof Circuit
- - 93: Power Windows Circuit, W/ AN3/DL3
- - 94: Power Windows Circuit, W/O AN3/DL3
- - 95: Sliding Rear Window Circuit
- - 96: Radio Circuit, W/ Y91 & W/ UQA (1 of 3)
- - 97: Radio Circuit, W/ Y91 & W/ UQA (2 of 3)
- - 98: Radio Circuit, W/ Y91 & W/ UQA (3 of 3)
- - 99: Radio Circuit, W/ Y91 & W/O UQA (1 of 3)
- - 100: Radio Circuit, W/ Y91 & W/O UQA (2 of 3)
- - 101: Radio Circuit, W/ Y91 & W/O UQA (3 of 3)
- - 102: Radio Circuit, W/O Y91 & W/ UQA (1 of 3)
- - 103: Radio Circuit, W/O Y91 & W/ UQA (2 of 3)
- - 104: Radio Circuit, W/O Y91 & W/ UQA (3 of 3)
- - 105: Radio Circuit, W/O Y91 & W/O UQA (1 of 3)
- - 106: Radio Circuit, W/O Y91 & W/O UQA (2 of 3)
- - 107: Radio Circuit, W/O Y91 & W/O UQA (3 of 3)
- - 108: Shift Interlock Circuit
- - 109: 6.0L VIN K, Charging Circuit
- - 110: 6.0L VIN K, Starting Circuit
- - 111: 6.6L VIN 6, Charging Circuit
- - 112: 6.6L VIN 6, Starting Circuit
- - 113: Supplemental Restraints Circuit (1 of 2)
- - 114: Supplemental Restraints Circuit (2 of 2)
- - 115: Transfer Case Circuit, 2-Speed Manual
- - 116: Transfer Case Circuit, Selectable
- - 117: 6.0L VIN K, A/T Circuit (1 of 2)
- - 118: 6.0L VIN K, A/T Circuit (2 of 2)
- - 119: 6.6L VIN 6, A/T Circuit (1 of 2)
- - 120: 6.6L VIN 6, A/T Circuit (2 of 2)
- - 121: Warning Systems Circuit, W/ AN3/DL3 (1 of 2)
- - 122: Warning Systems Circuit, W/ AN3/DL3 (2 of 2)
- - 123: Warning Systems Circuit, W/O AN3/DL3 (1 of 2)
- - 124: Warning Systems Circuit, W/O AN3/DL3 (2 of 2)
- - 125: Moisture Sensor Circuit
- - 126: Windshield Washer Solvent Heater Circuit
- - 127: Wiper/Washer Circuit
- GMC Sierra 3500 HD
- - 1: Automatic A/C Circuit (1 of 3)
- - 2: Automatic A/C Circuit (2 of 3)
- - 3: Automatic A/C Circuit (3 of 3)
- - 4: Compressor Circuit
- - 5: Manual A/C Circuit (1 of 3)
- - 6: Manual A/C Circuit (2 of 3)
- - 7: Manual A/C Circuit (3 of 3)
- - 8: Anti-Lock Brake Circuit, W/ JL4 (1 of 2)
- - 9: Anti-Lock Brake Circuit, W/ JL4 (2 of 2)
- AND MORE.....
- ELECTRICAL COMPONENTS LOCATOR
- - 1: Below Left Side Of Dash
- - 2: Left Side Of Engine Compartment
- - 3: Left Side Of Engine Compartment Legend
- - 4: Steering Column
- - 5: Under Front Seats
- - 6: Under Left Side Of Vehicle (E85)
- - 7: Front Wheel Speed Sensors
- - 8: Rear Wheel Speed Sensors
- - 9: Automatic Transmission (4L60-E)
- - 10: Transmission (4L60-E)
- - 11: Transfer Case
- - 12: Transmission Control Module (Allison)
- - 13: Front Headliner
- - 14: Driver Door
- - 15: Passenger Door
- - 16: Left Rear Door (Crew Cab)
- - 17: Right Rear Door (Crew Cab)
- - 18: Lower Left Side Of Dash
- - 19: Lower Left Side Of Dash
- - 20: Left Rear Of Vehicle
- - 21: Right Side Of Engine (4.8L, 5.3L, 6.0L & 6.2L)
- - 22: Top Of Engine (4.8L, 5.3L, 6.0L & 6.2L)
- - 23: Front Of Engine (4.8L, 5.3L, 6.0L & 6.2L)
- - 24: Engine Compartment (4.8L, 5.3L, 6.0L & 6.2L)
- - 25: Under Rear Of Vehicle
- - 26: Under Rear Of Vehicle (Short Wheel Base)
- - 27: Engine Cooling Fans (10 Series)
- - 28: Left Rear Door (Extended Cab)
- - 29: Right Rear Door (Extended Cab)
- - 30: Right Rear Of Passenger Compartment
- - 31: Roof Rail Air Bags (Extended Cab & Crew Cab)
- - 32: HVAC Module (CJ2)
- - 33: HVAC Module (C67)
- - 34: Horns
- - 35: Park Brake Assembly
- - 36: Front Of Vehicle
- - 37: Rear Of Vehicle
- - 38: Driver Seat
- - 39: Passenger Seat
- - 40: Left Rear Of Passenger Compartment
- - 41: Driver's Seat
- - 42: Passenger Seat
- - 43: Front Of Vehicle (10 Series)
- - 44: Roof Rail Air Bags (Regular Cab)
- - 45: Rear Of Vehicle
- - 46: Transfer Case (NQG)
- - 47: Front Axle
- - 48: Transfer Case (NQH)
- - 49: Engine Compartment
- - 50: Right Side Of Dash
- - 51: Front Of Vehicle
- - 52: Lower Front Of Engine
- - 53: Front Of Engine
- - 54: Left Rear Of Engine Compartment
- - 55: Left Front Of Passenger Compartment
- - 56: Under Left Side Of Vehicle
- - 57: Passenger Compartment Floor
- - 58: Front Of Engine Compartment (6.6L)
- - 59: Top Of Engine (6.6L)
- - 60: Engine Compartment (6.6L)
- - 61: Right Side Of Engine (6.6L)
- - 62: Left Side Of Engine (6.6L)
- - 63: Underhood Fuse Block
- - 64: Front Of Vehicle (Except 6.6L)
- - 65: Top Of Engine (4.3L)
- - 66: Left Side Of Engine (4.3L)
- - 67: Engine (4.8L, 5.3L, 6.0L & 6.2L)
- - 68: Engine Compartment
- - 69: Front Of Passenger Compartment
- - 70: Front Of Passenger Compartment (Base)
- - 71: Console
- - 72: Passenger Compartment (Regular Cab)
- - 73: Passenger Compartment (Extended Cab) (1 Of 2)
- - 74: Passenger Compartment (Extended Cab) (2 Of 2)
- - 75: Passenger Compartment (Crew Cab) (1 Of 2)
- - 76: Passenger Compartment (Crew Cab) (2 Of 2)
- - 77: Crew Cab Headliner (Extended Cab/Regular Cab Similar)
- - 78: Chassis (Crew Cab Shown, Regular & Extended Cab Similar)
- - 79: Right Rear Of Passenger Compartment
- - 80: Rear Bumper
- - 81: Engine Compartment
- - 82: Left Side Of Engine (4.3L)
- - 83: Top Of Engine (4.3L)
- - 84: Right Side Of Engine (4.3L)
- - 85: Top Of Engine (4.3L)
- - 86: Front Of Engine (4.8L, 5.3L, 6.0L & 6.2L)
- - 87: Lower Rear Of Engine Compartment (4.8L, 5.3L, 6.0L & 6.2L)
- - 88: Transmission (Diesel)
- - 89: Transmission (MYC/MYD)
- - 90: Front Of Vehicle (10 Series)
- - 91: Front Of Vehicle
- - 92: Rear Of Engine Compartment (4.3L)
- - 93: Rear Of Engine Compartment (Diesel)
- - 94: Behind Dash
- - 95: Dash
- - 96: Under Top Of Dash
- - 97: Steering Wheel
- - 98: Center Console
- - 99: Left Front Of Roof
- - 100: Overhead Console
- - 101: Overhead Console & Headliner (U42/5Y0)
- - 102: Windshield
- - 103: Left/Right "B" Pillars (Extended & Crew Cab)
- - 104: Left Side Frame & Underbody
- - 105: Left Side Frame & Underbody (Diesel)
- - 106: Right Side Frame & Underbody (Diesel)
- - 107: Left Rear Frame & Underbody
- - 108: Left Rear Frame & Underbody (20/30 Series)
- - 109: Left Rear Frame & Underbody (31 Series)
- - 110: Left Side Of Engine Compartment (4.8L, 5.3L, 6.0L & 6.2L)
- - 111: Front Chassis Frame Rails (31 Series & 6.0L)
- - 112: Top Left Side Of Engine (Diesel)
- - 113: Dash
- - 114: Steering Column
- - 115: Chassis (Regular Cab & Extended Cab)
- - 116: Driver's Door
- - 117: Front Passenger's Door
- - 118: Underside Of Cargo Box