• -$10.00
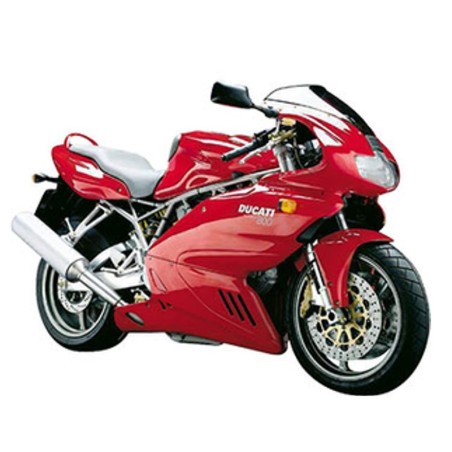
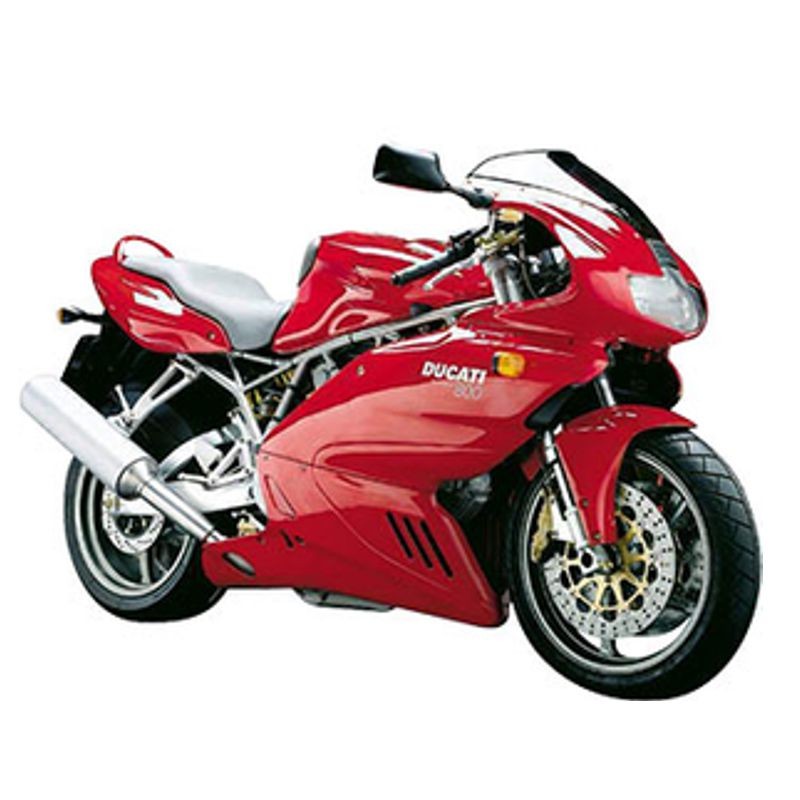
Ducati SuperSport 800 - Service, Repair Manual - Manuale di Officina, Riparazione
search
  • Ducati SuperSport 800 - Service, Repair Manual - Manuale di Officina, Riparazione

Ducati SuperSport 800 - Service, Repair Manual - Manuale di Officina, Riparazione

$29.95
$19.95 Save $10.00
No tax
Quantity

YOUTUBE Official Channel @SoloPDFcom (+18,000 subs). Trusted by mechanics worldwide using professional workshop manuals and wiring diagrams.

Ducati SuperSport 800 - Service, Repair Manual - Manuale di Officina, Riparazione

Digital technical documentation with sections on GENERAL SUMMARY, 1 - HOW TO USE THE MANUAL, - Manual layout. Review the complete contents below for the systems and procedures covered.
Manual contents

  • GENERAL SUMMARY
  • A - Description
  • 1 - HOW TO USE THE MANUAL
  • - Manual layout
  • 2 - SYMBOLS - ABBREVIATIONS - REFERENCES
  • - Product specifications
  • 3 - DANGEROUS PRODUCTS - WARNINGS
  • - General safety rules
  • - General maintenance indications
  • B - Model-specific information
  • 1 - IDENTIFICATION DATA
  • C - Specifications
  • 1.1 - TECHNICAL DATA
  • - Description
  • - Colors
  • - Transmission
  • - Timing/valves
  • - Lubrication system
  • - Cylinder / piston
  • - Gearbox
  • - Cooling system
  • - Front wheel
  • - Front suspension
  • - Rear wheel
  • - Rear suspension
  • - Hydraulic brakes
  • - Charging system / generator
  • - Ignition system
  • - Control unit
  • - Lights / instrument panel
  • 1.2 - DIMENSIONS
  • 2 - FUELS AND LUBRICANTS
  • 3 - TORQUE SETTINGS
  • - Frame torque settings
  • - Engine torque settings
  • 4 - SERVICE TOOLS
  • - Engine special tools
  • - Frame specific tools
  • D - Use and maintenance operations
  • 1 - PRELIMINARY CHECKS
  • - Running-in precautions
  • - Pre-ride checks
  • 2 - STARTING - ENGINE WARM-UP
  • - Starting the engine
  • 3 - ROUTINE MAINTENANCE TABLE
  • 4 - MAINTENANCE OPERATIONS
  • - Checking the engine oil level
  • - Changing the engine oil and filter cartridge
  • - Checking valve clearances
  • - Adjusting valve clearances
  • - Changing the fuel filter
  • - Changing and cleaning the air filters
  • - Changing the brake fluid
  • - Draining the braking circuit
  • - Filling the brake circuits
  • - Changing the clutch fluid
  • - Draining the clutch circuit
  • - Filling the clutch circuit
  • - Adjusting steering bearings play
  • - Adjusting chain tension
  • - Checking brake pad wear. Changing brake pads
  • - Adjusting the throttle and choke cables
  • - Adjusting the position of the gear change and rear brake pedals
  • - Adjusting the rear shock absorber
  • 5 - DIAGNOSIS INSTRUMENTS
  • - Tester description
  • - Instrument power supply
  • - DDS diagnosis instrument
  • - Checking and adjusting timing belt tension
  • - Resetting the throttle position sensor (TPS)
  • - Adjusting the throttle body
  • - Checking engine oil pressure
  • - Checking cylinder compression
  • - Checking fuel pressure
  • - Procedure-override the immobilizer system
  • - Guided diagnosis
  • - Checking the charging system
  • - Icons table
  • E - Fairing
  • 1 - HEADLIGHT FAIRING - REAR-VIEW MIRRORS
  • - Removing the rear-view mirrors
  • - Refitting the rear-view mirrors
  • - Removing the headlight fairing
  • - Refitting the headlight fairing
  • 2 - FAIRING
  • - Removing the fairings
  • - Refitting the fairings
  • 3 - TAIL GUARD
  • - Removing the tail guard
  • - Refitting the tail guard
  • 4 - FRONT AND REAR MUDGUARD
  • - Removing the front mudguard
  • - Refitting the front mudguard
  • - Removing the rear mudguard
  • - Refitting the rear mudguard
  • F - Controls - Devices
  • 1 - THROTTLE CONTROL - CHOKE
  • - Adjusting the throttle and choke cables
  • - Disassembling the throttle control
  • - Reassembling the throttle control
  • - Removing the choke control
  • - Refitting the choke control
  • 2 - CLUTCH HYDRAULIC CONTROL
  • - Removing the clutch master cylinder assembly
  • - Refitting the clutch master cylinder assembly
  • - Removing the clutch transmission unit
  • - Refitting the clutch transmission assembly
  • 3 - FRONT BRAKE CONTROL
  • - Removing the front brake control
  • - Refitting the front brake control
  • 4 - REAR BRAKE CONTROL
  • - Removing the rear brake control
  • - Disassembling the rear brake control
  • - Reassembling the rear brake control
  • 5 - GEAR CHANGE CONTROL
  • - Removing the gear change control
  • - Disassembling the gear change control
  • - Refitting the gear change control
  • 6 - SEAT LOCK AND RELEASING MECHANISMS
  • - Removing the seat releasing mechanism
  • - Refitting the seat releasing mechanism
  • G - Wheels - Suspension - Brakes
  • 1 - FRONT WHEEL
  • - Removing the front wheel
  • - Overhauling the front wheel
  • - Refitting the front wheel
  • 2 - FRONT FORK
  • - Removing the front fork
  • - Overhauling the front fork
  • - Refitting the front fork
  • 3 - FRONT BRAKE
  • - Braking system maintenance
  • - Removing the front brake system
  • - Overhauling the front brake components
  • - Refitting the front brake system
  • 4 - REAR WHEEL
  • - Removing the rear wheel
  • - Overhauling the rear wheel
  • - Refitting the rear wheel
  • 5 - REAR SWINGARM
  • - Removing the swingarm
  • - Inspecting the swingarm shaft
  • - Checking swingarm axial play
  • - Refitting the rear swingarm
  • 6 - REAR BRAKE
  • - Removing the rear brake system
  • - Refitting the rear brake system
  • 7 - REAR SUSPENSION
  • - Rear suspension
  • - Removing the rear shock absorber
  • - Overhauling the rear shock absorber
  • - Refitting the rear shock absorber
  • 8 - FINAL DRIVE
  • - Final drive inspection
  • - Removing the chain sprocket
  • - Refitting the chain sprocket
  • - Removing the rear sprocket
  • - Refitting the rear sprocket
  • - Wash the chain
  • - Chain lubrication
  • H - Frame
  • 1 - HANDLEBARS
  • - Removing the handlebars
  • - Refitting the handlebars
  • 2 - STEERING
  • - Adjusting steering bearing play
  • - Adjusting the steering angle
  • - Disassembling the steering tube components
  • - Refitting the steering tube components
  • 4 - FOOTPEG SUPPORTS
  • - Removing the footpegs
  • - Refitting the footpegs
  • 5 - STANDS
  • - Removing the side stand
  • - Disassembling the side stand
  • - Reassembling the side stand
  • - Refitting the side stand
  • 6 - FRAME INSPECTION
  • - Removing the frame and related components
  • - Checking the frame
  • - Refitting frame and related components
  • - Refitting the headlight support
  • 7 - TAIL LIGHT AND NUMBER PLATE HOLDER
  • - Removing the tail light and number plate holder
  • - Refitting the tail light and number plate holder
  • L - Fuel system - Exhaust system
  • 1 - FUEL SYSTEM DESCRIPTION
  • 2 - FUEL TANK
  • - Removing the fuel tank
  • - Removing the filler plug unit
  • - Refitting the filler plug unit
  • - Refitting the fuel tank
  • 3 - FUEL PUMP
  • - Removing the fuel pump
  • - Refitting the fuel pump
  • 4 - FUEL FILTER
  • - Changing the fuel filter
  • 5 - PRESSURE REGULATOR
  • - Changing the pressure regulator
  • 6 - THROTTLE BODY
  • - Removing the throttle body
  • - Refitting the throttle body
  • 7 - AIRBOX
  • - Removing the airbox
  • - Refitting the airbox
  • 8 - EXHAUST SYSTEM
  • - Operating principle of catalytic converter (EU only)
  • - Disassembling the exhaust system
  • - Reassembling the exhaust system
  • 10 - CANISTER FILTER
  • - Removing the Canister filter
  • - Refitting the Canister filter
  • M - Ignition - injection system
  • 1 - DESCRIPTION OF THE FUEL INJECTION- IGNITION SYSTEM
  • - General information on the fuel injection-ignition system
  • - Fuel circuit
  • - Intake air circuit
  • - Operating stages
  • 2 - SYSTEM DIAGRAM
  • - Fuel injection-ignition system diagram
  • 3 - FUEL INJECTION- IGNITION SYSTEM COMPONENTS
  • - Electronic control unit
  • - Electric injector
  • - Air temperature / pressure sensor
  • - Spark plug
  • - Coil
  • - Throttle position sensor
  • - Rpm/timing sensor
  • - Main and injection relays
  • N - Engine
  • 1 - REMOVING - REASSEMBLING THE COMPLETE ENGINE
  • - Removing the engine
  • - Reassembling the engine
  • 2.1 - LUBRICATION SYSTEM: OIL PUMP
  • - Lubrication system diagram
  • - Removing the oil pump
  • - Disassembling the oil pump
  • - Overhauling the oil pump
  • - Reassembling the oil pump
  • - Refitting the oil pump
  • 2.2 - LUBRICATION SYSTEM: OIL COOLER
  • - Removing the oil cooler
  • - Checking the oil cooler
  • - Refitting the oil cooler
  • 2.3 - LUBRICATION SYSTEM: OIL BREATHER RESERVOIR
  • - Removing the oil breather reservoir
  • - Refitting the oil breather reservoir
  • 4.1 - HEAD UNIT: CHECKS AND ADJUSTMENTS
  • - Checking and adjusting valve clearance
  • - Checking engine timing
  • 4.2 - HEAD UNITS: SIDE COVERS / TIMING SYSTEM
  • - Removing the timing side covers
  • - Disassembling the timing system
  • - Disassembling the mobile tensioner
  • - Disassembling the belt rollers
  • - Reassembling the timing system
  • - Refitting the timing side covers
  • 4.3 - HEAD UNIT: CAMSHAFTS
  • - Removing the engine oil temperature sensor
  • - Refitting the engine oil temperature sensor
  • - Disassembling the intake manifolds
  • - Refitting the intake manifolds
  • - Removing the side caps
  • - Removing the valve covers
  • - Refitting the valve covers
  • - Removing the camshafts
  • - Checking camshafts
  • - Checking the oil seals
  • - Checking the circlips
  • - Checking the bearings
  • - Refitting the camshafts
  • - Refitting the cam covers
  • 4.4 - HEAD UNIT: VALVES - ROCKER ARMS
  • - Disassembling the engine heads
  • - Overhauling the head parts
  • - Reassembling the head
  • 5 - CYLINDER / PISTON ASSEMBLY
  • - Removing cylinder / piston assy
  • - Overhauling the cylinder / piston assy
  • - Refitting cylinder / piston assy
  • 6.1 - CLUTCH UNIT: CLUTCH
  • - Clutch unit
  • - Disassembling the clutch
  • - Checking and overhauling the clutch unit
  • - Reassembling the clutch
  • 6.2 - CLUTCH UNIT: CLUTCH COVER
  • - Removing the clutch cover
  • - Disassembling the clutch cover
  • - Reassembling the clutch cover
  • - Refitting the clutch cover
  • 6.3 - CLUTCH UNIT: PRIMARY GEARS
  • - Disassembling the primary drive gears
  • - Fitting the primary drive gear and checking meshing play
  • 7.1 - GEARBOX ASSEMBLY: GEAR SELECTOR LEVERS
  • - Removing the gear selector levers
  • - Disassembling the gear selector levers
  • - Removing the gear stopper and ratchet
  • - Reassembling gear stopper and ratchet
  • - Reassembling the gear selector lever
  • 7.2 - GEARBOX ASSEMBLY: GEARBOX SHAFTS
  • - Removing the gearbox
  • - Disassembling the gearbox shafts
  • - Overhauling the gearbox
  • - Reassembling the gearbox shafts
  • - Inspecting the gear selector forks
  • - Inspecting the fork selector drum
  • - Reassembling the gearbox
  • 8 - FLYWHEEL - GENERATOR
  • - Removing the generator cover
  • - Disassembling the generator cover
  • - Removing the flywheel - generator assembly
  • - Checking the flywheel - generator assembly
  • - Refitting flywheel/ generator assembly
  • - Reassembling generator cover
  • - Checking the engine sensor air gap
  • 9.1 - CASING UNIT: OUTER COMPONENTS
  • - Removing outer components
  • - Reassembling the outer parts
  • - Removing the timing lay gear
  • - Reassembling the timing lay gear
  • - Removing the starter motor driven gear
  • - Refitting the starter motor driven gear
  • 9.2 - CASING UNIT: CRANKCASES
  • - Opening the casings
  • - Overhauling the casings
  • - Main bearings
  • - Reassembling the casings
  • - Shimming the shafts
  • - Closing the casings
  • 9.3 - CASING UNIT: CONNECTING RODS
  • - Removing the connecting rods
  • - Disassembling the connecting rods
  • - Overhauling the connecting rods
  • - Reassembling the connecting rods
  • - Refitting the connecting rod unit
  • P - Electric system
  • 1 - WIRING DIAGRAM
  • - Wiring diagram key
  • - Wire color coding - wiring diagram
  • - Legend of fuse box
  • - Arrangement of wiring on the frame
  • - Diagram A
  • - Diagram B
  • - Diagram C
  • - Diagram D
  • - Diagram E
  • - Diagram F
  • - Diagram G
  • - Diagram H
  • - Diagram J
  • - Diagram K
  • - Diagram L
  • - Diagram M
  • - Diagram N
  • - Diagram P
  • - Diagram Q
  • - Diagram R
  • - Diagram S
  • - Diagram T
  • - Diagram U
  • - Diagram V
  • 2 - CHARGING SYSTEM - BATTERY
  • - Checking the charging system
  • - Recharging the battery
  • - Adding electrolyte
  • - Battery
  • - Battery mount
  • - Generator
  • - Rectifier - regulator
  • 3 - ELECTRIC STARTING
  • - Electric starting system
  • - Starter motor
  • - Starter contactor
  • 4 - LIGHTING DEVICES
  • - Changing light bulbs
  • - Beam setting
  • 5 - INDICATORS AND LIGHTING SYSTEM
  • - Checking the indicators and lighting system components
  • - Changing light bulbs
  • 6 - PROTECTION AND SAFETY DEVICES
  • - Checking protection and safety devices components
  • - Checking the fuses
  • 7 - WARNING LIGHTS AND INDICATORS
  • - Instrument panel
  • 8 - IMMOBILIZER AND TRANSPONDER
  • 9 - DIAGNOSIS INSTRUMENTS
  • - How-use the multimeter-check electric systems
  • Subject index