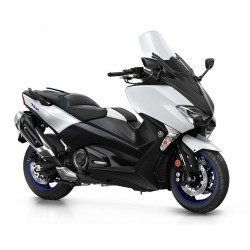
Yamaha NXC125 - Service Manual - Taller - Reparation - Reparaturanleitung - Officina
Digital technical documentation with sections on SCOOTER IDENTIFICATION, Vehicle identification number, Model label. Review the complete contents below for the systems and procedures covered.
Manual contents
- GENERAL INFORMATION
- - SCOOTER IDENTIFICATION
- Vehicle identification number
- Model label
- - IMPORTANT INFORMATION
- Preparation for removal and disassembly
- Replacement parts
- Gaskets, oil seals and O-rings
- Lock washers/plates and pins
- Cleft
- Bearings and oil seals
- elastic rings
- Notes on equipment preparation
- - CHECKING THE CONNECTIONS
- - SPECIAL TOOLS
- GENERAL SPECIFICATIONS
- - GENERAL SPECIFICATIONS
- - ENGINE SPECIFICATIONS
- - CHASSIS SPECIFICATIONS
- - ELECTRIC SPECIFICATIONS
- - CONVERSION TABLE /
- - GENERAL SPECIFICATIONS ABOUT PAIRS
- - OF TIGHTENING
- - TIGHTENING TORQUES
- - ENGINE TIGHTENING TORQUES
- Chassis tightening torques
- Grease points and types of lubricant
- Engine lubrication points and types of
- - LUBRICANTS
- Chassis grease points and types of
- Lubricants
- - CABLE ROUTE
- INSPECTIONS AND ADJUSTMENTS
- - INTRODUCTION
- - PERIODIC MAINTENANCE AND GREASING INTERVALS
- - Periodic maintenance and lubrication chart
- - COVER AND PANEL
- Saddle and side covers
- Lower fairing and footpeg board
- Top cover with handle,
- leg protector,
- - ENGINE
- Valve clearance adjustment
- Engine idle adjustment
- Checking the exhaust gas at idle (measurement
- Exhaust gas at idle when the induction system operates
- Of air)
- Checking and adjusting the exhaust gas at idle
- (Measurement of exhaust gas at idle when the system is not operating
- air induction)
- Throttle cable slack adjustment
- Checking the spark plug
- Checking the ignition timing
- Compression pressure measurement
- Checking the engine oil level
- Engine oil change
- Changing the gearbox oil
- Engine oil pressure measurement
- Cleaning the air filter element
- Cleaning the gearbox air filter element
- V-belt
- Checking the carburetor and manifold gasket
- Of admission
- Checking the fuel pipes and
- Empty
- Checking the crankcase breather tube
- Checking the exhaust system
- CHASSIS
- - FRONT WHEEL AND BRAKE DISC
- Front wheel
- Front wheel removal
- Checking the front wheel
- Checking the brake disc
- Front wheel assembly
- Front wheel installation
- Wheel Static Balance Adjustment
- Lead
- - REAR WHEEL AND REAR BRAKE
- Checking the rear wheel
- Brake check
- Brake shoe plate assembly
- Wheel Static Balance Adjustment
- Rear
- - FRONT BRAKE
- Front brake pads
- Replacing the brake pads
- Forward
- front brake master cylinder
- Disassembly of the front brake master cylinder
- Disassembly of the front brake master cylinder
- Checking the front brake master cylinder
- Assembly and installation of the front brake master cylinder
- Cylinder
- front brake caliper
- Disassembly of the front brake caliper
- Disassembly of the front brake caliper
- Checking the front brake caliper
- Assembly and installation of the brake caliper
- Forward
- - FRONT FORK
- Disassembly of the fork bars
- Lead
- Removing the fork legs
- Lead
- Disassembly of the fork bars
- Lead
- Checking the front fork bars
- Mounting the front fork bars
- Installing the fork legs
- Lead
- - HANDLEBAR
- Handlebar removal
- Checking the handlebar
- Handlebar installation
- - STEERING COLUMN
- Bottom Bracket Removal
- Checking the steering column
- Steering column installation
- - REAR SHOCK ABSORBER AND ARM ASSEMBLY
- - REAR
- Shock Absorber Assembly Removal
- Rear
- Checking the rear shock absorber assembly
- ENGINE
- - ENGINE
- Cables and tubes
- Pipes, air filter assembly, mounting screw
- Engine and engine
- Engine installation
- - HEAD
- Cylinder head removal
- Checking the cylinder head
- Cylinder head installation
- - ROCKER AND CAMSHAFT
- Removing the rocker arms and camshaft
- Checking the rocker arms and rocker shafts
- Checking the camshaft
- Checking the timing chain,
- Camshaft and chain guide sprockets
- Of distribution
- Checking the timing chain tensioner
- Installing the camshaft and rocker arms
- - VALVES AND VALVE SPRINGS
- Valve removal
- Checking valves and valve guides
- Checking valve seats
- Checking the valve springs
- Valve installation
- - CYLINDER AND PISTON
- Cylinder and piston removal
- Cylinder and piston check
- Checking the piston rings
- Checking the piston pin
- Checking the chain guide
- Distribution
- Piston and cylinder installation
- Belt drive
- Air duct, pedal starter and crankcase cover
- (left)
- Pedal start
- Installing the kick starter
- V-belt, clutch and primary and discs
- Secondary
- Disassembly of the secondary disk
- Removing the primary disk
- Removing the secondary disc and belt
- Trapezoidal
- Disassembly of the secondary disk
- Checking the clutch shoe
- Checking the V-belt
- Checking the primary disk
- Checking the primary disc counterweights
- Cursor Check
- Checking the secondary disk
- Mounting the primary disk
- Mounting the secondary disk
- Belt Drive Installation
- - STARTER MOTOR CLUTCH
- Checking the transmission gear
- start
- - AC MAGNETO
- AC Magnet Removal
- AC Magnet Installation
- - OIL PUMP
- Checking the oil pump
- Oil pump installation
- - GEARBOX
- Checking the gearbox
- Crankcase and crankshaft
- Crankcase disassembly
- Crankshaft Assembly Removal
- Checking the timing chain and guides
- From the distribution chain
- Checking the crankshaft and connecting rod
- Crankshaft installation
- Crankcase assembly
- CARBURETOR
- - CARBURETOR
- Checking the carburetor
- Carburetor assembly
- Carburetor installation
- Fuel level measurement and adjustment
- Checking the operation of the pump
- Fuel
- Checking the automatic choke
- - AIR INDUCTION SYSTEM
- Checking the air induction system
- ELECTRIC SYSTEM
- - ELECTRIC COMPONENTS
- - WIRING DIAGRAM
- - VERIFICATION OF THE CONTINUITY OF THE
- - SWITCHES
- - CHECKING THE SWITCHES
- - CHECKING THE BULBS AND THE BUSHINGS
- - LIGHT BULBS
- Types of bulbs
- Checking the condition of the bulbs
- Checking the condition of the bulb sockets
- - IGNITION SYSTEM
- - CIRCUIT DIAGRAM
- Troubleshooting
- - ELECTRICAL STARTING SYSTEM
- - CIRCUIT DIAGRAM
- Operation of the circuit cutting system
- start
- Troubleshooting
- Starting motor
- Checking the starter motor
- Starter motor assembly
- - CHARGING SYSTEM
- - CIRCUIT DIAGRAM
- Troubleshooting
- - LIGHTING SYSTEM
- - CIRCUIT DIAGRAM
- Troubleshooting
- Checking the lighting system
- - SIGNALING SYSTEM
- - CIRCUIT DIAGRAM
- Troubleshooting
- Checking the signaling system
- - CARBURETOR HEATER SYSTEM
- - CIRCUIT DIAGRAM
- Troubleshooting
- - AUTOMATIC CHOKE SYSTEM
- - CIRCUIT DIAGRAM
- Troubleshooting
- TROUBLESHOOTING
- - STARTING FAULTS
- Engine
- Fuel system
- Electric system
- - INCORRECT ENGINE IDLE
- Engine
- Fuel system
- Electric system
- - POOR PERFORMANCE AT MEDIUM AND HIGH SPEEDS
- Engine
- Fuel system
- - DEFECTIVE CLUTCH
- The engine runs but the scooter does not move
- The clutch slips
- Poor starting performance
- Poor performance at speed
- - OVERHEATING
- Engine
- Fuel system
- Chassis
- Electric system
- Poor brake performance
- Defective front fork bars
- oil leaks
- malfunction
- - UNSTABLE DRIVING
- - DEFECTIVE LIGHTING OR SIGNALING SYSTEM
- The headlight does not turn on
- Headlight bulb burned out
- Taillight/brake light does not come on
- Burnt taillight/brake light bulb
- The turn signal does not turn on
- The turn signal flashes slowly
- The turn signal stays on
- The turn signal flashes quickly
- The horn does not sound