• -$10.00
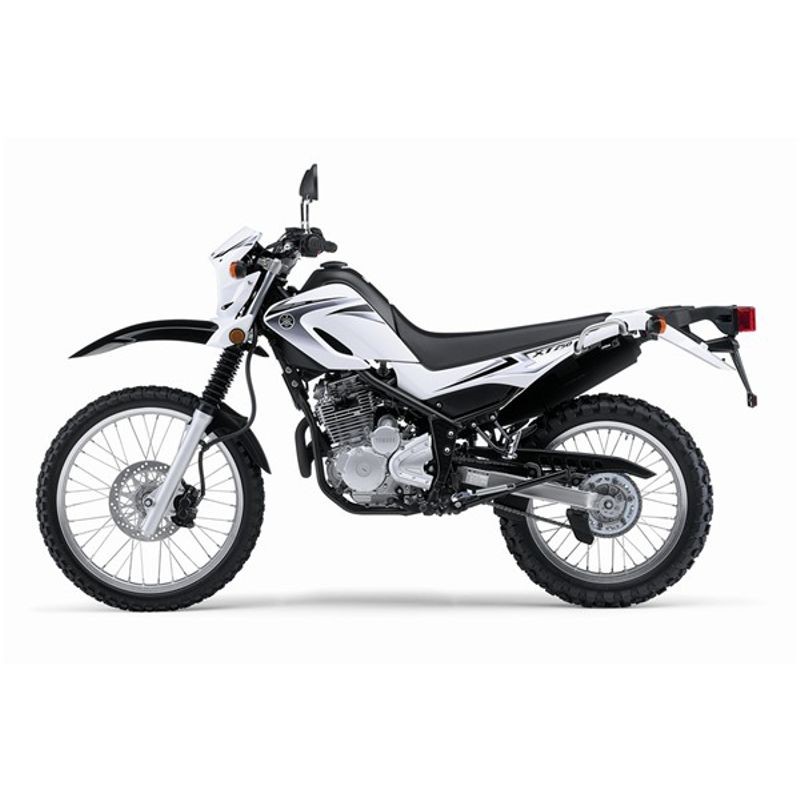
Yamaha XT250X XT250XC - Service Repair Manual - Wiring Diagrams - Owners
search
  • Yamaha XT250X XT250XC - Service Repair Manual - Wiring Diagrams - Owners

Yamaha XT250X XT250XC - Service Repair Manual - Wiring Diagrams - Owners

$29.95
$19.95 Save $10.00
No tax
Quantity

YOUTUBE Official Channel @SoloPDFcom (+18,000 subs). Trusted by mechanics worldwide using professional workshop manuals and wiring diagrams.

Yamaha XT250X XT250XC - Service Repair Manual - Wiring Diagrams - Owners

Digital technical documentation with sections on Engine Specifications, Lubrication Points And Lubricant Types, Adjusting The Clutch Cable Free Play. Review the complete contents below for the systems and procedures covered.
Manual contents

  • SERVICE MANUAL
  • Important Manual Information
  • How To Use This Manual
  • Symbols
  • Table Of Contents
  • General Information
  • - Identification
  • - Vehicle Identification Number
  • - Model Label
  • - Important Information
  • - Preparation For Removal And Disassembly
  • - Replacement Parts
  • - Gaskets, Oil Seals And O-Rings
  • - Lock Washers/Plates And Cotter Pins
  • - Bearings And Oil Seals
  • - Circlips
  • - Checking The Connections
  • - Special Tools
  • Specifications
  • - General Specifications
  • - Engine Specifications
  • - Chassis Specifications
  • - Electrical Specifications
  • - Tightening Torques
  • - General Tightening Torque Specifications
  • - Engine Tightening Torques
  • - Chassis Tightening Torques
  • - Lubrication Points And Lubricant Types
  • - Engine
  • - Chassis
  • - Lubrication System Chart And Diagrams
  • - Engine Oil Lubrication Chart
  • - Lubrication Diagrams
  • - Cable Routing
  • Periodic Checks And Adjustments
  • - Periodic Maintenance
  • - Introduction
  • - Periodic Maintenance Chart For The Emission Control System
  • - General Maintenance And Lubrication Chart
  • - Engine
  • - Adjusting The Valve Clearance
  • - Adjusting The Engine Idling Speed
  • - Adjusting The Throttle Cable Free Play
  • - Checking The Spark Plug
  • - Checking The Ignition Timing
  • - Measuring The Compression Pressure
  • - Checking The Engine Oil Level
  • - Changing The Engine Oil
  • - Adjusting The Clutch Cable Free Play
  • - Replacing The Air Filter Element
  • - Checking The Carburetor Joint And Intake Manifold
  • - Checking The Fuel Line
  • - Checking The Cylinder Head Breather Hose
  • - Checking The Exhaust System
  • - Chassis
  • - Adjusting The Front Disc Brake
  • - Adjusting The Rear Disc Brake
  • - Checking The Brake Fluid Level
  • - Checking The Front Brake Pads
  • - Checking The Rear Brake Pads
  • - Checking The Front Brake Hose
  • - Checking The Rear Brake Hose
  • - Adjusting The Rear Brake Light Switch
  • - Bleeding The Hydraulic Brake System
  • - Adjusting The Drive Chain Slack
  • - Lubricating The Drive Chain
  • - Checking And Adjusting The Steering Head
  • - Checking The Front Fork
  • - Adjusting The Rear Shock Absorber Assembly
  • - Checking The Tires
  • - Checking The Wheels
  • - Checking And Tightening The Spokes
  • - Checking And Lubricating The Cables
  • - Lubricating The Levers
  • - Lubricating The Pedal
  • - Lubricating The Sidestand
  • - Lubricating The Rear Suspension
  • - Electrical System
  • - Checking And Charging The Battery
  • - Checking The Fuses
  • - Replacing The Headlight Bulb
  • - Adjusting The Headlight Beam
  • Chassis
  • - General Chassis
  • - Front Wheel
  • - Removing The Front Wheel
  • - Checking The Front Wheel
  • - Disassembling The Front Wheel
  • - Assembling The Front Wheel
  • - Adjusting The Front Wheel Static Balance
  • - Installing The Front Wheel (Disc)
  • - Rear Wheel
  • - Removing The Rear Wheel (Disc)
  • - Disassembling The Rear Wheel
  • - Checking The Rear Wheel
  • - Checking And Replacing The Rear Wheel Sprocket
  • - Assembling The Rear Wheel
  • - Adjusting The Rear Wheel Static Balance
  • - Installing The Rear Wheel
  • - Front Brake
  • - Introduction
  • - Checking The Front Brake Disc
  • - Replacing The Front Brake Pads
  • - Removing The Front Brake Caliper
  • - Disassembling The Front Brake Caliper
  • - Checking The Front Brake Caliper
  • - Assembling The Front Brake Caliper
  • - Installing The Front Brake Caliper
  • - Removing The Front Brake Master Cylinder
  • - Checking The Front Brake Master Cylinder
  • - Assembling The Front Brake Master Cylinder
  • - Installing The Front Brake Master Cylinder
  • - Rear Brake
  • - Introduction
  • - Checking The Rear Brake Disc
  • - Replacing The Rear Brake Pads
  • - Removing The Rear Brake Caliper
  • - Disassembling The Rear Brake Caliper
  • - Checking The Rear Brake Caliper
  • - Assembling The Rear Brake Caliper
  • - Installing The Rear Brake Caliper
  • - Removing The Rear Brake Master Cylinder
  • - Checking The Rear Brake Master Cylinder
  • - Assembling The Rear Brake Master Cylinder
  • - Installing The Rear Brake Master Cylinder
  • - Handlebar
  • - Removing The Handlebars
  • - Checking The Handlebar
  • - Installing The Handlebar
  • - Front Fork
  • - Removing The Front Fork Legs
  • - Disassembling The Front Fork Legs
  • - Checking The Front Fork Legs
  • - Assembling The Front Fork Legs
  • - Installing The Front Fork Legs
  • - Steering Head
  • - Removing The Lower Bracket
  • - Checking The Steering Head
  • - Installing The Steering Head
  • - Rear Shock Absorber Assembly
  • - Handling The Rear Shock Absorber
  • - Disposing Of A Rear Shock Absorber
  • - Removing The Rear Shock Absorber Assembly
  • - Checking The Rear Shock Absorber Assembly
  • - Checking The Connecting Arm And Relay Arm
  • - Installing The Relay Arm
  • - Installing The Rear Shock Absorber Assembly
  • - Swingarm
  • - Removing The Swingarm
  • - Checking The Swingarm
  • - Installing The Swingarm
  • - Chain Drive
  • - Removing The Drive Chain
  • - Checking The Drive Chain
  • - Checking The Drive Sprocket
  • - Installing The Drive Chain
  • Engine
  • - Engine Removal
  • - Installing The Engine
  • - Installing The Shift Pedal
  • - Cylinder Head
  • - Removing The Cylinder Head
  • - Checking The Cylinder Head
  • - Checking The Tappet Covers And Camshaft Sprocket Cover
  • - Checking The Camshaft Sprocket And Timing Chain Guide (Exhaust System Side)
  • - Checking The Timing Chain Tensioner
  • - Installing The Cylinder Head
  • - Camshaft
  • - Removing The Rocker Arms And Camshaft
  • - Checking The Camshaft
  • - Checking The Rocker Arms And Rocker Arm Shafts
  • - Installing The Camshaft And Rocker Arms
  • - Valves And Valve Springs
  • - Removing The Valves
  • - Checking The Valves And Valve Guides
  • - Checking The Valve Seats
  • - Checking The Valve Springs
  • - Installing The Valves
  • - Cylinder And Piston
  • - Removing The Piston
  • - Checking The Cylinder And Piston
  • - Checking The Piston Rings
  • - Checking The Piston Pin
  • - Installing The Piston And Cylinder
  • - Clutch
  • - Removing The Clutch
  • - Checking The Friction Plates
  • - Checking The Clutch Plates
  • - Checking The Clutch Springs
  • - Checking The Clutch Housing
  • - Checking The Clutch Boss
  • - Checking The Pressure Plate
  • - Checking The Clutch Push Rods
  • - Checking The Primary Drive Gear
  • - Checking The Primary Driven Gear
  • - Installing The Clutch
  • - Oil Pump And Balancer Gear
  • - Removing The Balancer Gear
  • - Checking The Oil Pump
  • - Checking The Oil Strainer
  • - Assembling The Oil Pump
  • - Install The Oil Pump And Balancer Gear
  • - Shift Shaft
  • - Checking The Shift Shaft
  • - Checking The Stopper Lever
  • - Installing The Shift Shaft
  • - Generator And Starter Clutch
  • - Removing The Generator
  • - Removing The Starter Clutch
  • - Checking The Starter Clutch
  • - Installing The Starter Clutch
  • - Installing The Generator
  • - Electric Starter
  • - Checking The Starter Motor
  • - Assembling The Starter Motor
  • - Crankcase
  • - Disassembling The Crankcase
  • - Checking The Crankcase
  • - Checking The Timing Chain, Crankshaft Sprocket, Timing Chain Guide (Intake Side)
  • - Checking The Bearing And Oil Seal
  • - Assembling The Crankcase
  • - Crankshaft Assembly
  • - Removing The Crankshaft Assembly
  • - Checking The Crankshaft And Connecting Rod
  • - Installing The Crankshaft Assembly
  • - Transmission
  • - Checking The Shift Forks
  • - Checking The Shift Drum Assembly
  • - Checking The Transmission
  • - Installing The Shift Forks And Shift Drum Assembly
  • Fuel System
  • - Fuel Tank
  • - Checking The Fuel Cock
  • - Carburetor
  • - Checking The Carburetor
  • - Assembling The Carburetor
  • - Installing The Carburetor
  • - Air Induction System
  • - Checking The Air Induction System
  • Electrical System
  • - Ignition System
  • - Circuit Diagram
  • - Troubleshooting
  • - Electric Starting System
  • - Circuit Diagram
  • - Starting Circuit Cut-Off System Operation
  • - Troubleshooting
  • - Charging System
  • - Circuit Diagram
  • - Troubleshooting
  • - Lighting System
  • - Circuit Diagram
  • - Troubleshooting
  • - Signaling System
  • - Circuit Diagram
  • - Troubleshooting
  • - Carburetor Heating System
  • - Circuit Diagram
  • - Troubleshooting
  • - Electrical Components
  • - Checking The Switches
  • - Checking The Bulbs And Bulb Sockets
  • - Checking The Fuse
  • - Checking And Charging The Battery
  • - Checking The Relays
  • - Checking The Turn Signal Relay
  • - Checking The Diode
  • - Checking The Spark Plug Cap
  • - Checking The Ignition Coil
  • - Checking The Pickup Coil
  • - Checking The Stator Coil
  • - Checking The Rectifier/Regulator
  • - Checking The Horn
  • - Checking The Speed Sensor
  • - Checking The Thermo Switch
  • - Checking The Carburetor Warmer
  • Troubleshooting
  • - Troubleshooting
  • - General Information
  • - Starting Failures
  • - Incorrect Engine Idling Speed
  • - Poor Medium-and-High-Speed Performance
  • - Faulty Gear Shifting
  • - Shift Pedal Does Not Move
  • - Jumps Out Of Gear
  • - Faulty Clutch
  • - Overheating
  • - Poor Braking Performance
  • - Faulty Front Fork Legs
  • - Unstable Handling
  • - Faulty Lighting Or Signaling System
  • Wiring Diagram
  • - Xt250x/Xt250xc 2008
  • - 2008 Xt250x/Xt250xc Wiring Diagram
  • - 2008 Xt250x/Xt250xc Wiring Diagram
  • OWNERS MANUAL
  • Introduction
  • Important Manual Information
  • Table Of Contents
  • Safety Information
  • - Location Of Important Labels
  • Description
  • - Left View
  • - Right View
  • - Controls And Instruments
  • Instrument And Control Functions
  • - Main Switch/Steering Lock
  • - Indicator Lights
  • - Multi-Function Display
  • - Handlebar Switches
  • - Clutch Lever
  • - Shift Pedal
  • - Brake Lever
  • - Brake Pedal
  • - Fuel Tank Cap
  • - Fuel
  • - Fuel Cock
  • - Starter (Choke) Knob
  • - Seat
  • - Helmet Holder
  • - Adjusting The Shock Absorber Assembly
  • - Sidestand
  • - Ignition Circuit Cut-Off System
  • Pre-Operation Checks
  • - Pre-Operation Check List
  • Operation And Important Riding Points
  • - Starting And Warming Up A Cold Engine
  • - Starting A Warm Engine
  • - Shifting
  • - Engine Break-In
  • - Parking
  • Periodic Maintenance And Minor Repair
  • - Periodic Maintenance
  • - Owner's Tool Kit
  • - Periodic Maintenance Chart For The Emission Control System
  • - General Maintenance And Lubrication Chart
  • - Removing And Installing The Cowling And Panels
  • - Checking The Spark Plug
  • - Canister (For California Only)
  • - Engine Oil And Oil Filter Element
  • - Replacing The Air Filter Element And Cleaning The Check Hose
  • - Cleaning The Spark Arrester
  • - Carburetor
  • - Checking The Engine Idling Speed
  • - Checking The Throttle Cable Free Play
  • - Valve Clearance
  • - Tires
  • - Spoke Wheels
  • - Accessories And Replacement Parts
  • - Adjusting The Clutch Lever Free Play
  • - Adjusting The Brake Lever Free Play
  • - Adjusting The Rear Brake Light Switch
  • - Checking The Front And Rear Brake Pads
  • - Checking The Brake Fluid Level
  • - Changing The Brake Fluid
  • - Drive Chain Slack
  • - Cleaning And Lubricating The Drive Chain
  • - Checking And Lubricating The Cables
  • - Checking And Lubricating The Throttle Grip And Cable
  • - Checking And Lubricating The Brake And Shift Pedals
  • - Checking And Lubricating The Brake And Clutch Levers
  • - Checking And Lubricating The Sidestand
  • - Lubricating The Rear Suspension
  • - Checking The Front Fork
  • - Checking The Steering
  • - Checking The Wheel Bearings
  • - Battery
  • - Replacing The Fuse
  • - Replacing The Headlight Bulb
  • - Replacing The Tail/Brake Light Bulb
  • - Replacing A Turn Signal Light Bulb
  • - Supporting The Motorcycle
  • - Front Wheel
  • - Rear Wheel
  • - Troubleshooting
  • - Troubleshooting Chart
  • Motorcycle Care And Storage
  • - Matte Color Caution
  • - Care
  • - Storage
  • Specifications
  • Consumer Information
  • - Identification Numbers
  • - Reporting Safety Defects
  • - Motorcycle Noise Regulation
  • - Maintenance Record
  • - Yamaha Motor Corporation, U.S.A. Street And Enduro Motorcycle Limited Warranty
  • - Yamaha Extended Service (Y.E.S.)
  • Index