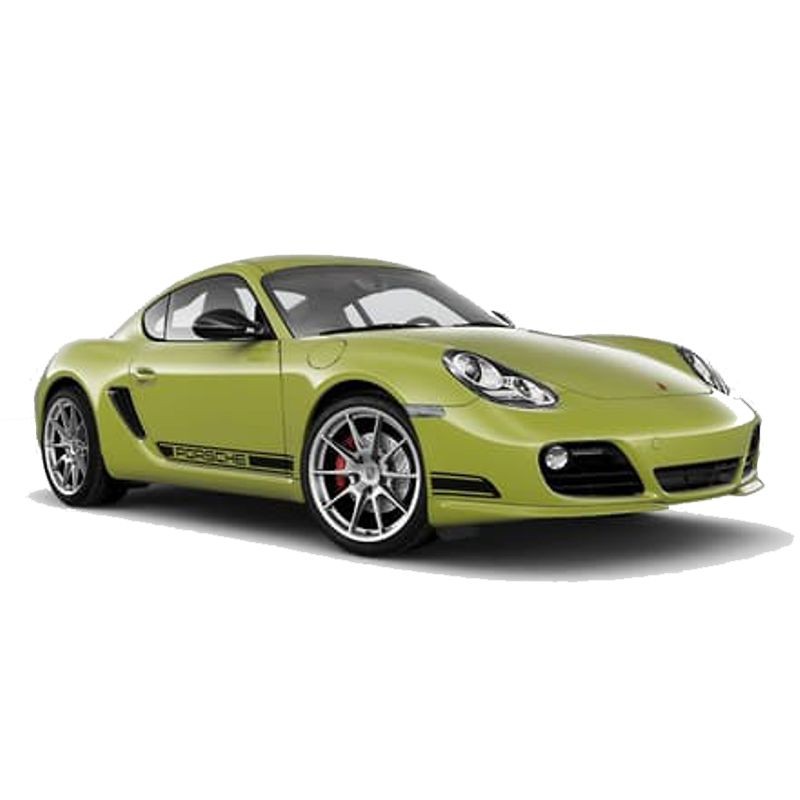
Porsche 987 Cayman R 2011-2012 Electrical Wiring Diagrams
This is an electrical wiring/circuit and component-location reference, not a mechanical workshop repair manual. Only the systems and model applicability identified in the source index are represented.
Porsche 987 Cayman R electrical diagram reference listing vehicle circuits, connector locations and mixed Cayman/Boxster figure references.
Indexed areas: engine and mechanical systems, brakes and steering, suspension and axles, electrical and electronic systems, body and equipment.
Examples from the original index: ELECTRICAL WIRING DIAGRAMS; 56: Power Distribution Circuit (5 of 5); 28: Ground Distribution Circuit (2 of 4); ELECTRICAL COMPONENTS LOCATOR.
Document scope / limitation: The electrical index includes both 2.9L and 3.4L circuits and figures labelled for Boxster as well as Cayman. These are source headings, not a guarantee that every item is specific to Cayman R.
Original technical index
- CONTENTS:
- ELECTRICAL WIRING DIAGRAMS
- 2011 Porsche Cayman R
- - 1: Active Bodyworks Circuit
- - 2: Automatic A/C Circuit (1 of 2)
- - 3: Automatic A/C Circuit (2 of 2)
- - 4: Manual A/C Circuit (1 of 2)
- - 5: Manual A/C Circuit (2 of 2)
- - 6: Anti-lock Brakes Circuit
- - 7: Anti-theft Circuit
- - 8: Front Controller Circuit
- - 9: Rear Control Unit Circuit
- - 10: Vehicle Electrical System Control Module Circuit
- - 11: Computer Data Lines Circuit
- - 12: Cooling Fan Circuit
- - 13: Cruise Control Circuit
- - 14: Defogger Circuit
- - 15: Heated Mirrors Circuit
- - 16: Electronic Suspension Circuit
- - 17: 2.9L, Engine Performance Circuit (1 of 3)
- - 18: 2.9L, Engine Performance Circuit (2 of 3)
- - 19: 2.9L, Engine Performance Circuit (3 of 3)
- - 20: 3.4L, Engine Performance Circuit (1 of 4)
- - 21: 3.4L, Engine Performance Circuit (2 of 4)
- - 22: 3.4L, Engine Performance Circuit (3 of 4)
- - 23: 3.4L, Engine Performance Circuit (4 of 4)
- - 24: Backup Lamps Circuit
- - 25: Exterior Lamps Circuit (1 of 2)
- - 26: Exterior Lamps Circuit (2 of 2)
- - 27: Ground Distribution Circuit (1 of 4)
- - 28: Ground Distribution Circuit (2 of 4)
- - 29: Ground Distribution Circuit (3 of 4)
- - 30: Ground Distribution Circuit (4 of 4)
- - 31: Headlights Circuit, W/ Cornering Headlights
- - 32: Headlights Circuit, W/ Halogen Lamps (1 of 2)
- - 33: Headlights Circuit, W/ Halogen Lamps (2 of 2)
- - 34: Headlights Circuit, W/ Xenon Lamps (1 of 2)
- - 35: Headlights Circuit, W/ Xenon Lamps (2 of 2)
- - 36: Horn Circuit
- - 37: Instrument Cluster Circuit
- - 38: Interior Lights Circuit (1 of 2)
- - 39: Interior Lights Circuit (2 of 2)
- - 40: Driver"s Memory Seat Circuit (1 of 2)
- - 41: Driver"s Memory Seat Circuit (2 of 2)
- - 42: Memory Mirrors Circuit
- - 43: Passenger"s Memory Seat Circuit (1 of 2)
- - 44: Passenger"s Memory Seat Circuit (2 of 2)
- - 45: Navigation Circuit, W/ Bose (1 of 3)
- - 46: Navigation Circuit, W/ Bose (2 of 3)
- - 47: Navigation Circuit, W/ Bose (3 of 3)
- - 48: Navigation Circuit, W/O Bose (1 of 3)
- - 49: Navigation Circuit, W/O Bose (2 of 3)
- - 50: Navigation Circuit, W/O Bose (3 of 3)
- - 51: Parking Assistant Circuit
- - 52: Power Distribution Circuit (1 of 5)
- - 53: Power Distribution Circuit (2 of 5)
- - 54: Power Distribution Circuit (3 of 5)
- - 55: Power Distribution Circuit (4 of 5)
- - 56: Power Distribution Circuit (5 of 5)
- - 57: Power Door Locks Circuit (1 of 2)
- - 58: Power Door Locks Circuit (2 of 2)
- - 59: Auto Anti-dazzling Mirror Circuit
- - 60: Power Mirror Circuit
- - 61: Driver Power Seat Circuit, Base
- - 62: Driver Power Seat Circuit, Except Base
- - 63: Heated Seats Circuit
- - 64: Passenger Power Seat Circuit
- - 65: Power Top/Sunroof Circuit
- - 66: Power Windows Circuit
- - 67: Base Radio Circuit
- - 68: Optical WaveGuide Circuit
- - 69: Premium Radio Circuit, W/ Bose (1 of 3)
- - 70: Premium Radio Circuit, W/ Bose (2 of 3)
- - 71: Premium Radio Circuit, W/ Bose (3 of 3)
- - 72: Premium Radio Circuit, W/O Bose (1 of 3)
- - 73: Premium Radio Circuit, W/O Bose (2 of 3)
- - 74: Premium Radio Circuit, W/O Bose (3 of 3)
- - 75: Shift Interlock Circuit
- - 76: Charging Circuit
- - 77: Starting Circuit
- - 78: Supplemental Restraints Circuit (1 of 2)
- - 79: Supplemental Restraints Circuit (2 of 2)
- - 80: A/T Circuit
- - 81: PDK Circuit
- - 82: Tailgate & Fuel Door Release Circuit
- - 83: Warning Systems Circuit
- - 84: Front Wiper/Washer Circuit, W/ Rain Sensor
- - 85: Front Wiper/Washer Circuit, W/O Rain Sensor
- 2012 Porsche Cayman R
- - 1: Active Bodyworks Circuit
- - 2: Automatic A/C Circuit (1 of 2)
- - 3: Automatic A/C Circuit (2 of 2)
- - 4: Manual A/C Circuit (1 of 2)
- - 5: Manual A/C Circuit (2 of 2)
- - 6: Anti-lock Brakes Circuit
- - 7: Anti-theft Circuit
- - 8: Front Controller Circuit
- - 9: Rear Control Unit Circuit
- - 10: Vehicle Electrical System Control Module Circuit
- - 11: Computer Data Lines Circuit
- - 12: Cooling Fan Circuit
- - 13: Cruise Control Circuit
- - 14: Defogger Circuit
- - 15: Heated Mirrors Circuit
- - 16: Electronic Suspension Circuit
- - 17: 2.9L, Engine Performance Circuit (1 of 3)
- - 18: 2.9L, Engine Performance Circuit (2 of 3)
- - 19: 2.9L, Engine Performance Circuit (3 of 3)
- - 20: 3.4L, Engine Performance Circuit (1 of 4)
- - 21: 3.4L, Engine Performance Circuit (2 of 4)
- - 22: 3.4L, Engine Performance Circuit (3 of 4)
- - 23: 3.4L, Engine Performance Circuit (4 of 4)
- - 24: Backup Lamps Circuit
- - 25: Exterior Lamps Circuit (1 of 2)
- - 26: Exterior Lamps Circuit (2 of 2)
- - 27: Ground Distribution Circuit (1 of 4)
- - 28: Ground Distribution Circuit (2 of 4)
- - 29: Ground Distribution Circuit (3 of 4)
- - 30: Ground Distribution Circuit (4 of 4)
- - 31: Headlights Circuit, W/ Cornering Headlights
- - 32: Headlights Circuit, W/ Halogen Lamps (1 of 2)
- - 33: Headlights Circuit, W/ Halogen Lamps (2 of 2)
- - 34: Headlights Circuit, W/ Xenon Lamps (1 of 2)
- - 35: Headlights Circuit, W/ Xenon Lamps (2 of 2)
- - 36: Horn Circuit
- - 37: Instrument Cluster Circuit
- - 38: Interior Lights Circuit (1 of 2)
- - 39: Interior Lights Circuit (2 of 2)
- - 40: Driver"s Memory Seat Circuit (1 of 2)
- - 41: Driver"s Memory Seat Circuit (2 of 2)
- - 42: Memory Mirrors Circuit
- - 43: Passenger"s Memory Seat Circuit (1 of 2)
- - 44: Passenger"s Memory Seat Circuit (2 of 2)
- - 45: Navigation Circuit, W/ Bose (1 of 3)
- - 46: Navigation Circuit, W/ Bose (2 of 3)
- - 47: Navigation Circuit, W/ Bose (3 of 3)
- - 48: Navigation Circuit, W/O Bose (1 of 3)
- - 49: Navigation Circuit, W/O Bose (2 of 3)
- - 50: Navigation Circuit, W/O Bose (3 of 3)
- - 51: Parking Assistant Circuit
- - 52: Power Distribution Circuit (1 of 5)
- - 53: Power Distribution Circuit (2 of 5)
- - 54: Power Distribution Circuit (3 of 5)
- - 55: Power Distribution Circuit (4 of 5)
- - 56: Power Distribution Circuit (5 of 5)
- - 57: Power Door Locks Circuit (1 of 2)
- - 58: Power Door Locks Circuit (2 of 2)
- - 59: Auto Anti-dazzling Mirror Circuit
- - 60: Power Mirror Circuit
- - 61: Driver Power Seat Circuit, Base
- - 62: Driver Power Seat Circuit, Except Base
- - 63: Heated Seats Circuit
- - 64: Passenger Power Seat Circuit
- - 65: Power Top/Sunroof Circuit
- - 66: Power Windows Circuit
- - 67: Base Radio Circuit
- - 68: Optical WaveGuide Circuit
- - 69: Premium Radio Circuit, W/ Bose (1 of 3)
- - 70: Premium Radio Circuit, W/ Bose (2 of 3)
- - 71: Premium Radio Circuit, W/ Bose (3 of 3)
- - 72: Premium Radio Circuit, W/O Bose (1 of 3)
- - 73: Premium Radio Circuit, W/O Bose (2 of 3)
- - 74: Premium Radio Circuit, W/O Bose (3 of 3)
- - 75: Shift Interlock Circuit
- - 76: Charging Circuit
- - 77: Starting Circuit
- - 78: Supplemental Restraints Circuit (1 of 2)
- - 79: Supplemental Restraints Circuit (2 of 2)
- - 80: A/T Circuit
- - 81: PDK Circuit
- - 82: Tailgate & Fuel Door Release Circuit
- - 83: Warning Systems Circuit
- - 84: Front Wiper/Washer Circuit, W/ Rain Sensor
- - 85: Front Wiper/Washer Circuit, W/O Rain Sensor
- ELECTRICAL COMPONENTS LOCATOR
- 2006-2007
- - buzzers, relays & timers location
- - circuit protection devices location
- - control units location
- - motors location
- - sending units & sensors location
- - solenoids & solenoid valves location
- - switches location
- - miscellaneous location
- - connectors location
- - grounds location
- - 1: Vehicle Overview
- - 2: Vehicle Overview
- - 3: Vehicle Overview
- - 4: Vehicle Overview
- - 5: Vehicle Overview
- - 6: Vehicle Overview
- - 7: Vehicle Overview
- - 8: Vehicle Overview
- - 9: Vehicle Overview
- - 10: Vehicle Overview
- - 11: Vehicle Overview
- - 12: Vehicle Overview
- - 13: Vehicle Overview
- - 14: Vehicle Overview
- - 15: Vehicle Overview
- - 16: Vehicle Overview
- - 17: Vehicle Overview
- - 18: Relay Support No. 1
- - 19: Relay Support No. 2
- 2008-2012
- - buzzers, relays & timers location
- - circuit protection devices location
- - control units location
- - motors location
- - sending units & sensors location
- - solenoids & solenoid valves location
- - switches location
- - miscellaneous location
- - connectors location
- - grounds location
- - 1: Vehicle Overview (Boxster Shown - Cayman Rimilar)
- - 2: Vehicle Overview (Boxster Shown - Cayman Rimilar)
- - 3: Vehicle Overview (Boxster Shown - Cayman Rimilar)
- - 4: Vehicle Overview (Boxster Shown - Cayman Rimilar)
- - 5: Vehicle Overview (Cayman)
- - 6: Vehicle Overview (Boxster Shown - Cayman Rimilar)
- - 7: Vehicle Overview (Boxster Shown - Cayman Rimilar)
- - 8: Vehicle Overview (Boxster Shown - Cayman Rimilar)
- - 9: Vehicle Overview (Boxster Shown - Cayman Rimilar)
- - 10: Vehicle Overview (Boxster Shown - Cayman Rimilar)
- - 11: Vehicle Overview (Boxster Shown - Cayman Rimilar)
- - 12: Vehicle Overview (Boxster Shown - Cayman Rimilar)
- - 13: Vehicle Overview (Boxster Shown - Cayman Rimilar)
- - 14: Vehicle Overview (Boxster Shown - Cayman Rimilar)
- - 15: Vehicle Overview (Boxster Shown - Cayman Rimilar)
- - 16: Vehicle Overview (Boxster Shown - Cayman Rimilar)
- - 17: Relay Support No. 1
- - 18: Relay Support No. 2