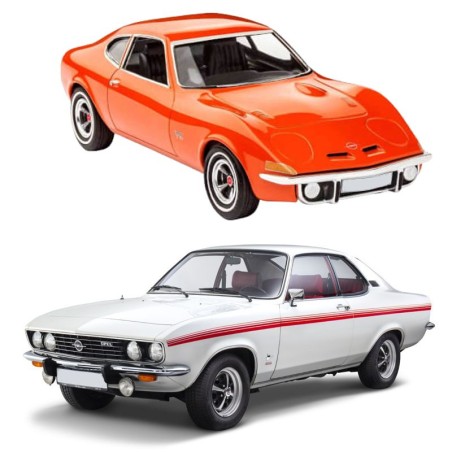
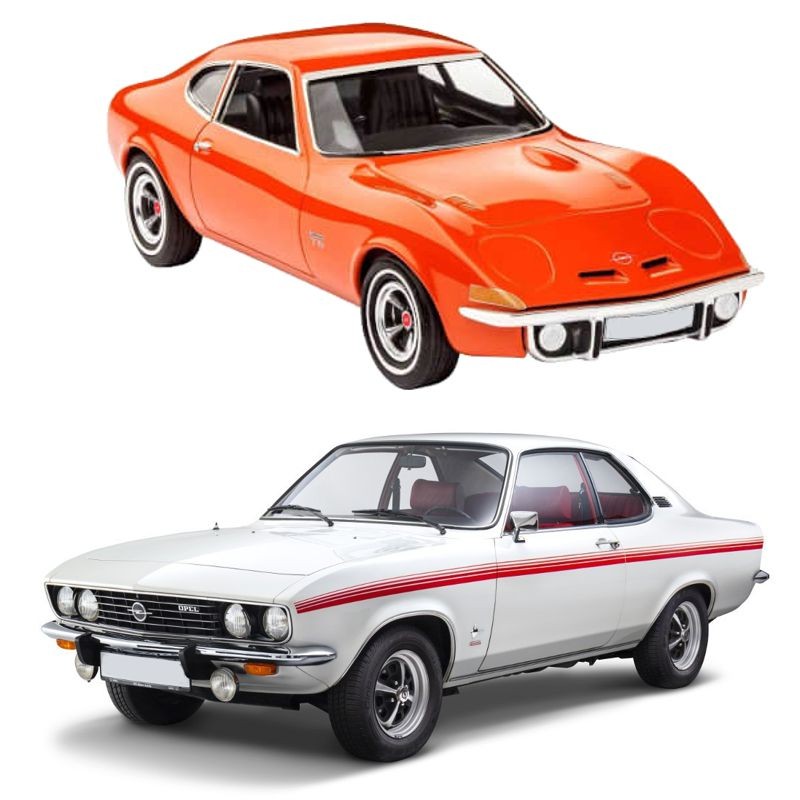
Opel GT 1900 Manta - Service Manual - Repair Manual
Digital technical documentation with sections on Group 0 - General Information, - 0A - General Information, - Keys and Locks. Review the complete contents below for the systems and procedures covered.
Manual contents
- Group 0 - General Information
- - 0A - General Information
- - Keys and Locks
- - Federal Certification Label
- - Vehicle Identification
- - Model Identification Plate
- - Engine Number
- - Vehicle Identification Number
- - Model Designations
- - Vehicle Identification Number
- - General Specifications
- - Paint
- - 0B - Vehicle Lifting
- - 0C - Lubrication & Maintenance
- - Lubrication Chart
- - Maintenance Schedule
- - Lubrication and General Maintenance
- - Safety Maintenance
- - Emission Control Maintenance
- - Services
- - Lube and General Maintenance
- - Engine Oil
- - Engine Oil Filter
- - Chassis
- - Fluid Levels
- - Tires
- - Clutch
- - Rear Axle
- - Cooling System
- - Wheel Bearings
- - Automatic Transmission Fluid
- - Safety Maintenance
- - Brake Lines and Hoses
- - Tires and Wheels
- - Exhaust System
- - Engine Drive Belts
- - Suspension and Steering
- - Safety Checks-be Performed by Owner
- - Disc Brakes
- - Parking and Drum Brakes
- - Throttle Linkage
- - Headlights
- - Underbody
- - Emission Control Maintenance
- - Thermostatically Controlled Air Cleaner
- - Carburetor Choke
- - Timing, Dwell and Distributor
- - Carburetor and Idle Speed
- - Carburetor Fuel Inlet Filter
- - Spark Plugs
- - Spark Plug Wires
- - Positive Crankcase Ventillation System
- - Evaporation Control System
- - Exhaust Gas Recirculation System
- - Engine Compression
- - Fuel Cap, Fuel Lines, and Fuel Tank
- - Air Cleaner Element
- Group 1 - Electrical
- - 1A - Battery & Cables
- - Description and Operation
- - General Battery Information
- - Registration of Battery
- - Care of Wet Batteries in Storage
- - Importance of Maintaining Electrolyte at Proper Level
- - Importance of Keep Battery Properly Charged
- - Care of Dry Batteries in Storage
- - Preparing Dry Charged Batteries for Service
- - Test After Batteries are Prepared for Service
- - Diagnosis
- - Battery and Cables - Trouble Diagnosis
- - Quick Check of Battery and Cables
- - Testing Resistance of Cables and Terminal Connections
- - Undercharge Failure of Battery
- - Overcharge Failure of Battery
- - Maintenance and Adjustments
- - Periodic Battery Inspection and Service
- - Maintain Electrolyte Level
- - Inspect Battery, Mounting and Cables
- - Cleaning Cable Terminals
- - 421 Battery Test
- - 421 Test Procedure
- - Hydrometer Test of Battery
- - Hydrometer Test
- - Use of Hydrometer
- - Fusible Links
- - Battery Recharging
- - Slow-Charging
- - Quick-Charging
- - Major Repair
- - Battery Removal and Installation
- - Removal
- - Installation
- - Fusible Link Removal and Installation
- - Specifications
- - Battery Specifications
- - 1B - Starting System
- - Description and Operation
- - Starting System Description
- - Diagnosis
- - Starting System Diagnosis
- - Maintenance and Adjustments
- - Starting System Checks
- - Voltage Loss Checks
- - Starter Current Draw - Lock Test
- - Starter Current Draw - On Car
- - Major Repair
- - Starter Removal
- - Starter Disassembly
- - Cleaning and Inspecting Parts
- - Replacing Field Coils
- - Checking and Replacing Brushes
- - Replacing Bushings
- - Starter Assembly
- - Starter Installation
- - Specifications
- - Starter Specifications
- - 1C - Ignition System
- - Description and Operation
- - Ignition System
- - Ignition Switch
- - Ignition Coil
- - Distributor
- - Maintenance and Adjustments
- - Contact Point Replacement
- - Removing Contact Points
- - Installing Contact Points
- - Dwell Angle Adjustment
- - Ignition Timing Adjustment
- - Preliminary Timing (Engine Won't Run)
- - Finish Timing
- - Ignition Wire Inspection
- - Check Ignition Output
- - Check Distributor
- - Check Spark Plugs
- - Major Repair
- - Distributor Overhaul
- - Distributor Removal
- - Disassembly
- - Reassembly
- - Distributor Installation
- - Specifications
- - Ignition Coil
- - Distirbutor
- - Spark Plugs
- - 1D - Charging System
- - Description and Operation
- - Alternator
- - Regulator
- - Maintenance and Adjustments
- - Alternator and Regulator Tests
- - Test Current Output
- - Test and Adjust Voltage Regulator Setting
- - Major Repair
- - Alternator Removal
- - Alternator Disassembly
- - Removing Diodes
- - Positive Diodes
- - Negative Diodes
- - Installing Diodes
- - Positive Diodes
- - Negative Diodes
- - Alternator Reassembly
- - Alternator Installation
- - Specifications
- - Alternator
- - Regulator
- - 1E - Windsheild Wipers
- - Description and Operation
- - WIndshield Wiper Motor
- - Diagnosis
- - Windshield Wiper
- - Preliminary Inspection
- - Checking Wiper Operation
- - Major Repair
- - Wiper Transmission - 1900 & Manta
- - Removal
- - Installation
- - Wiper Transmission - GT
- - Removal and Installation
- - Removal of Wiper Motor
- - Disassembly
- - Cleaning and Inspection of Parts
- - Assembly of Wiper Motor
- - Installation
- - Specifications
- - General Specifications
- - Torque Specifications
- - 1F - Lighting Systems
- - Description and Operation
- - Lighting Systems
- - Headlight High-Low Beam Control and Passing Signal
- - Fog Light Switch
- - Courtesy Light
- - GT Headlamp Mechanism
- - Maintenance and Adjustments
- - Headlamp Aiming
- - Major Repair
- - Opel 1900 & Manta
- - Headlight Switch
- - Removal
- - Installation
- - Fog Lamp or Heated Rear Window Switch
- - Removal
- - Installation
- - Exterior Lights
- - (Models 51-53-54) Headlamp Sealed Beam Unit
- - Removal
- - Installation
- - (Models 57-57R) Headlamp Sealed Beam Unit
- - Removal
- - Installation
- - Parking Light Housing or Lens
- - Removal
- - Installation
- - (Models 51-53) Rear Stop, Tail, Directional Signal, or Back-up Lamp Housing
- - Removal
- - Installation
- - (Model 54) Rear Stop, Tail, Directional Signal, or Back-up Lamp Housing
- - Removal
- - Installation
- - (Model 57-57R) Rear Stop, Tail, Directional Signal, or Back-up Lamp Housing
- - Removal
- - Installation
- - Rear License Plate Lamp Assembly
- - Removal
- - Installation
- - Side Marker Lights
- - Front
- - Removal
- - Installation
- - Rear
- - Removal
- - Installation
- - Interior Lights
- - Courtesy Light
- - Removal
- - Installation
- - Door Jam Switch
- - Removal
- - Installation
- - GT
- - Exterior Lights - GT
- - Parking Light Housing
- - Removal
- - Installation
- - Front Directional Signal Lamp
- - Removal
- - Installation
- - Headlamp Sealed Beam
- - Removal
- - Installation
- - Rear Directional Signal Lamp, Stop, and Tail Lamp
- - Removal
- - Installation
- - Side Marker Lights
- - Removal
- - Installation
- - License Plate Lamp
- - Removal
- - Installation
- - Back-Up Lamp
- - Removal
- - Installation
- - Headlamp Switch
- - Removal
- - Installation
- - Door Jam Switch
- - Removal
- - Installation
- - 1G - Signal Systems
- - Description and Operation
- - Directional Signal Lever
- - Horn
- - Hazard Warning Flasher
- - Brake System Warning Light
- - Diagnosis
- - Signal System
- - Major Repair
- - Directional Signal Switch
- - Horn
- - Removal
- - Installation
- - Horn Contact
- - Removal
- - Installation
- - Specifications
- - Fuse Chart
- - 1H - Instrument Panel
- - Description and Operation
- - Instrument Panel - Opel 1900 & Manta
- - Headlight Switch
- - Fog Light Switch (Rallye)
- - Windshield Wiper Switch
- - Electrically Heated Rear Window Switch (If Equipped)
- - Instrument Panel - GT
- - Headlight Switches
- - Parking Light and Instrument Panel Light Switch Assembly
- - Combined Windshield Wiper, Electrically Heated Rear Window and Heater Blower Switch
- - Four Way Hazzard Warning Flasher Switch
- - Major Repair
- - Instrument Cluster Housing - Opel 1900 & Manta
- - Removal
- - Installation
- - Windshield Wiper Switch
- - Removal
- - Installation
- - Instrument Cluster Bulbs
- - Removing
- - Installation
- - Instrument Cluster Housing - GT
- - Removal
- - Installation
- - Combined Switch Assemblies
- - Removal
- - Installation
- - Cigar Lighter
- - Removal
- - Installation
- - 1I - Gauges
- - Diagnosis
- - Temperature and Fuel Gauge System - 1900 & Manta
- - Temperature and Fuel Gauge System - GT
- - Major Repair
- - Opel 1900 & Manta
- - Voltage Stabilizer
- - Removal
- - Installation
- - Speedometer
- - Removal
- - Installation
- - Electric Clock or Tachometer
- - Removal
- - Installation
- - Temperature Indicator or Fuel Gauge
- - Removal
- - Installation
- - Rallye Gauges
- - Removal
- - Installation
- - Temperature Sending Unit
- - Removal
- - Installation
- - Oil Pressure Sending Unit
- - Removal
- - Installation
- - GT
- - Speedometer
- - Removal
- - Installation
- - Tachometer
- - Removal
- - Installation
- - Temperature Indicator and Fuel Gauge Dash Unit
- - Removal
- - Installation
- - 1J - Wiring Diagrams
- - Windshield Wiper and Horn - Opel 1900 & Manta
- - Windshield Wiper and Horn - Rallye
- - Windshield Wiper and Horn - GT
- - Turn Signal and Hazard Flasher - Opel 1900 & Manta
- - Turn Signal and Hazard Flasher - GT
- - Oil, Fuel, Temp, Tach, Stop and Brake Warning Light - GT
- - Blower, Lighter and Backup Lights - Opel 1900 & Manta
- - Blower and Lighter - GT
- - Indicator Lights and Gauges - Opel 1900 & Manta
- - Indicator Lights and Gauges - Rallye
- - Dome Light and Buzzer - Opel 1900 & Manta
- - Dome Light, Clock, and Buzzer - GT
- - Headlamps - Opel 1900
- - Headlamps - Manta
- - Headlamp adn Fog Lights - Rallye
- - Headlamps, Parking, Tail and Instrument Panel Lighting - GT
- - Left Parking and Tail Lights - Opel 1900 & Manta
- - Right Parking, Tail and Instrument Panel Lighting - Opel 1900 & Manta
- - Starting, Ignition and Charging - Opel 1900 & Manta
- - Starting, Ignition and Charging - GT
- - Instrument Panel - GT
- - A/C Generator and Regulator - All Models
- - Seat Belt Warning System (Manual Transmission) - Opel 1900 & Manta
- - Seat Belt Warning System (Automatic Transmission) - Opel 1900 & Manta
- - Seat Belt Warning System (Manual Transmission) - GT
- - Seat Belt Warning System (Automatic Transmission) - GT
- - Heated Rear Glass - Opel 1900 & Manta
- - Heated Rear Glass - GT
- - Colored Wiring Diagrams (missing)
- Group 2 - Body and Bumpers
- - 2A - General Information
- - Maintenance and Adjustments
- - Paint Maintenance
- - Chrome Maintenance
- - Stain Removal
- - Specifications
- - Bolt Torque Specifications
- - Special Body Tools
- - 2B - Frame & Body Mountings
- - Specifications
- - 2C - Windows & Window Moldings
- - Major Repair
- - Removal & Installation
- - Windshield Reveal Molding
- - Windshield and Back Window
- - Door Window
- - Rear Quarter Window Molding
- - Rear Quarter Window - 1900 & Manta
- - Rear Quarter Window - GT
- - Rear Quarter Window - Lock
- - 2D - Doors
- - Major Repair
- - Front Door - Removal & Installation
- - Door Lock Striker
- - Window Regulator Handle
- - Trim Pad
- - Door Handle - Inside
- - Reveal Molding
- - Window Lifter
- - Door Lock Cylinder
- - Weatherstrip
- - Door
- - Rear Door - Removal & Installation
- - Sash Window
- - Window Regulator
- - Tail Gate
- - Door
- - 2E - Rear Compartment Lid
- - Major Repair
- - Removal and Installation
- - Weatherstrip
- - Lock Cylinder
- - Luggage Compartment Lid
- - 2F - Roof and Sun Roof
- - Diagnosis
- - Sun Roof Diagnosis
- - Maintenance and Adjustments
- - Adjusting Height of Sun Roof
- - Adjusting Front of Sun Roof
- - Adjusting Rear of Sun Roof
- - Major Repair
- - Sun Roof Panel and Frame
- - Removal of Sun Roof Panel
- - Installation of Sun Roof Panel
- - Removal of Sun Roof Frame
- - Installation of Sun Roof Frame
- - Velvet Strip and Weather Strip
- - Removal of Velvet Strip On Sun Roof Opening
- - Installation of Velvet Strip On Sun Roof Opening
- - Removal of Velvet Strip and Weatherstrip On Rear of Sun Roof Panel
- - Installing Velvet STrip and Weatherstrip On Rear of Sun Roof Panel
- - Rear Guides and Cables
- - Removal of Rear Guides and Cable
- - Drive Pinion
- - Water Drain Hoses
- - Removal of Front Water Drainage Hose
- - Installation of Front Water Drain Hose
- - Removal of Rear Water Drain Hose
- - Installation of Rear Water Drain Hose
- - Luggage Rack
- - 2G - Seats, Interior Trim & Headlining
- - Major Repair
- - Removal and Installation of Front Seat
- - Removal and Installation of Rear Seat Back
- - Removal and Installation of Glove Compartment Door Lock
- - Removal and Installation of Front Side Panel Trim Pad
- - Removal and Installation of Headlining
- - Removal and Installation of Rear Side Panel Trim Pad
- - 2H - Bumpers
- - Description and Operation
- - Protective Moldings
- - Major Repair
- - Removal & Installation of Front Bumper and Bumper Guards (1900 & Manta)
- - Removal & Installation of Front Bumper Brackets (Opel 1900 & Manta)
- - Removal and Installation of Rear Bumper and Guards (Opel 1900 & Manta)
- - Removal and Installation of Front Bumper Assembly (GT)
- - Removal and Installation of Rear Bumper Assembly (GT)
- - Trailer Hitch Installation
- - GT
- - Opel 1900 Wagon
- - Opel 1900 & Manta
- Group 3 - Suspension & Steering
- - 3A - Front Suspension
- - Description and Operation
- - Suspension Description
- - GT
- - Opel 1900 & Manta
- - Maintenance and Adjustments
- - Front Wheel Bearing Adjustments
- - Major Repair
- - Removal and Installation of Front Suspension
- - Removal (GT)
- - Removal (Opel 1900 & Manta)
- - Installation (GT
- - Installation (Opel 1900 & Manta)
- - Upper Balljoint Removal and Installation
- - Removal
- - Installation
- - Lower Balljoint Removal and Installation
- - Removal (GT)
- - Removal (Opel 1900 & Manta)
- - Installation (GT)
- - Installation (Opel 1900 & Manta)
- - Upper Control Arm Removal and Installation
- - Removal (GT)
- - Removal (Opel 1900 & Manta)
- - Installation (GT)
- - Installation (Opel 1900 & Manta)
- - Lower Control Arm Removal and Installation
- - Removal (GT)
- - Removal (Opel 1900 & Manta)
- - Installation (GT)
- - Installation (Opel 1900 & Manta)
- - Steering Knuckle Removal and Installation
- - Removal (GT)
- - Removal (Opel 1900 & Manta)
- - Installation (GT)
- - Installation (Opel 1900 & Manta)
- - Shock Absorber Removal and Installation
- - Removal (Opel 1900 & Manta)
- - Removal (GT)
- - Installation (Opel 1900 & Manta)
- - Installation (GT)
- - Front Spring Removal and Installation
- - Removal (GT)
- - Removal (Opel 1900 & Manta)
- - Installation (GT)
- - Installation (Opel 1900 & Manta)
- - Specifications
- - Bolt Torque and Front End Alignment
- - 3B - Steering Linkage
- - Description and Operation
- - Description and Operation of Tie Rods
- - Major Service
- - Removal and Installation of Tie Rods
- - Removal
- - Installation (GT)
- - Installation (Opel 1900 & Manta)
- - Disassembly and Reassembly of Tie Rods
- - Disassembly (GT)
- - Reassembly (GT)
- - Specifications
- - Tightening Specifications
- - 3C - Front End Alignment
- - Description and Operation
- - Front Wheel Alignment
- - Maintenance and Adjustments
- - Inspection Before Checking Front Wheel Alignment
- - Adjusting Caster (GT)
- - Adjusting Caster (Opel 1900 & Manta)
- - Adjusting Camber
- - Adjusting Toe-in (GT)
- - Adjusting Toe-in (Opel 1900 & Manta)
- - Checking Theoretical King Pin Inclination
- - Specificaitons
- - Front End Alignment
- - 3D - Steering Gear Assembly
- - Description and Operation
- - Description and Operation of Steering Gear Assembly
- - Maintenance and Adjustments
- - Adjustment of Steering Gear
- - Major Repair
- - Removal and Installation of Steering Gear Assembly and Tie Rods
- - Removal (GT)
- - Removal (Opel 1900 & Manta)
- - Installation (GT)
- - Installation (Opel 1900 & Manta)
- - Disassembly and Assembly of Steering Gear With Tie Rods
- - Disassembly (GT)
- - Disassembly (Opel 1900 & Manta)
- - Reassembly (GT)
- - Reassembly (Opel 1900 & Manta)
- - Specifications
- - Tightening Specifications
- - 3E - Steering Column Assembly
- - Opel 1900 and Manta
- - Description and Operation
- - Description and Operation of Directional Signal Lever
- - Description and Operation of Horn
- - Description o f Steering Column Assembly
- - Major Repair
- - Removal and Installation of Steering Column Assembly
- - Removal
- - Installation
- - Removal and Installation of Steering Wheel
- - Removal
- - Installation
- - Removal and Replacement of Horn Contact Ring
- - Disassembly and Reassembly of Directional Signal Switch
- - Disassembly
- - Reassembly
- - Disassembly and Reassembly of Steering & Ignition Lock Cylinder & Electrical Switch from Mast Jacket Assembly
- - Disassembly (GT)
- - Disassembly (Opel 1900 & Manta)
- - Reassembly
- - Specifications
- - Steering Column Tightening Specifications
- - GT
- - Description and Operation
- - Description of Steering Column
- - Major Repair
- - Removal and Installation of Steering Wheel
- - Removal
- - Installation
- - Removal and Installation of Ignition Lock Cylinder
- - Removal
- - Installation
- - Removal and Installation of Steering Column Assembly
- - Removal
- - Installation
- - Removal and Installation of Center Steering Shaft
- - Removal
- - Installation
- - Removal and Installation of Ignition Switch and/or Steering Lock
- - Removal
- - Installation
- - Removal and Installation of Upper Steering Bearing and/or Direction Signal Switch
- - Removal
- - Installation
- - Removal and Installation of Steering Column Lower Bearing
- - Removal
- - Installation
- - 3F - Rear Suspension
- - Description and Operation
- - Description and Operation of Rear Suspension
- - Major Repair
- - Rear Shock Absorber Removal and Installation
- - Removal
- - Installation
- - Rear Spring Removal and Installation
- - Rear Spring Removal
- - Rear Spring Installation
- - Lower Control Arm Replacement
- - Removal
- - Installation
- - Stabilizer Rod Replacement
- - Removal
- - Installation
- - Track Rod Replacement
- - Removal
- - Installation
- - Specifications
- - Tightening Specifications
- - 3G - Wheels and Tires
- - Diagnosis
- - Car Roughness and Vibration
- - Unbalance
- - Runout
- - Tire Grinding
- - Tire Wear Irregularities
- - Wheel Nut Torque and Tightening Specifications
- - Summary of Diagnosis and Correction of Tire and Wheel Vibration
- - Abnormal Tire Wear
- - General Operation Conditions
- - Shoulder or Underinflation Tread Wear
- - Canter or Overinflation Tread Wear
- - Cross or Toe Tread Wear
- - Side or Camber Wear
- - Cornering Tread Wear
- - Heel and Toe Tread Wear
- - Cupped or Scalloped Type Tire Wear
- - Maintenance and Adjustments
- - Demounting and Mounting Tubeless Tires
- - Wheel and Tire Balance
- - Specifications
- - General Specifications
- Group 4 - Propeller Shaft & Differential
- - 4A - Propeller Shaft & Central Joint
- - Description and Operation
- - Propeller Shaft and Central Joint
- - Major Repair
- - Propeller Shaft Removal and Installation
- - Removal
- - Installation
- - Disassembly and Assembly of the Central Joint
- - Disassembly of Central Joint
- - Assembly of Central Joint
- - Specifications
- - Tightening Specifications
- - 4B - Rear Axle
- - Description and Operation
- - Rear Axle Description
- - Diagnosis
- - Rear Axle Trouble Diagnosis
- - Major Repair
- - Removal and Installation of Rear Axle Assembly
- - Removal
- - Installation
- - Removal and Installation of Axle Shaft Assembly
- - Removal
- - Installation
- - Disassembly and Assembly of the Differential
- - Removal and Disassembly of Differential Case
- - Removal and Disassembly of Drive Pinion
- - Assembly and Installation of Drive Pinion
- - Assembly and Installation of Differential Case (Opel 1900 and Manta)
- - Assembly and Installation of Differential Case (GT)
- - Specifications
- - General Specifications
- - Axle Ratios
- - Adjusting end Fitting Specificaitons
- - Torque Specifications
- Group 5 - Brakes
- - 5A - Power Brake Booster & Master Cylinder
- - Description and Operation
- - Power Brake Booster
- - Master Cylinder
- - Vacuum Control Valve
- - Diagnosis
- - Power Brake Unit Trouble Diagnosis
- - Maintenance and Adjustments
- - Checking Brake Booster Operation
- - Brake Booster Filter Service
- - Vacuum Control Valve Service
- - Major Repair
- - Brake Booster Removal and Installation
- - Removal
- - Installation
- - Master Cylinder Overhaul - GT
- - Removal of Master Cylinder
- - Disassembly
- - Cleaning and Checking
- - Assembly
- - Installation
- - Master Cylinder Overhaul - Opel 1900 & Manta
- - Removal of Master Cylinder
- - Disassembly
- - Cleaning and Checking
- - Assembly
- - Installation
- - Specification
- - General Specifications
- - 5B - Disc Brakes
- - Description and Operation
- - Description
- - Operation
- - Diagnosis
- - Disc Brake Trouble Diagnosis
- - Maintenance and Adjustments
- - Disc Brake Maintenance
- - Checking Brake Fluid Level
- - Friction Pad Adjustment
- - Lubricating Front Wheel Bearings
- - Checking Disc Brake Friction Pads for Wear
- - Removal and Installation of Friction Pads
- - Checking Brake Disc for Lateral Runout
- - Major Repair
- - Removing and Installing Brake Caliper
- - Removing and Installing Brake Disc
- - Removing and Installing Brake Disc Shield
- - Removal
- - Installation
- - Disassembly and Assembly of Brake Caliper
- - Specifications
- - Disc Brake Specifications
- - General Specifications
- - Torque Specifications
- - 5C - Drum Brakes
- - Description and Operation
- - Description of Brake Mechanism
- - Wheel Brake Assemblies
- - Parking Brake Control System
- - Service Brake Control System - Standard Brakes
- - Operation of Hydraulic Service Brake
- - Diagnosis
- - Brake Trouble Diagnosis Chart
- - Maintenance and Adjustments
- - Brake Adjustments
- - Primary Checks
- - Pedal Height Adjustment
- - Adjustments at Wheels
- - Parking Brake Adjustment
- - Filling Brake Master Cylinder Reservoir
- - Bleeding Brake Hydraulic System
- - Sequence for Bleeding Wheel Cylinders or Calipers
- - Bleeding Wheel Cylinder or Caliper
- - Flushing Brake Hydraulic System
- AND MORE....