- -$10.00



Tearing into an MV Agusta inline-three demands an entirely different mindset than servicing a conventional four-cylinder engine. The extreme packaging of the 675cc platform means that electrical harnesses, cooling ducts, and mechanical assemblies share incredibly tight physical tolerances. Guessing at bolt clamp force on the aluminum frame or engine mounts often distorts surrounding structures.
In many real-world repair cases, what appears to be an intermittent ignition drop or erratic fueling is actually the result of physical misalignment. A frequent diagnostic mistake is overlooking grounding issues affecting system performance, particularly where the main chassis harness grounds to the powder-coated frame near the engine block. Without genuine OEM service instructions to verify the exact grounding eyelet locations and resistance values, hours can be wasted chasing ghost codes through OBD2 sensor diagnostics.
A common issue technicians encounter on the 2010 to 2013 models involves the sophisticated air intake injection system. The Ride-by-Wire throttle bodies depend on absolute mechanical precision to communicate with the Engine Control Unit (ECU). During troubleshooting, it is easy to condemn an expensive throttle position sensor (TPS) when the dashboard flags a throttle actuation error.
One frequent diagnostic mistake is ignoring how physical binding or incorrect torque affecting sensor readings can trigger electronic limp modes. If the throttle body mounting clamp nuts are over-tightened during routine maintenance, the cast housing can distort by just a few thousandths of an inch. That microscopic mechanical deflection creates drag on the internal butterfly valve shaft. The ECU detects the resistance as an actuator current spike and cuts fuel injection. This workshop reference details the exact tightening sequences and torque specifications required to mount the intake assembly safely, proving that mechanical accuracy is the foundation of electronic reliability.
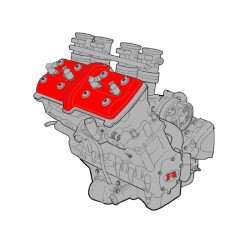
When an engine rebuild becomes necessary, having an authoritative engine teardown guide is non-negotiable. The counter-rotating crankshaft and compact cylinder head of the F3 675 require precise step-by-step handling. This technical document covers every critical phase of bottom-end and top-end servicing, from splitting the crankcase to inspecting the timing chain tensioner and valve train.
You will find dedicated breakdowns for the cooling and lubrication circuits, which are vital for preventing premature top-end wear on high-revving track machines. By cross-referencing the factory wear limits for pistons, crankshaft main bearings, and drivetrain components, you can reassemble the engine knowing every clearance meets Varese factory standards.
Tracing a parasitic draw or a failed sensor requires complete visibility into the machine's electrical architecture. This mechanical and electrical repair PDF includes full-page, high-resolution wiring circuits for both the standard F3 675 and the limited-production Serie Oro edition.
Every connector pinout, relay location, and fuse box layout is mapped clearly. Whether you are performing an F3 675 parasitic draw diagnosis, inspecting the starter relay grid, or diagnosing CAN-bus communication faults between the dashboard and the central control unit, having accurate schematics eliminates trial-and-error probing.
When a customer's bike is torn down on your lift, you cannot afford to wait for shipping. Our fulfillment process is engineered for professional technicians who need verified data right now:
Download the complete workshop manual PDF instantly and perform repairs with confidence.
What causes the Ride-by-Wire system to lose calibration after a throttle body cleaning?
In practical diagnostics, disturbing the butterfly valves manually without relieving mechanical tension can throw off the zero-point voltage reading. This technical document explains the physical inspection limits of the air intake injection system and provides the correct procedures for resetting throttle plate alignment before electronic recalibration.
Are the Serie Oro specific wiring differences documented in this file?
Yes. The electrical diagram section contains dedicated, full-schematic layouts that differentiate between the standard F3 675 and the Serie Oro models, ensuring accurate pinout tracking for specialized trim components and lighting harnesses.
How critical are the camshaft cap torque sequences during a top-end refresh?
Extremely critical. The aluminum head castings on this three-cylinder engine are sensitive to clamping variance. Uneven tightening sequences can bind the camshaft journals, causing oil film breakdown and triggering erratic camshaft position sensor readings.
Where can I find the hydraulic bleeding procedures for the ABS and front brake calipers?
Section H (Brakes) provides full mechanical and hydraulic servicing instructions for the braking system. It covers caliper overhauls, disc wear limits, and proper routing to ensure firm lever feel without trapping micro-bubbles in the ABS modulator.