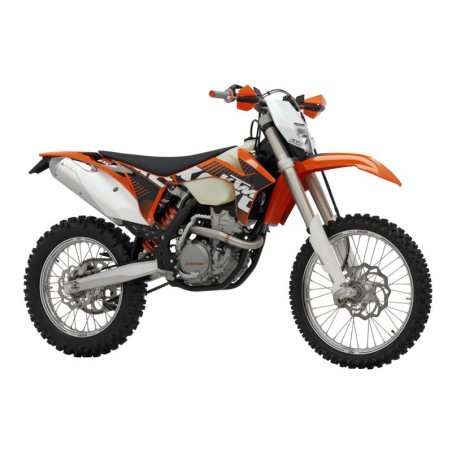
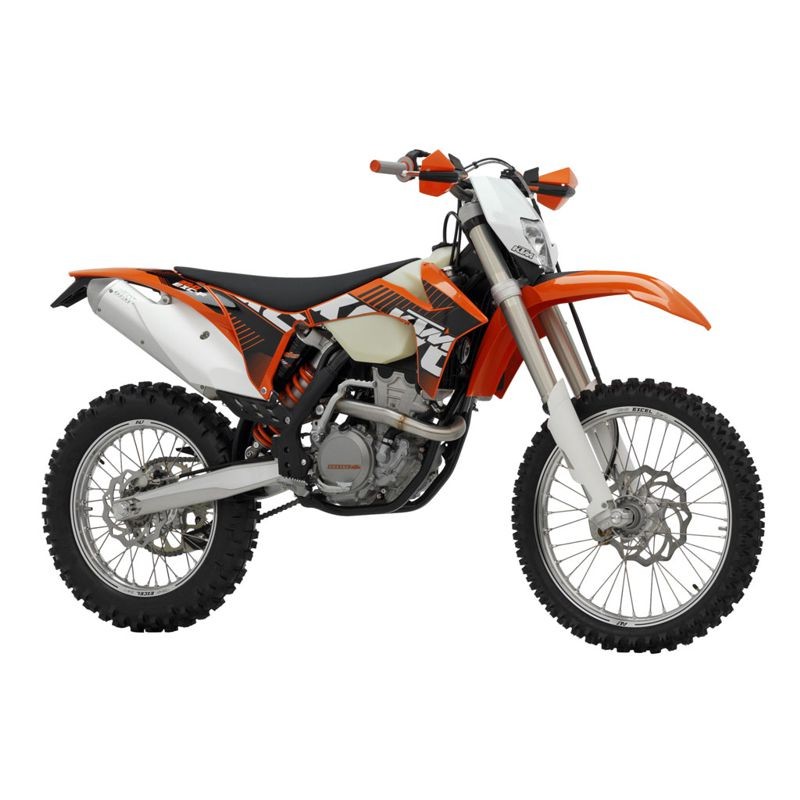
KTM 350 EXC-F XCF-W (2012) - Service Manual - Taller - Reparation - Reparaturanleitung - Officina
Digital technical documentation with sections on MEANS OF REPRESENTATION, IMPORTANT NOTES, SERIAL NUMBERS. Review the complete contents below for the systems and procedures covered.
Manual contents
- MEANS OF REPRESENTATION
- IMPORTANT NOTES
- SERIAL NUMBERS
- - Chassis number
- - Type label
- - Key number (All EXC F models)
- - Engine number
- - Fork part number
- - Shock absorber part number
- MOTORCYCLE
- - Raising the motorcycle with the lift stand
- - Removing the motorcycle from the lift stand
- - Starting
- - Starting the motorcycle for a check
- 01/FORK, TRIPLE CLAMP
- - Adjusting the compression damping of the fork
- - Adjusting the rebound damping of the fork
- - Adjusting the spring preload of the fork
- - Bleeding fork legs
- - Cleaning the dust boots of the fork legs
- - Loosening the fork protector
- - Positioning the fork protection
- - Removing the fork legs
- - Installing the fork legs
- - Removing the fork protector
- - Installing the fork protector
- - Performing a fork service
- - Disassembling the fork legs
- - Cartridge disassembly
- - Disassembling the compression damping fitting
- - Checking the fork legs
- - Assembling the compression damping fitting
- - Assembling the cartridge
- - Assembling the fork legs
- - Greasing the steering head bearing
- - Removing the lower triple clamp (EXC-F SIX DAYS)
- - Installing the lower triple clamp (EXC-F SIX DAYS)
- - Removing the lower triple clamp (EXC F EU/AUS/USA, XCF W)
- - Installing the lower triple clamp (EXC F EU/AUS/USA, XCF W)
- - Checking the steering head bearing play
- - Adjusting the play of the steering head bearing (EXC-F SIX DAYS)
- - Adjusting the play of the steering head bearing (EXC F EU/AUS/USA, XCF W)
- 02/HANDLEBAR, INSTRUMENTS
- - Handlebar position
- - Adjusting handlebar position
- - Adjusting the basic position of the clutch lever
- - Checking the throttle cable routing
- - Checking the play in the throttle cable
- - Adjusting the play in the throttle cable
- 03/FRAME
- - Removing the engine guard (EXC F AUS, EXC-F SIX DAYS)
- - Installing the engine guard (EXC F AUS, EXC-F SIX DAYS)
- 04/SHOCK ABSORBER, SWINGARM
- - Adjusting the high-speed compression damping of the shock absorber
- - Adjusting the low-speed compression damping of the shock absorber
- - Adjusting the rebound damping of the shock absorber
- - Measuring rear wheel sag unloaded
- - Checking the static sag of the shock absorber
- - Checking the riding sag of the shock absorber
- - Adjusting the spring preload of the shock absorber
- - Adjusting the riding sag
- - Removing the shock absorber
- - Installing the shock absorber
- - Servicing the shock absorber
- - Removing the spring
- - Disassembling the damper
- - Disassembling the piston rod
- - Disassembling the seal ring retainer
- - Replacing the pilot bushing
- - Checking the damper
- - Disassembling the rebound adjuster
- - Removing the heim joint
- - Installing the heim joint
- - Assembling the rebound adjuster
- - Assembling the seal ring retainer
- - Assembling the piston rod
- - Assembling the damper
- - Bleeding and filling the damper
- - Filling the damper with nitrogen
- - Installing the spring
- - Changing the heim joint
- 05/EXHAUST
- - Removing the manifold
- - Installing the manifold
- - Removing main silencer
- - Installing the main silencer
- - Changing the glass fiber yarn filling of the main silencer
- 06/AIR FILTER
- - Removing the air filter box lid
- - Installing the air filter box lid
- - Removing the air filter
- - Installing the air filter
- - Cleaning the air filter and air filter box
- 07/FUEL TANK, SEAT, TRIM
- - Opening filler cap
- - Closing filler cap
- - Removing the seat
- - Mounting the seat
- - Removing the fuel tank
- - Installing the fuel tank
- - Changing the fuel screen
- - Changing the fuel filter
- - Changing the fuel pump
- - Checking the fuel pressure
- 08/MASK, FENDER
- - Removing the front fender
- - Installing the front fender
- - Removing headlight mask with headlight
- - Refitting the headlight mask with the headlight
- 09/FRONT WHEEL
- - Removing the front wheel
- - Installing the front wheel
- - Checking the brake discs
- - Removing the front brake disc
- - Installing the front brake disc
- - Checking the tire condition
- - Checking tire air pressure
- - Checking spoke tension
- 10/REAR WHEEL
- - Removing the rear wheel
- - Installing the rear wheel
- - Removing the rear brake disc
- - Installing the rear brake disc
- - Checking the chain tension
- - Adjusting the chain tension
- - Adjusting the chain guide
- - Checking the chain, rear sprocket, engine sprocket and chain guide
- - Checking for chain dirt accumulation
- - Cleaning the chain
- 11/WIRING HARNESS, BATTERY
- - Removing the main fuse
- - Installing the main fuse
- - Changing the fuses of individual power consumers
- - Changing the fuse of the radiator fan (EXC-F SIX DAYS)
- - Removing the battery
- - Installing the battery
- - Charging the battery
- 13/BRAKE SYSTEM
- - Checking the front brake linings
- - Changing the front brake linings
- - Checking free travel of hand brake lever
- - Adjusting the basic position of the hand brake lever (XCF W)
- - Adjusting free travel of hand brake lever (All EXC F models)
- - Checking the front brake fluid level
- - Adding front brake fluid
- - Changing the front brake fluid
- - Checking the rear brake linings
- - Changing the rear brake linings
- - Checking the free travel of foot brake lever
- - Adjusting the basic position of the foot brake lever
- - Checking the rear brake fluid level
- - Adding brake fluid-the rear brake circuit
- - Changing the rear brake fluid
- 14/LIGHTING SYSTEM, INSTRUMENTS
- - Adjusting the speedometer functions
- - Setting kilometers or miles
- - Activating the additional functions
- - Setting the wheel circumference
- - Setting the clock
- - Checking the headlight setting
- - Adjusting the headlight range
- 30/ENGINE
- - Removing the engine
- - Installing the engine
- 30/DISASSEMBLING THE ENGINE
- - Preparations
- - Removing the clutch push rod
- - Removing the spacer
- - Draining the engine oil
- - Removing the oil filter
- - Removing the spark plug
- - Removing the valve cover
- - Removing the kick starter
- - Removing the alternator cover
- - Removing the torque limiter
- - Positioning the engine at ignition top dead center
- - Removing the timing chain tensioner
- - Removing the camshaft
- - Removing the cylinder head
- - Removing the piston
- - Removing the starter drive
- - Removing the suction pump
- - Removing the water pump wheel
- - Removing the clutch cover
- - Removing the clutch discs
- - Removing the outer clutch hub
- - Removing the intermediate kick starter gear
- - Removing the intermediate kick starter gear
- - Removing the shift shaft
- - Removing the shift drum locating unit
- - Removing the locking lever
- - Removing the force pump
- - Removing the primary gear
- - Removing the timing chain
- - Removing the spacer
- - Removing the left section of the engine case
- - Removing the shift rails
- - Removing the shift drum
- - Removing the shift forks
- - Removing the transmission shafts
- - Removing the crankshaft
- 30/ENGINE - WORK ON THE INDIVIDUAL PARTS
- - Work on the right section of the engine case
- - Working on the left section of the engine case
- - Work on the clutch cover
- - Checking the oil pressure regulator valve
- - Checking the lubrication system
- - Removing the crankshaft bearing inner race
- - Installing the crankshaft bearing inner race
- - Changing the connecting rod, conrod bearing and crank pin
- - Checking the crankshaft run-out at the bearing pin
- - Removing the drive wheel of the balancer shaft
- - Installing the drive wheel of the balancer shaft
- - Cylinder - Nikasil® coating
- - Checking/measuring the cylinder
- - Checking/measuring the piston
- - Measuring the piston/cylinder mounting clearance
- - Checking the piston ring
- - Changing the camshaft bearing
- - Checking the camshafts
- - Checking the pivot points of the camshafts
- - Removing the valves
- - Checking the valves
- - Checking the valve springs
- - Checking the valve spring seat
- - Checking the cam levers
- - Checking the cylinder head
- - Installing the valves
- - Checking the freewheel
- - Preassembling the kick starter shaft
- - Checking the electric starter drive
- - Checking the timing assembly
- - Preparing the timing chain tensioner for installation
- - Checking the clutch
- - Checking the shift mechanism
- - Preassembling the shift shaft
- - Disassembling the main shaft
- - Disassembling the countershaft
- - Checking the transmission
- - Assembling the main shaft
- - Assembling the countershaft
- 30/ENGINE ASSEMBLY
- - Installing the crankshaft
- - Installing the transmission shafts
- - Installing the shift forks
- - Installing the shift drum
- - Installing the shift rails
- - Installing the left engine case
- - Installing the spacer
- - Installing the timing chain
- - Installing the primary gear
- - Installing the force pump
- - Installing the suction pump
- - Installing the locking lever
- - Installing the shift drum locating unit
- - Installing the shift shaft
- - Installing the intermediate kick starter gear
- - Installing the kick starter shaft
- - Installing the outer clutch hub
- - Installing the clutch discs
- - Installing the clutch cover
- - Installing the water pump cover
- - Installing the starter drive
- - Installing the piston
- - Installing the cylinder head
- - Installing the camshafts
- - Checking the valve timing
- - Adjusting the valve timing
- - Installing the timing chain tensioner
- - Checking the valve clearance
- - Adjusting the valve clearance
- - Installing the torque limiter
- - Installing the alternator cover
- - Installing the kick starter
- - Installing the valve cover
- - Installing the spark plug
- - Installing the oil filter
- - Installing the oil screen
- - Installing the spacer
- - Installing the clutch push rod
- - Removing the engine from the work stand
- 32/CLUTCH
- - Checking the fluid level of the hydraulic clutch
- - Changing the hydraulic clutch fluid
- 35/WATER PUMP, COOLING SYSTEM
- - Cooling system
- - Checking the antifreeze and coolant level
- - Checking the coolant level
- - Draining the coolant
- - Refilling coolant
- 38/LUBRICATION SYSTEM
- - Oil circuit
- - Checking the engine oil level
- - Changing the engine oil and oil filter, cleaning the oil screen
- - Adding engine oil
- - Checking the engine oil pressure
- 39/IGNITION SYSTEM
- - Ignition coil - checking the secondary winding
- - Checking the spark plug connector
- - Alternator - checking the stator winding
- - Removing the stator and ignition pulse generator
- - Installing the stator and ignition pulse generator
- 40/ELECTRIC STARTER
- - Checking the starter motor
- 41/THROTTLE VALVE BODY
- - Throttle position sensor circuit A - checking the basic settings
- - Throttle position sensor - adjusting the basic settings
- TECHNICAL DATA - ENGINE
- - Capacity - engine oil
- - Capacity - coolant
- TECHNICAL DATA - TOLERANCE, WEAR LIMITS OF ENGINE
- TECHNICAL DATA - ENGINE TIGHTENING TORQUES
- TECHNICAL DATA - CHASSIS
- - Lighting equipment
- - Tires
- - Capacity - fuel
- TECHNICAL DATA - FORK
- TECHNICAL DATA - SHOCK ABSORBER
- TECHNICAL DATA - CHASSIS TIGHTENING TORQUES
- CLEANING, CARE
- - Cleaning the motorcycle
- - Checks and maintenance steps for winter operation
- STORAGE
- - Storage
- - Preparing for use after storage
- SERVICE SCHEDULE
- - Service schedule
- - Service work (as additional order)
- WIRING DIAGRAM
- - Page 1 of 8 (EXC F EU, EXC-F SIX DAYS)
- - Page 2 of 8 (EXC F EU, EXC-F SIX DAYS)
- - Page 3 of 8 (EXC F EU, EXC-F SIX DAYS)
- - Page 4 of 8 (EXC F EU, EXC-F SIX DAYS)
- - Page 5 of 8 (EXC F EU, EXC-F SIX DAYS)
- - Page 6 of 8 (EXC F EU, EXC-F SIX DAYS)
- - Page 7 of 8 (EXC F EU, EXC-F SIX DAYS)
- - Page 8 of 8 (EXC F EU, EXC-F SIX DAYS)
- - Page 1 of 8 (EXC F AUS)
- - Page 2 of 8 (EXC F AUS)
- - Page 3 of 8 (EXC F AUS)
- - Page 4 of 8 (EXC F AUS)
- - Page 5 of 8 (EXC F AUS)
- - Page 6 of 8 (EXC F AUS)
- - Page 7 of 8 (EXC F AUS)
- - Page 8 of 8 (EXC F AUS)
- - Page 1 of 8 (EXC-F USA)
- - Page 2 of 8 (EXC-F USA)
- - Page 3 of 8 (EXC-F USA)
- - Page 4 of 8 (EXC-F USA)
- - Page 5 of 8 (EXC-F USA)
- - Page 6 of 8 (EXC-F USA)
- - Page 7 of 8 (EXC-F USA)
- - Page 8 of 8 (EXC-F USA)
- - Page 1 of 7 (XCF W)
- - Page 2 of 7 (XCF W)
- - Page 3 of 7 (XCF W)
- - Page 4 of 7 (XCF W)
- - Page 5 of 7 (XCF W)
- - Page 6 of 7 (XCF W)
- - Page 7 of 7 (XCF W)
- SUBSTANCES
- AUXILIARY SUBSTANCES
- SPECIAL TOOLS
- STANDARDS
- INDEX