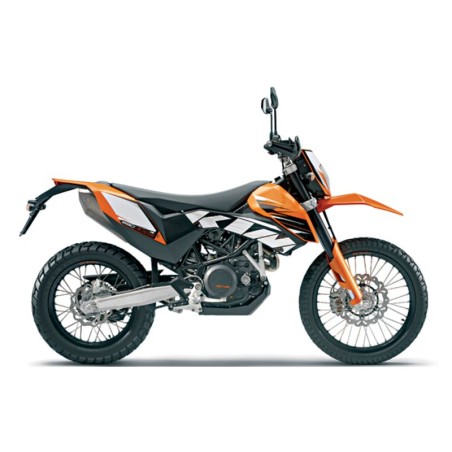
KTM 690 Enduro - Service Repair Manual - Wiring Diagrams
Digital technical documentation with sections on MEANS OF REPRESENTATION, IMPORTANT NOTES, LOCATION OF SERIAL NUMBERS. Review the complete contents below for the systems and procedures covered.
Manual contents
- MEANS OF REPRESENTATION
- IMPORTANT NOTES
- LOCATION OF SERIAL NUMBERS
- - Chassis number/type label (690 Enduro, 690 Enduro R EU, 690 Enduro R AUS/UK)
- - Chassis number/type label (690 Enduro R USA)
- - Key number
- - Engine number
- - Fork part number
- - Shock absorber part number
- MOTORCYCLE
- - Raising the motorcycle with the lift stand
- - Removing the motorcycle from the lift stand
- - Raising the motorcycle with the work stand
- - Removing the motorcycle from the work stand
- - Starting
- - Starting the motorcycle-make checks
- 01/FORK, TRIPLE CLAMP
- - Adjusting the compression damping of the fork
- - Adjusting the rebound damping of the fork
- - Bleeding the fork legs
- - Cleaning the dust boots of the fork legs
- - Loosening the fork protection
- - Positioning the fork protection
- - Removing fork legs
- - Installing the fork legs
- - Servicing the fork
- - Disassembling the fork legs
- - Disassembling the cartridge
- - Disassembling the tap compression
- - Checking the fork legs (690 Enduro)
- - Checking the fork legs (690 Enduro R)
- - Assembling the tap compression
- - Assembling the cartridge
- - Assembling the fork legs (690 Enduro)
- - Assembling the fork legs (690 Enduro R)
- - Checking the steering head bearing play
- - Adjusting the play of the steering head bearing
- 02/HANDLEBAR, INSTRUMENTS
- - Handlebar position
- - Adjusting handlebar position
- - Checking the play in the throttle cable
- - Adjusting the play in the throttle cable
- 03/FRAME
- - Removing the engine guard
- - Installing the engine guard
- 04/SHOCK ABSORBER, SWINGARM
- - Adjusting the high-speed compression damping of the shock absorber
- - Adjusting the low-speed compression damping of the shock absorber
- - Adjusting the rebound damping of the shock absorber
- - Measuring the unloaded rear wheel sag
- - Checking the static sag of the shock absorber
- - Checking the riding sag of the shock absorber
- - Adjusting the spring preload of the shock absorber
- - Adjusting the riding sag
- - Removing the shock absorber
- - Installing the shock absorber
- - Servicing the shock absorber
- - Removing the spring
- - Dismantling the damper
- - Disassembling the piston rod
- - Checking the damper
- - Removing the heim joint
- - Installing the heim joint
- - Assembling the piston rod
- - Assembling the damper
- - Bleeding and filling the damper
- - Filling the damper with nitrogen
- - Installing the spring
- 05/EXHAUST
- - Removing the exhaust manifold
- - Installing exhaust manifold
- - Removing the main silencer
- - Installing the main silencer
- 06/AIR FILTER
- - Removing the air filter
- - Installing the air filter
- - Removing the air filter box
- - Installing the air filter box
- 07/FUEL TANK, SEAT, TRIM
- - Opening filler cap
- - Closing filler cap
- - Removing the seat
- - Mounting the seat
- - Taking off the side cover
- - Mounting the side cover
- - Checking the fuel pressure
- - Changing the fuel filter
- 09/FRONT WHEEL
- - Removing the front wheel
- - Installing the front wheel
- - Checking the tire air pressure
- - Checking the tire condition
- - Checking the brake discs
- 10/REAR WHEEL
- - Removing rear wheel
- - Installing the rear wheel
- - Checking the chain tension
- - Adjusting the chain tension
- - Adjusting chain guide
- - Checking the chain, rear sprocket and engine sprocket
- - Cleaning the chain
- - Checking the rear hub rubber dampers
- - Checking the spoke tension
- - Checking the rim run-out
- 11/WIRING HARNESS, BATTERY
- - Removing the battery
- - Installing the battery
- - Disconnecting the battery
- - Connecting the battery
- - Recharging the battery
- - Checking the charging voltage
- - Changing the main fuse
- - Changing fuses of individual power consumers
- - Adjusting the engine characteristic
- 13/BRAKE SYSTEM
- - Checking the front brake linings
- - Changing the front brake linings
- - Checking the free travel of the hand brake lever
- - Adjusting the free travel of the hand brake lever
- - Checking the front brake fluid level
- - Adding front brake fluid
- - Changing the front brake fluid
- - Checking the rear brake linings
- - Changing rear brake linings
- - Checking the free travel of foot brake lever
- - Adjusting the basic position of the foot brake lever
- - Checking rear brake fluid level
- - Adding rear brake fluid
- - Changing the rear brake fluid
- 14/LIGHT SYSTEM, INSTRUMENTS
- - Setting kilometers or miles
- - Setting the clock
- - Combination instrument - setting/resetting TRIP 1
- - Combination instrument - setting/resetting TRIP 2
- - Combination instrument - setting the wheel circumference (690 Enduro)
- - Checking the headlight setting
- - Adjusting the headlight range
- - Removing the headlight mask with the headlight
- - Installing the headlight mask with the headlight
- - Changing the parking light bulb
- - Changing the headlight bulb
- - Changing the turn signal bulb
- 30/ENGINE
- - Removing the engine
- - Installing the engine
- 30/DISASSEMBLING THE ENGINE
- - Clamping engine into engine work stand
- - Draining the engine oil
- - Removing starter motor
- - Removing valve cover
- - Removing the alternator cover
- - Removing spacer
- - Removing gear position sensor
- - Removing oil filter
- - Removing thermostat
- - Setting engine-ignition top dead center
- - Removing water pump wheel
- - Removing clutch cover
- - Removing spacer and spring
- - Removing spark plug
- - Removing timing chain tensioner
- - Removing camshafts
- - Removing cylinder head
- - Removing piston
- - Removing rotor
- - Removing timing chain rails
- - Removing timing chain and timing chain sprocket
- - Removing crankshaft position sensor
- - Removing clutch cage
- - Removing primary gear
- - Removing starter drive
- - Removing shift shaft
- - Removing shift drum locating
- - Removing locking lever
- - Removing oil pumps
- - Removing left engine case
- - Removing crankshaft and balancer shaft
- - Removing transmission shafts
- 30/ENGINE - WORK ON INDIVIDUAL PARTS
- - Work on the right section of the engine case
- - Work on the left section of the engine case
- - Work on the clutch cover
- - Removing crankshaft bearing inner ring
- - Removing balancer shaft drive wheel
- - Changing the conrod bearing
- - Checking crankshaft run-out at bearing pin
- - Installing balancer shaft drive wheel
- - Installing crankshaft bearing inner ring
- - Measuring axial clearance of crankshaft and balancer shaft
- - Cylinder - Nikasil® coating
- - Checking/measuring the cylinder
- - Checking/measuring the piston
- - Checking piston ring
- - Checking piston/cylinder mounting clearance
- - Checking oil pumps for wear
- - Replacing autodecompressor
- - Preparing timing chain tensioner for installation
- - Checking timing assembly
- - Removing rocker arm
- - Changing camshaft bearing
- - Removing valves
- - Checking valves
- - Checking valve springs
- - Checking valve spring retainer
- - Checking cylinder head
- - Installing valves
- - Installing rocker arm
- - Dismantling antihopping clutch
- - Checking the clutch
- - Preassembling antihopping clutch
- - Checking shift mechanism
- - Preassembling shift shaft
- - Disassembling the main shaft
- - Dismantling countershaft
- - Checking the transmission
- - Assembling the main shaft
- - Assembling countershaft
- - Checking electric starter drive
- - Removing freewheel
- - Checking freewheel
- - Installing freewheel
- 30/ASSEMBLING THE ENGINE
- - Installing transmission shafts
- - Installing crankshaft and balancer shaft
- - Installing left engine case
- - Installing oil pumps
- - Installing locking lever
- - Installing shift drum locating
- - Installing shift shaft
- - Installing starter drive
- - Installing primary gear
- - Installing clutch cage
- - Installing crankshaft position sensor
- - Installing timing chain and timing chain sprocket
- - Installing timing chain rails
- - Installing rotor
- - Adjusting crankshaft position sensor distance
- - Setting engine-top dead center
- - Installing piston
- - Installing cylinder head
- - Installing camshafts
- - Installing timing chain tensioner
- - Checking valve clearance
- - Adjusting valve clearance
- - Installing spark plug
- - Installing spacer and spring
- - Installing clutch cover
- - Mounting water pump cover
- - Installing thermostat
- - Installing the oil filter
- - Installing gear position sensor
- - Installing the spacer
- - Installing oil screens
- - Installing alternator cover
- - Installing starter motor
- - Installing valve cover
- - Taking engine off universal mounting rack
- 32/CLUTCH
- - Checking/rectifying the fluid level of the hydraulic clutch
- 35/WATER PUMP, COOLING SYSTEM
- - Draining the coolant
- - Filling the cooling system
- - Checking the antifreeze and coolant level
- - Checking the coolant level
- 38/LUBRICATION SYSTEM
- - Oil circuit
- - Checking the engine oil level
- - Checking the engine oil pressure
- - Changing the engine oil and filter, cleaning the oil screens
- - Draining the engine oil
- - Removing the oil filter
- - Installing the oil filter
- - Cleaning the oil screens
- - Filling up with engine oil
- - Adding engine oil
- 39/IGNITION SYSTEM
- - Alternator - checking the stator winding
- - Checking the spark plug connector
- - Ignition coil - checking the secondary winding
- 41/THROTTLE VALVE BODY
- - Checking the basic setting of the motor drive
- - Adjusting the basic setting of the motor drive
- - Flashing the EFI control unit and/or the EPT control unit
- - Requesting the enabling code
- - Coding the EFI control unit and/or EPT control unit
- TECHNICAL DATA - ENGINE
- - Capacity - engine oil
- - Capacity - coolant
- TECHNICAL DATA - TOLERANCE, WEAR LIMITS OF ENGINE
- TECHNICAL DATA - ENGINE TIGHTENING TORQUES
- TECHNICAL DATA - CHASSIS
- - Lighting equipment
- - Capacity - fuel
- TECHNICAL DATA - FORK
- - 690 Enduro
- - 690 Enduro R
- TECHNICAL DATA - SHOCK ABSORBER
- - 690 Enduro
- - 690 Enduro R
- TECHNICAL DATA - CHASSIS TIGHTENING TORQUES
- CLEANING/PROTECTIVE TREATMENT
- - Cleaning the motorcycle
- - Protective treatment for winter operation
- STORAGE
- - Storage
- - Putting into operation after storage
- SERVICE SCHEDULE
- - Service schedule
- WIRING DIAGRAM
- - Page 1 of 10 (690 Enduro)
- - Page 2 of 10 (690 Enduro)
- - Page 3 of 10 (690 Enduro)
- - Page 4 of 10 (690 Enduro)
- - Page 5 of 10 (690 Enduro)
- - Page 6 of 10 (690 Enduro)
- - Page 7 of 10 (690 Enduro)
- - Page 8 of 10 (690 Enduro)
- - Page 9 of 10 (690 Enduro)
- - Page 10 of 10 (690 Enduro)
- - Page 1 of 10 (690 Enduro R)
- - Page 2 of 10 (690 Enduro R)
- - Page 3 of 10 (690 Enduro R)
- - Page 4 of 10 (690 Enduro R)
- - Page 5 of 10 (690 Enduro R)
- - Page 6 of 10 (690 Enduro R)
- - Page 7 of 10 (690 Enduro R)
- - Page 8 of 10 (690 Enduro R)
- - Page 9 of 10 (690 Enduro R)
- - Page 10 of 10 (690 Enduro R)
- SUBSTANCES
- AUXILIARY SUBSTANCES
- SPECIAL TOOLS
- STANDARDS
- INDEX