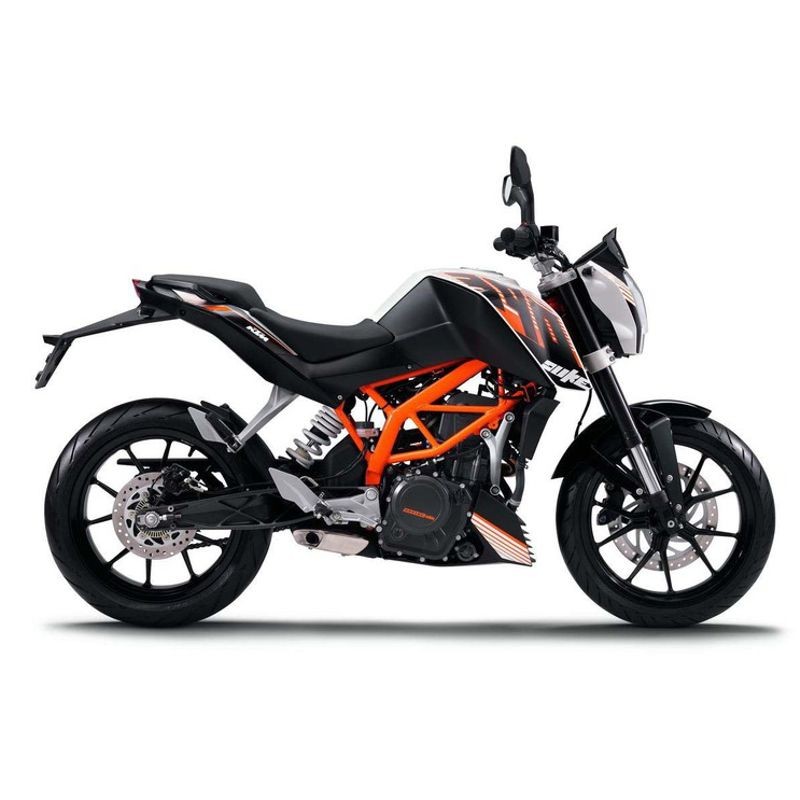
KTM Duke 390 (2013) - Service Repair Manual - Wiring Diagrams
Digital technical documentation with sections on MEANS OF REPRESENTATION, Symbols used, Formats used. Review the complete contents below for the systems and procedures covered.
Manual contents
- 1 MEANS OF REPRESENTATION
- 1.1 Symbols used
- - 1.2 Formats used
- 2 SAFETY ADVICE
- - 2.1 Repair Manual
- - 2.2 Safety advice
- - 2.3 Degrees of risk and symbols
- - 2.4 Work rules
- 3 IMPORTANT INFORMATION
- - 3.1 Guarantee, warranty
- - 3.2 Operating and auxiliary substances
- - 3.3 Spare parts, accessories
- - 3.4 Figures
- 4 SERIAL NUMBERS
- - 4.1 Chassis number/type label
- - 4.2 Key number
- - 4.3 Engine number
- 5 MOTORCYCLE
- - 5.1 Raising the motorcycle with the rear wheel stand
- - 5.2 Taking the motorcycle off of the rear wheel stand
- - 5.3 Raising the motorcycle with the front wheel stand
- - 5.4 Taking the motorcycle off of the front wheel stand
- - 5.5 Raising the motorcycle with the work stand
- - 5.6 Removing the motorcycle from the work stand
- - 5.7 Starting
- - 5.8 Starting the motorcycle-make checks
- 6 FORK, TRIPLE CLAMP
- - 6.1 Cleaning the dust boots of the fork legs
- - 6.2 Removing fork legs
- - 6.3 Installing the fork legs
- - 6.4 Disassembling the fork legs
- - 6.5 Checking the fork legs
- - 6.6 Assembling the fork legs
- - 6.7 Removing the lower triple clamp
- - 6.8 Installing the lower triple clamp
- - 6.9 Checking the steering head bearing play
- - 6.10 Adjusting the steering head bearing play
- 7 HANDLEBAR, CONTROLS
- - 7.1 Checking the play in the throttle cable
- - 7.2 Adjusting the play in the throttle cable
- - 7.3 Checking the clutch lever play
- - 7.4 Adjusting the clutch cable play
- 8 SHOCK ABSORBER, SWINGARM
- - 8.1 Adjusting the spring preload of the shock absorber
- - 8.2 Removing the shock absorber
- - 8.3 Installing the shock absorber
- - 8.4 Removing the spring
- - 8.5 Installing the spring
- 9 EXHAUST
- - 9.1 Removing the exhaust manifold
- - 9.2 Installing the exhaust manifold
- - 9.3 Removing the main silencer
- - 9.4 Installing the main silencer
- 10 AIR FILTER
- - 10.1 Removing the air filter
- - 10.2 Installing the air filter
- 11 FUEL TANK, SEAT, TRIM
- - 11.1 Opening the filler cap
- - 11.2 Closing the filler cap
- - 11.3 Removing the seat
- - 11.4 Mounting the seat
- - 11.5 Removing the passenger seat
- - 11.6 Mounting the passenger seat
- - 11.7 Removing the fuel tank cover
- - 11.8 Installing the fuel tank cover
- - 11.9 Removing the fuel tank
- - 11.10 Installing the fuel tank
- - 11.11 Removing the front spoiler
- - 11.12 Fitting front spoiler
- - 11.13 Dismounting the front fender
- - 11.14 Installing the front fender
- - 11.15 Checking the fuel pressure
- - 11.16 Changing the fuel filter
- - 11.17 Replacing the fuel pump
- 12 WHEELS
- - 12.1 Checking the tire air pressure
- - 12.2 Checking the tire condition
- - 12.3 Checking the brake discs
- - 12.4 Front wheel
- - 12.4.1 Removing the front wheel
- - 12.4.2 Installing the front wheel
- - 12.4.3 Removing the brake disc of the front brake
- - 12.4.4 Installing the brake disc of the front brake
- - 12.5 Rear wheel
- - 12.5.1 Removing the rear wheel
- - 12.5.2 Installing the rear wheel
- - 12.5.3 Removing the brake disc of the rear brake
- - 12.5.4 Installing the brake disc of the rear brake
- - 12.5.5 Checking the chain tension
- - 12.5.6 Adjusting the chain tension
- - 12.5.7 Checking the chain, rear sprocket, and engine sprocket
- - 12.5.8 Cleaning the chain
- - 12.5.9 Checking the rear hub rubber dampers
- 13 WIRING HARNESS, BATTERY
- - 13.1 Removing the battery
- - 13.2 Installing the battery
- - 13.3 Disconnecting the negative cable of the battery
- - 13.4 Reconnecting the negative cable of the battery
- - 13.5 Recharging the battery
- - 13.6 Checking the charging voltage
- - 13.7 Changing the fuses of individual power consumers
- 14 BRAKE SYSTEM
- - 14.1 Checking the front brake linings
- - 14.2 Changing the front brake linings
- - 14.3 Checking the brake fluid level of the front brake
- - 14.4 Adding front brake fluid
- - 14.5 Changing the front brake fluid
- - 14.6 Checking the rear brake linings
- - 14.7 Changing the rear brake linings
- - 14.8 Checking the free travel of foot brake lever
- - 14.9 Adjusting the free travel of the foot brake lever
- - 14.10 Checking the rear brake fluid level
- - 14.11 Adding rear brake fluid
- - 14.12 Changing the rear brake fluid
- 15 LIGHTING SYSTEM, INSTRUMENTS
- - 15.1 Setting kilometers or miles
- - 15.2 Adjusting the shift speed RPM 1
- - 15.3 Adjusting the shift speed RPM 2
- - 15.4 Setting the time
- - 15.5 Resetting the service interval display
- - 15.6 Checking the headlight setting
- - 15.7 Adjusting the headlight range
- - 15.8 Changing the parking light bulb
- - 15.9 Changing the headlight bulb
- 16 ENGINE
- - 16.1 Removing the engine
- - 16.2 Installing the engine
- - 16.3 Disassembling the engine
- - 16.3.1 Preparations
- - 16.3.2 Draining the engine oil
- - 16.3.3 Removing the chain securing guide
- - 16.3.4 Removing the valve cover
- - 16.3.5 Removing the spark plug
- - 16.3.6 Removing the clutch cover
- - 16.3.7 Setting the engine-ignition top dead center
- - 16.3.8 Removing the timing chain tensioner
- - 16.3.9 Removing the camshaft
- - 16.3.10 Removing the cylinder head
- - 16.3.11 Removing the piston
- - 16.3.12 Removing the starter motor
- - 16.3.13 Removing the timing chain
- - 16.3.14 Removing the water pump wheel
- - 16.3.15 Removing the alternator cover
- - 16.3.16 Removing the rotor
- - 16.3.17 Removing the starter drive
- - 16.3.18 Removing the balancer shaft drive wheel
- - 16.3.19 Removing the gear position sensor
- - 16.3.20 Removing the suction pump
- - 16.3.21 Removing the spacer
- - 16.3.22 Removing the clutch cage
- - 16.3.23 Removing the primary gear
- - 16.3.24 Removing the force pump
- - 16.3.25 Removing the shift shaft
- - 16.3.26 Removing the shift drum locating
- - 16.3.27 Removing the locking lever
- - 16.3.28 Removing the oil filter
- - 16.3.29 Removing the left engine case
- - 16.3.30 Removing the shift rails
- - 16.3.31 Removing the shift drum
- - 16.3.32 Removing the shift forks
- - 16.3.33 Removing the transmission shafts
- - 16.3.34 Removing the balancer shaft
- - 16.3.35 Removing the crankshaft
- - 16.4 Work on individual parts
- - 16.4.1 Work on the left section of the engine case
- - 16.4.2 Work on the right section of the engine case
- - 16.4.3 Changing the shaft seal ring of the water pump
- - 16.4.4 Checking the radial play of the lower conrod bearing
- - 16.4.5 Changing the conrod bearing
- - 16.4.6 Changing the balancer shaft bearing
- - 16.4.7 Work on the cylinder head
- - 16.4.8 Checking the cylinder head
- - 16.4.9 Checking the pivot point of the camshafts
- - 16.4.10 Checking/measuring the cylinder
- - 16.4.11 Checking the piston ring
- - 16.4.12 Checking/measuring the piston
- - 16.4.13 Checking the piston/cylinder mounting clearance
- - 16.4.14 Checking the oil pump
- - 16.4.15 Checking the oil pressure regulator valve
- - 16.4.16 Checking the clutch
- - 16.4.17 Checking the shift mechanism
- - 16.4.18 Preassembling the shift shaft
- - 16.4.19 Disassembling the main shaft
- - 16.4.20 Dismantling the countershaft
- - 16.4.21 Checking the transmission
- - 16.4.22 Assembling the main shaft
- - 16.4.23 Assembling the countershaft
- - 16.4.24 Checking the timing assembly
- - 16.4.25 Changing the stator
- - 16.4.26 Checking the electric starter drive
- - 16.4.27 Checking the freewheel
- - 16.5 Assembling the engine
- - 16.5.1 Installing the crankshaft
- - 16.5.2 Installing the balancer shaft
- - 16.5.3 Installing the transmission shafts
- - 16.5.4 Installing the shift forks
- - 16.5.5 Installing the shift drum
- - 16.5.6 Installing the shift rails
- - 16.5.7 Installing the left engine case
- - 16.5.8 Installing the oil filter
- - 16.5.9 Installing the locking lever
- - 16.5.10 Installing the shift drum locating
- - 16.5.11 Installing the shift shaft
- - 16.5.12 Installing the oil pump
- - 16.5.13 Installing the primary gear
- - 16.5.14 Installing the clutch cage
- - 16.5.15 Installing the spacer
- - 16.5.16 Installing the suction pump
- - 16.5.17 Installing the gear position sensor
- - 16.5.18 Installing the balancer shaft drive wheel
- - 16.5.19 Installing the starter drive
- - 16.5.20 Installing the rotor
- - 16.5.21 Installing the alternator cover
- - 16.5.22 Installing the water pump cover
- - 16.5.23 Installing the timing chain
- - 16.5.24 Installing the starter motor
- - 16.5.25 Installing the piston
- - 16.5.26 Installing the cylinder head
- - 16.5.27 Installing the camshafts
- - 16.5.28 Installing the timing chain tensioner
- - 16.5.29 Checking the valve clearance
- - 16.5.30 Adjusting the valve clearance
- - 16.5.31 Installing the clutch cover
- - 16.5.32 Installing the spark plug
- - 16.5.33 Installing the valve cover
- - 16.5.34 Installing the chain securing guide
- - 16.5.35 Installing the oil screen
- - 16.5.36 Removing the engine from the engine assembly stand
- 17 SHIFT MECHANISM
- - 17.1 Adjusting the shift lever
- 18 WATER PUMP, COOLING SYSTEM
- - 18.1 Draining the coolant
- - 18.2 Filling/bleeding the cooling system
- - 18.3 Checking the antifreeze and coolant level
- - 18.4 Checking the coolant level
- 19 LUBRICATION SYSTEM
- - 19.1 Oil circuit
- - 19.2 Checking the engine oil level
- - 19.3 Checking the engine oil pressure
- - 19.4 Changing the engine oil and oil filter, cleaning the oil screen
- - 19.5 Adding engine oil
- 20 IGNITION SYSTEM
- - 20.1 Alternator - checking the stator winding
- 21 TECHNICAL DATA
- - 21.1 Engine
- - 21.2 Engine tolerance, wear limits
- - 21.3 Engine tightening torques
- - 21.4 Capacities
- - 21.4.1 Engine oil
- - 21.4.2 Coolant
- - 21.4.3 Fuel
- - 21.5 Chassis
- - 21.6 Electrical system
- - 21.7 Tires
- - 21.8 Fork
- - 21.9 Shock absorber
- - 21.10 Chassis tightening torques
- 22 CLEANING/PROTECTIVE TREATMENT
- - 22.1 Cleaning the motorcycle
- - 22.2 Checks and maintenance steps for winter operation
- 23 STORAGE
- - 23.1 Storage
- - 23.2 Preparing for use after storage
- 24 SERVICE SCHEDULE
- - 24.1 Service schedule
- 25 WIRING DIAGRAM
- - 25.1 Page 1 of 9
- - 25.2 Page 2 of 9
- - 25.3 Page 3 of 9
- - 25.4 Page 4 of 9
- - 25.5 Page 5 of 9
- - 25.6 Page 6 of 9
- - 25.7 Page 7 of 9
- - 25.8 Page 8 of 9
- - 25.9 Page 9 of 9
- 26 SUBSTANCES
- 27 AUXILIARY SUBSTANCES
- 28 SPECIAL TOOLS
- 29 STANDARDS
- INDEX