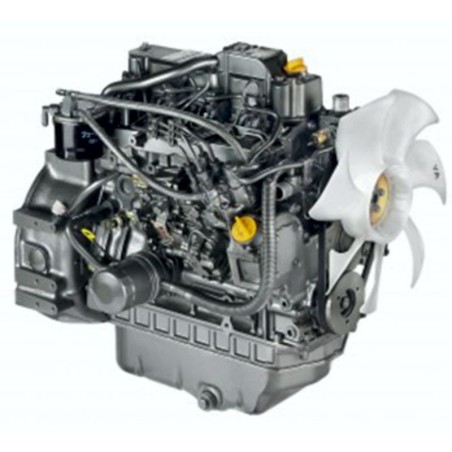
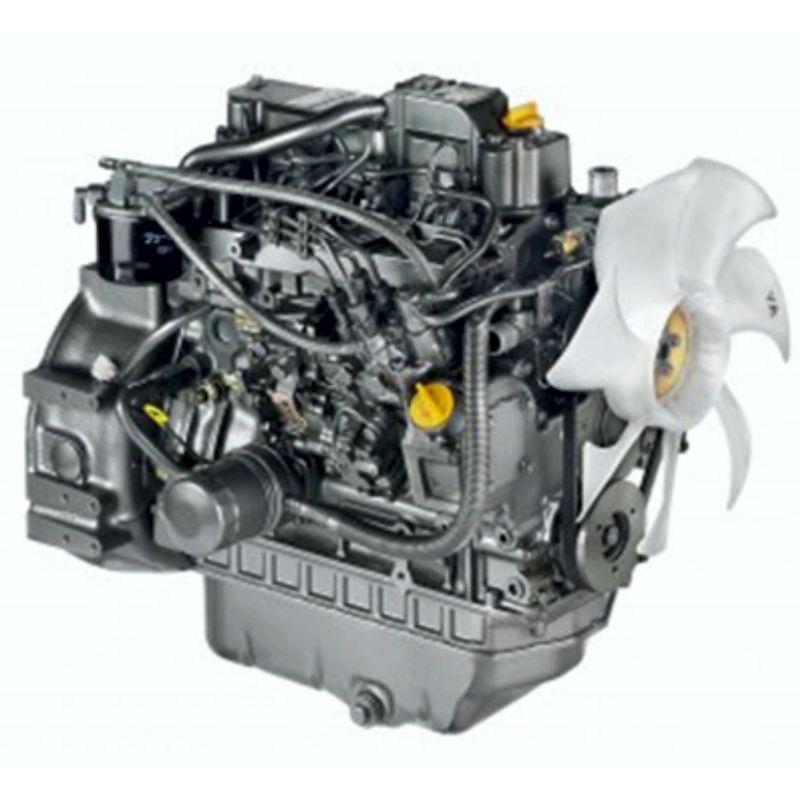
Yanmar 4TNV98 4TNV98-Z 4TNV98T 4TNV98T-Z Engine - Service Manual - Repair Manual
Digital technical documentation with sections on Cover, Yanmar Warranties, Yanmar Limited Warranty. Review the complete contents below for the systems and procedures covered.
Manual contents
- SERVICE MANUAL
- -Cover
- -Table Of Contents
- -Introduction
- -Yanmar Warranties
- - Yanmar Limited Warranty
- - What Is Covered By This Warranty?
- - How Long Is The Warranty Period?
- - What The Engine Owner Must Do:
- - To Locate An Authorized Yanmar Industrial Engine Dealer Or Distributor:
- - What Yanmar Will Do:
- - What Is Not Covered By This Warranty?
- - Warranty Limitations:
- - Warranty Modifications:
- - Questions:
- - Retail Purchaser Registration
- - Emission System Warranty
- - Yanmar Co., Ltd. Limited Emission Control System Warranty - Usa Only
- - Your Warranty Rights And Obligations:
- - California
- - Manufacturer’s Warranty Period:
- - Warranty Coverage:
- - Warranted Parts:
- - Exclusions:
- - Owner’s Warranty Responsibilities:
- -Safety
- - Safety Statements
- - Safety Precautions
- -General Service Information
- - Component Identification
- - Location Of Labels
- - Engine Nameplate (Typical)
- - Emission Control Regulations
- - Epa / Arb Regulations - Usa Only
- - Emission Control Labels
- - The 97/68/Ec Directive Certified Engines
- - Engine Family
- - Function Of Major Engine Components
- - Main Electronic Control Components And Features
- - Function Of Cooling System Components
- - Diesel Fuel
- - Diesel Fuel Specifications
- - Additional Technical Fuel Requirements
- - Bio-Diesel Fuels
- - Kit Parts List For B20 (Tnv Di Engines)
- - Filling The Fuel Tank
- - Priming The Fuel System
- - Engine Oil
- - Engine Oil Specifications
- - Service Categories
- - Definitions
- - Additional Technical Engine Oil Requirements:
- - Engine Oil Viscosity
- - Checking Engine Oil
- - Adding Engine Oil
- - Engine Oil Capacity (Typical)
- - Engine Coolant
- - Engine Coolant Specifications
- - Additional Technical Coolant Specifications:
- - Alternative Engine Coolant
- - Filling Radiator With Engine Coolant
- - Engine Coolant Capacity (Typical)
- - Specifications
- - Description Of Model Number
- - Engine Speed Specifications
- - Principal Engine Specifications
- - 3tnv82a (~ Epa Tier2)
- - Engine Service Standards
- - Tightening Torques For Standard Bolts And Nuts
- - Abbreviations And Symbols
- - Abbreviations
- - Symbols
- - Unit Conversions
- - Unit Prefixes
- - Units Of Length
- - Units Of Volume
- - Units Of Mass
- - Units Of Force
- - Units Of Torque
- - Units Of Pressure
- - Units Of Power
- - Units Of Temperature
- -Periodic Maintenance
- - Before You Begin Servicing
- - Introduction
- - The Importance Of Periodic Maintenance
- - Performing Periodic Maintenance
- - Yanmar Replacement Parts
- - Required Epa / Arb Maintenance - Usa Only
- - Epa / Arb Installation Requirements - Usa Only
- - Periodic Maintenance Schedule
- - Periodic Maintenance Procedures
- - After Initial 50 Hours Of Operation
- - Replace Engine Oil And Engine Oil Filter
- - Check And Adjust Cooling Fan V-Belt
- - Every 50 Hours Of Operation
- - Drain Fuel Filter / Water Separator
- - Check Battery
- - Every 250 Hours Of Operation
- - Drain Fuel Tank
- - Replace Engine Oil And Engine Oil Filter
- - Check And Clean Radiator Fins
- - Check And Adjust Cooling Fan V-Belt
- - Check And Adjust The Governor Lever And Engine Speed Control
- - Clean Air Cleaner Element
- - Every 500 Hours Of Operation
- - Replace Air Cleaner Element
- - Replace Fuel Filter
- - Clean Fuel Filter / Water Separator
- - Every 1000 Hours Of Operation
- - Drain, Flush And Refill Cooling System With New Coolant
- - Adjust Intake / Exhaust Valve Clearance
- - Every 1500 Hours Of Operation
- - Inspect, Clean And Test Fuel Injectors
- - Clean Egr Cooler 4tnv84t-Z, 4tnv98t-Z
- - Inspect Crankcase Breather System
- - Every 2000 Hours Of Operation
- - Check And Replace Fuel Hoses And Engine Coolant Hoses
- - Lap The Intake And Exhaust Valves
- - Every 3000 Hours Of Operation
- - Inspect Turbocharger (Blower Wash As Necessary)
- - Inspect, Clean And Test Egr Valve 4tnv84t-Z, 4tnv98t-E, 4tnv98-Z, 4tnv98t-Z
- - Inspect And Clean Egr Lead Valve 4tnv84t-Z, 4tnv98t-Z
- -Engine
- - Before You Begin Servicing
- - Introduction
- - Cylinder Head Specifications
- - Adjustment Specifications
- - Cylinder Head
- - Intake / Exhaust Valve And Guide
- - Push Rod
- - Rocker Arm And Shaft
- - Valve Spring
- - Camshaft And Timing Gear Train Specifications
- - Camshaft
- - Idler Gear Shaft And Bushing
- - Timing Gear Backlash
- - Crankshaft And Piston Specifications
- - Crankshaft
- - Thrust Bearing
- - Piston
- - Piston Ring
- - Connecting Rod
- - Connecting Rod Small End
- - Connecting Rod Big End
- - Tappet
- - Cylinder Block Specifications
- - Cylinder Block
- - Special Torque Chart
- - Torque For Bolts And Nuts
- - Special Service Tools
- - Measuring Instruments
- - 2-Valve Cylinder Head
- - 2-Valve Cylinder Head Components
- - Components Of A Two-Valve Cylinder Head
- - Disassembly Of 2-Valve Cylinder Head
- - Removing The Glow Plugs
- - Removal Of Valve Cover
- - Removal Of Rocker Arm Assembly
- - Disassembly Of Rocker Arm Assembly
- - Removal Of Cylinder Head
- - Removal Of Intake / Exhaust Valves
- - Removal Of Valve Guides
- - Cleaning Of Cylinder Head Components
- - Inspection Of Cylinder Head Components
- - Inspection Of Push Rods
- - Inspection Of Rocker Arm Assembly
- - Inspection Of Valve Guides
- - Inspection Of Cylinder Head
- - Inspection Of Intake And Exhaust Valves
- - Inspection Of Valve Springs
- - Reassembly Of Cylinder Head
- - Reassembly Of Valve Guides
- - Reassembly Of Intake And Exhaust Valves
- - Reassembly Of Cylinder Head
- - Reassembly Of Rocker Arm Reassembly
- - Reassembly Of The Valve Cover
- - 4-Valve Cylinder Head
- - 4-Valve Cylinder Head Components
- - Disassembly Of 4-Valve Cylinder Head
- - Removal Of Valve Cover
- - Removal Of Rocker Arm Assembly
- - Disassembly Of Rocker Arm Assembly
- - Removal Of Cylinder Head
- - Removal Of Intake And Exhaust Valves
- - Removal Of Valve Guides
- - Cleaning Of Cylinder Head Components
- - Inspection Of Cylinder Head Components
- - Inspection Of Push Rods
- - Inspection Of Rocker Arm Assembly
- - Inspection Of Valve Guides
- - Inspection Of Cylinder Head
- - Inspection Of Intake And Exhaust Valves
- - Inspection Of Valve Springs
- - Inspection Of Valve Bridges
- - Reassembly Of Cylinder Head
- - Reassembly Of Valve Guides
- - Reassembly Of Intake And Exhaust Valves
- - Reassembly Of Cylinder Head
- - Reassembly Of Rocker Arm Assembly
- - Reassembly Of The Valve Cover
- - Measuring And Adjusting Valve Clearance
- - 2-Valve Cylinder Heads
- - 4-Valve Cylinder Heads
- - Crankshaft And Camshaft Components
- - Disassembly Of Engine
- - Disassembly Of Camshaft And Timing Components
- - Removal Of Timing Gear Case Cover
- - Checking Timing Gear Backlash
- - Measuring Idler Gear-To-Crankshaft Gear Backlash
- - Measuring Idler Gear-To-Camshaft Gear Backlash
- - Removal Of Timing Gears
- - Removal Of Oil Pan
- - Removal Of Camshaft
- - Removal Of Gear Case Or Front Plate
- - Disassembly Of Crankshaft And Piston Components
- - Removal Of Pistons
- - Removal Of Crankshaft
- - Inspection Of Crankshaft And Camshaft Components
- - Replacement Of Crankshaft Oil Seals
- - Measure Crankshaft Bearing Oil Clearance
- - Inspection Of Cylinder Block
- - Inspection Of Pistons, Piston Rings And Wrist Pin
- - Inspection Of Connecting Rod
- - Inspection Of Tappets
- - Inspection Of Crankshaft
- - Inspection Of Camshaft
- - Inspection Of Camshaft Bushing And Bores
- - Inspection Of Idler Gear And Shaft
- - Honing And Boring
- - Reassembly Of Crankshaft And Piston Components
- - Reassembly Of Pistons
- - Installation Of Crankshaft
- - Installation Of Pistons
- - Reassembly Of Camshaft And Timing Components
- - Installation Of Gear Case Or Front Plate
- - Installation Of Camshaft
- - Installation Of Timing Gears
- - Installation Of Gear Case Cover
- - Installation Of Oil Pan
- - Final Reassembly Of Engine
- - Egr System
- - Egr System
- - Egr System
- - 4tnv98-E, 4tnv98-Z
- - 4tnv84t-Z, 4tnv98t-Z
- - Inspecting/Cleaning Egr Related Components
- - Egr Valve
- - Egr Valve Operation Checks
- - Cleaning The Egr Valves
- - Lead Valves
- - Precautions For Installation
- - Egr Cooler
- - Egr Pipe And Other Connecting Elbows
- - Installing Egr Related Components/Parts
- -Fuel System
- - Before You Begin Servicing
- - Introduction
- - Fuel Injection Pump
- - Stop Solenoid
- - Cold Start Device
- - Trochoid Fuel Pump
- - Electronically Controlled Governor
- - Fuel System Specifications
- - Special Torque Chart
- - Test And Adjustment Specifications
- - Special Service Tools
- - Measuring Instruments
- - Fuel System Diagram
- - Fuel System Components
- - 2-Valve Cylinder Head
- - 4-Valve Cylinder Head
- - Fuel Injection Pump
- - Removal Of Fuel Injection Pump
- - Installation Of Fuel Injection Pump
- - Idle Sub Spring Adjustment
- - Checking And Adjusting Fuel Injection Timing
- - Determining The Fuel Injection Timing Specification
- - (6.8 X 2) = 13.6 + 4 = 17.6° Fuel Injection Timing
- - Checking Fuel Injection Timing
- - Adjusting Fuel Injection Timing
- - Fuel Injectors
- - Removal Of Fuel Injectors
- - 2-Valve Cylinder Head
- - 4-Valve Cylinder Head
- - Testing Of Fuel Injectors
- - Disassembly And Inspection Of Fuel Injectors
- - Adjusting Fuel Injector Pressure
- - Reassembly Of Fuel Injectors
- - Installation Of The Fuel Injectors
- - 2-Valve Cylinder Head
- - 4-Valve Cylinder Head
- - Fuel Injection System (For A Four-Valve Cylinder Head)
- -Cooling System
- - Before You Begin Servicing
- - Introduction
- - Cooling System Diagram
- - Engine Coolant Pump Components
- - Engine Coolant System Check
- - Engine Coolant Pump
- - Removal Of Engine Coolant Pump
- - Disassembly Of Engine Coolant Pump
- - Cleaning And Inspection
- - Temperature Switch
- - Water Temperature Sensor
- - Thermostat
- - Radiator Cap
- - Reassembly Of Engine Coolant Pump
- - Installation Of Engine Coolant Pump
- -Lubrication System
- - Before You Begin Servicing
- - Introduction
- - Oil Pump Service Information
- - Lubrication System Diagram
- - Checking Engine Oil Pressure
- - Trochoid Oil Pump
- - 3tnv82a To 4tnv88 Oil Pump Components
- - Disassembly Of Oil Pump
- - Cleaning And Inspection
- - Check Outer Rotor Outside Clearance
- - Outer Rotor To Inner Rotor Tip Clearance
- - Check Outer Rotor Side Clearance
- - Check Inner Rotor And Gear Boss Clearance
- - Reassembly Of Oil Pump
- - Trochoid Oil Pump
- - 3tnv82a-B, 3tnv88-B, 3tnv88- U, 4tnv88-B4tnv88-U, 3tnv84t-Z, 4tnv84t-Z Oil Pump Components
- - Disassembly Of Oil Pump
- - Cleaning And Inspection
- - Check Outer Rotor Outside Clearance
- - Outer Rotor To Inner Rotor Tip Clearance
- - Check Outer Rotor Side Clearance
- - Check Rotor Shaft Clearance
- - Reassembly Of Oil Pump
- - Trochoid Oil Pump
- - 4tnv94l/98/106 Oil Pump Components
- - Disassembly Of Oil Pump
- - Cleaning And Inspection
- - Check Outer Rotor Outside Clearance
- - Outer Rotor To Inner Rotor Tip Clearance
- - Check Outer Rotor Side Clearance
- - Check Rotor Shaft Clearance
- - Reassembly Of Oil Pump
- -Turbocharger
- - Before You Begin Servicing
- - Introduction
- - Specifications
- - Turbocharger Service Information
- - Troubleshooting
- - Excessive Exhaust Smoke
- - Generates White Smoke
- - Sudden Oil Decrease
- - Decrease In Output
- - Poor (Slow) Response (Starting) Of Turbocharger
- - Abnormal Sound Or Vibration
- - Turbocharger Components
- - Turbocharger Component Functions
- - Theory Of Operation
- - Turbine
- - Compressor
- - Bearings
- - Compressor Side Sealing Mechanism
- - Waste Gate Modulation
- - Waste Gate Control
- - Washing Procedure
- - Periodic Inspection
- - Visual Inspection
- - Inspection Of Rotor Rotation
- - Inspection Of Rotor Play
- - Removal Of Turbocharger
- - Checking Rotor Play
- - To Check Rotor End Play:
- - To Check Rotor Run-Out:
- - Waste Gate Valve Test
- - Waste Gate Actuator Leak Test
- - Installation Of Turbocharger
- -Starter Motor
- - Before You Begin Servicing
- - Introduction
- - Starter Motor Information
- - 3tnv82a To 4tnv88 - Standard And Optional
- - Starter Motor Specifications
- - Starter Motor Troubleshooting
- - Starter Motor Components
- - Starter Motor
- - Removal Of Starter Motor
- - Disassembly Of Starter Motor
- - Cleaning And Inspection
- - Armature
- - Field Coil
- - Magnetic Switch
- - Pinion Clutch Assembly
- - Reassembly Of Starter Motor
- - Check Pinion Projection Length
- - No-Load Test
- - Installation Of Starter Motor
- -Alternator
- - Before You Begin Servicing
- - Introduction
- - Dynamo And Alternator Information
- - 3tnv82a To 4tnv106t - Standard And Optional Dynamos
- - 3tnv82a To 4tnv106t - Standard And Optional Alternators
- - Alternator Specifications
- - Dynamo Specifications
- - Alternator Troubleshooting
- - Alternator Components
- - Alternator Wiring Diagram
- - Alternator Standard Output
- - Alternator
- - Removal Of Alternator
- - Disassembly Of Alternator
- - Reassembly Of Alternator
- - Installation Of Alternator
- - Dynamo Component Location
- - Dynamo Wiring Diagram
- - Operation Of Dynamo
- - Dynamo Standard Output
- - Testing Of Dynamo
- - Testing Stator Coil Continuity
- - Testing Stator Coil Short-To-Ground
- - Testing Dynamo Regulated Output
- - Dynamo
- - Removal Of Dynamo
- - Disassembly Of Dynamo
- - Reassembly Of Dynamo
- - Installation Of Dynamo
- -Electronic Control System
- - Engines Available With The Electronic Control System
- - Before You Begin Servicing
- - Introduction
- - Electronic Control System
- - Electronic Control Harness Connections
- -Electric Wiring
- - Electric Wiring Precautions
- - Electrical Wire Resistance
- - Battery Cable Resistance
- - Electrical Wire Sizes - Voltage Drop
- - Conversion Of Awg To European Standards
- -Failure Diagnosis
- - Special Service Tools
- - Troubleshooting By Measuring Compression Pressure
- - Compression Pressure Measurement Method
- - Measured Value And Troubleshooting
- - Quick Reference Table For Troubleshooting
- - Failure Diagnostic List
- - Electrical Wiring
- -Back Cover
- TROUBLESHOOTING MANUAL
- -Cover
- -Failure Diagnosis
- -Dtcs (Diagnostic Trouble Codes) General Description
- - Dtc Code List
- - Description Items
- - Analog Input Related Failures
- - Rack Position Sensor
- - Accelerator Sensor
- - Spare Accelerator Sensor (Option)
- - Atmospheric Pressure Sensor (Option)
- - Ecu Temperature Sensor
- - Cooling Water Temperature Sensor
- - Sensor 5v
- - Power Supply Voltage
- - Pulse Sensor Related Failures
- - Speed Sensor
- - Spare Speed Sensor (Option)
- - Engine Rotational Speed
- - Contact Output Related Failures
- - Rack Actuator Relay
- - Start Assist Relay
- - Csd Solenoid Valve
- - Egr Valve
- - Contact Input Related Failures
- - Oil Pressure Related Failures
- - Battery Charge Related Failures
- - Water Temperature Switch
- - Air Cleaner Switch
- - Oil-Water Separator Switch
- - Actuators Etc.
- - Rack Actuator
- - Engine
- - E-Ecu Internal Errors
- - Can Communication
- - Immobilizer
- -Method And Procedure Of Failure Diagnosis
- - Description Items
- - E-Ecu Pin Layout Diagram
- - How To Use The 2g Eco-Checker Harness
- - Analog Input Related Failures
- - Rack Position Sensor
- - Accelerator Sensor
- - Foot Pedal
- - Spare Analog (Spare Accelerator Sensor, Atmospheric Pressure Sensor)
- - Pulse Accelerator
- - Ecu Temperature Sensor
- - Cooling Water Temperature Sensor
- - Sensor 5v
- - Pulse Sensor Related Failures
- - Speed Sensor
- - Spare Speed Sensor
- - Contact Output Related Failures
- - Rack Actuator Relay
- - Start Assist Relay
- - Csd Solenoid Valve Coil
- - Egr Valve
- - Contact Input Related Failures
- - Actuator Related Failures
- - Rack Actuator
- - Ecu Internal And Communication Errors
- - Ecu Internal Errors
- - Main Relay
- - Can Communication
- - Immobilizer
- - Failure Indicator Lamp Flashing Pattern
- -Using The Failure Indicator For Failure Diagnosis
- - Flashing Patterns Of The Failure Indicator
- -Factor Analysis
- - 2g-Type Eco-Governor Speed-Fluctuation Factor Analysis
- -Back Cover