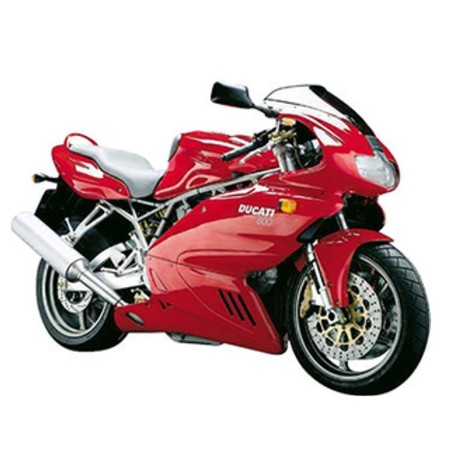
• -$10.00
Ducati SuperSport 800S Workshop & Electrical Wiring Manual
search
  • Ducati SuperSport 800S Workshop & Electrical Wiring Manual

Ducati SuperSport 800S Workshop & Electrical Wiring Manual

$29.95
$19.95 Save $10.00
No tax
Quantity

YOUTUBE Official Channel @SoloPDFcom (+18,000 subs). Trusted by mechanics worldwide using professional workshop manuals and wiring diagrams.

Ducati SuperSport 800S Workshop & Electrical Wiring Manual

A service, workshop or specialist documentation set with specific wiring diagrams or circuit references identified in the original index. Coverage is limited to the listed models and document variants.

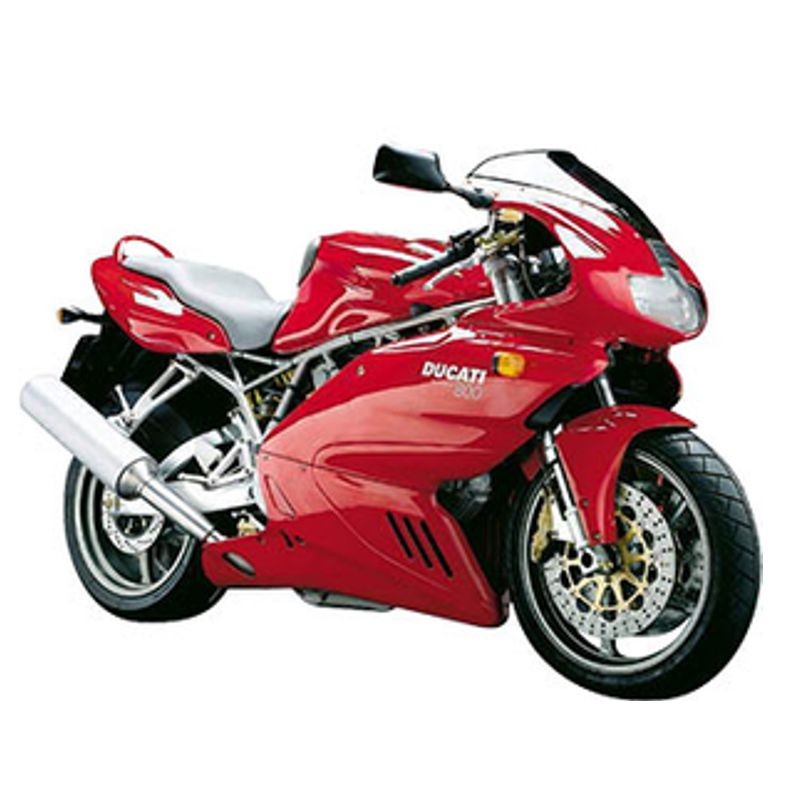
Ducati SuperSport 800S workshop manual and Italian service reference with maintenance, chassis systems and electrical wiring diagrams.

Indexed areas: engine and mechanical systems, gearbox and transmission, brakes and steering, suspension and axles, hydraulics.

Examples from the original index: Manuale di Officina in italiano, ai moto Ducati SuperSport 800S.; F - Controls - Devices; Removing the fuel tank; Refitting cylinder / piston assy.
Original technical index

  • - Manuale di Officina in italiano, ai moto Ducati SuperSport 800S.
  • CONTENTS:
  • GENERAL SUMMARY
  • A - Description
  • 1 - HOW TO USE THE MANUAL
  • - Manual layout
  • 2 - SYMBOLS - ABBREVIATIONS - REFERENCES
  • - Product specifications
  • 3 - DANGEROUS PRODUCTS - WARNINGS
  • - General safety rules
  • - General maintenance indications
  • B - Model-specific information
  • 1 - IDENTIFICATION DATA
  • C - Specifications
  • 1.1 - TECHNICAL DATA
  • - Description
  • - Colors
  • - Transmission
  • - Timing/valves
  • - Lubrication system
  • - Cylinder / piston
  • - Gearbox
  • - Cooling system
  • - Front wheel
  • - Front suspension
  • - Rear wheel
  • - Rear suspension
  • - Hydraulic brakes
  • - Charging system / generator
  • - Ignition system
  • - Control unit
  • - Lights / instrument panel
  • 1.2 - DIMENSIONS
  • 2 - FUELS AND LUBRICANTS
  • 3 - TORQUE SETTINGS
  • - Frame torque settings
  • - Engine torque settings
  • 4 - SERVICE TOOLS
  • - Engine special tools
  • - Frame specific tools
  • D - Use and maintenance operations
  • 1 - PRELIMINARY CHECKS
  • - Running-in precautions
  • - Pre-ride checks
  • 2 - STARTING - ENGINE WARM-UP
  • - Starting the engine
  • 3 - ROUTINE MAINTENANCE TABLE
  • 4 - MAINTENANCE OPERATIONS
  • - Checking the engine oil level
  • - Changing the engine oil and filter cartridge
  • - Checking valve clearances
  • - Adjusting valve clearances
  • - Changing the fuel filter
  • - Changing and cleaning the air filters
  • - Changing the brake fluid
  • - Draining the braking circuit
  • - Filling the brake circuits
  • - Changing the clutch fluid
  • - Draining the clutch circuit
  • - Filling the clutch circuit
  • - Adjusting steering bearings play
  • - Adjusting chain tension
  • - Checking brake pad wear. Changing brake pads
  • - Adjusting the throttle and choke cables
  • - Adjusting the position of the gear change and rear brake pedals
  • - Adjusting the rear shock absorber
  • 5 - DIAGNOSIS INSTRUMENTS
  • - Tester description
  • - Instrument power supply
  • - DDS diagnosis instrument
  • - Checking and adjusting timing belt tension
  • - Resetting the throttle position sensor (TPS)
  • - Adjusting the throttle body
  • - Checking engine oil pressure
  • - Checking cylinder compression
  • - Checking fuel pressure
  • - Procedure-override the immobilizer system
  • - Guided diagnosis
  • - Checking the charging system
  • - Icons table
  • E - Fairing
  • 1 - HEADLIGHT FAIRING - REAR-VIEW MIRRORS
  • - Removing the rear-view mirrors
  • - Refitting the rear-view mirrors
  • - Removing the headlight fairing
  • - Refitting the headlight fairing
  • 2 - FAIRING
  • - Removing the fairings
  • - Refitting the fairings
  • 3 - TAIL GUARD
  • - Removing the tail guard
  • - Refitting the tail guard
  • 4 - FRONT AND REAR MUDGUARD
  • - Removing the front mudguard
  • - Refitting the front mudguard
  • - Removing the rear mudguard
  • - Refitting the rear mudguard
  • F - Controls - Devices
  • 1 - THROTTLE CONTROL - CHOKE
  • - Adjusting the throttle and choke cables
  • - Disassembling the throttle control
  • - Reassembling the throttle control
  • - Removing the choke control
  • - Refitting the choke control
  • 2 - CLUTCH HYDRAULIC CONTROL
  • - Removing the clutch master cylinder assembly
  • - Refitting the clutch master cylinder assembly
  • - Removing the clutch transmission unit
  • - Refitting the clutch transmission assembly
  • 3 - FRONT BRAKE CONTROL
  • - Removing the front brake control
  • - Refitting the front brake control
  • 4 - REAR BRAKE CONTROL
  • - Removing the rear brake control
  • - Disassembling the rear brake control
  • - Reassembling the rear brake control
  • 5 - GEAR CHANGE CONTROL
  • - Removing the gear change control
  • - Disassembling the gear change control
  • - Refitting the gear change control
  • 6 - SEAT LOCK AND RELEASING MECHANISMS
  • - Removing the seat releasing mechanism
  • - Refitting the seat releasing mechanism
  • G - Wheels - Suspension - Brakes
  • 1 - FRONT WHEEL
  • - Removing the front wheel
  • - Overhauling the front wheel
  • - Refitting the front wheel
  • 2 - FRONT FORK
  • - Removing the front fork
  • - Overhauling the front fork
  • - Refitting the front fork
  • 3 - FRONT BRAKE
  • - Braking system maintenance
  • - Removing the front brake system
  • - Overhauling the front brake components
  • - Refitting the front brake system
  • 4 - REAR WHEEL
  • - Removing the rear wheel
  • - Overhauling the rear wheel
  • - Refitting the rear wheel
  • 5 - REAR SWINGARM
  • - Removing the swingarm
  • - Inspecting the swingarm shaft
  • - Checking swingarm axial play
  • - Refitting the rear swingarm
  • 6 - REAR BRAKE
  • - Removing the rear brake system
  • - Refitting the rear brake system
  • 7 - REAR SUSPENSION
  • - Rear suspension
  • - Removing the rear shock absorber
  • - Overhauling the rear shock absorber
  • - Refitting the rear shock absorber
  • 8 - FINAL DRIVE
  • - Final drive inspection
  • - Removing the chain sprocket
  • - Refitting the chain sprocket
  • - Removing the rear sprocket
  • - Refitting the rear sprocket
  • - Wash the chain
  • - Chain lubrication
  • H - Frame
  • 1 - HANDLEBARS
  • - Removing the handlebars
  • - Refitting the handlebars
  • 2 - STEERING
  • - Adjusting steering bearing play
  • - Adjusting the steering angle
  • - Disassembling the steering tube components
  • - Refitting the steering tube components
  • 4 - FOOTPEG SUPPORTS
  • - Removing the footpegs
  • - Refitting the footpegs
  • 5 - STANDS
  • - Removing the side stand
  • - Disassembling the side stand
  • - Reassembling the side stand
  • - Refitting the side stand
  • 6 - FRAME INSPECTION
  • - Removing the frame and related components
  • - Checking the frame
  • - Refitting frame and related components
  • - Refitting the headlight support
  • 7 - TAIL LIGHT AND NUMBER PLATE HOLDER
  • - Removing the tail light and number plate holder
  • - Refitting the tail light and number plate holder
  • L - Fuel system - Exhaust system
  • 1 - FUEL SYSTEM DESCRIPTION
  • 2 - FUEL TANK
  • - Removing the fuel tank
  • - Removing the filler plug unit
  • - Refitting the filler plug unit
  • - Refitting the fuel tank
  • 3 - FUEL PUMP
  • - Removing the fuel pump
  • - Refitting the fuel pump
  • 4 - FUEL FILTER
  • - Changing the fuel filter
  • 5 - PRESSURE REGULATOR
  • - Changing the pressure regulator
  • 6 - THROTTLE BODY
  • - Removing the throttle body
  • - Refitting the throttle body
  • 7 - AIRBOX
  • - Removing the airbox
  • - Refitting the airbox
  • 8 - EXHAUST SYSTEM
  • - Operating principle of catalytic converter (EU only)
  • - Disassembling the exhaust system
  • - Reassembling the exhaust system
  • 10 - CANISTER FILTER
  • - Removing the Canister filter
  • - Refitting the Canister filter
  • M - Ignition - injection system
  • 1 - DESCRIPTION OF THE FUEL INJECTION- IGNITION SYSTEM
  • - General information on the fuel injection-ignition system
  • - Fuel circuit
  • - Intake air circuit
  • - Operating stages
  • 2 - SYSTEM DIAGRAM
  • - Fuel injection-ignition system diagram
  • 3 - FUEL INJECTION- IGNITION SYSTEM COMPONENTS
  • - Electronic control unit
  • - Electric injector
  • - Air temperature / pressure sensor
  • - Spark plug
  • - Coil
  • - Throttle position sensor
  • - Rpm/timing sensor
  • - Main and injection relays
  • N - Engine
  • 1 - REMOVING - REASSEMBLING THE COMPLETE ENGINE
  • - Removing the engine
  • - Reassembling the engine
  • 2.1 - LUBRICATION SYSTEM: OIL PUMP
  • - Lubrication system diagram
  • - Removing the oil pump
  • - Disassembling the oil pump
  • - Overhauling the oil pump
  • - Reassembling the oil pump
  • - Refitting the oil pump
  • 2.2 - LUBRICATION SYSTEM: OIL COOLER
  • - Removing the oil cooler
  • - Checking the oil cooler
  • - Refitting the oil cooler
  • 2.3 - LUBRICATION SYSTEM: OIL BREATHER RESERVOIR
  • - Removing the oil breather reservoir
  • - Refitting the oil breather reservoir
  • 4.1 - HEAD UNIT: CHECKS AND ADJUSTMENTS
  • - Checking and adjusting valve clearance
  • - Checking engine timing
  • 4.2 - HEAD UNITS: SIDE COVERS / TIMING SYSTEM
  • - Removing the timing side covers
  • - Disassembling the timing system
  • - Disassembling the mobile tensioner
  • - Disassembling the belt rollers
  • - Reassembling the timing system
  • - Refitting the timing side covers
  • 4.3 - HEAD UNIT: CAMSHAFTS
  • - Removing the engine oil temperature sensor
  • - Refitting the engine oil temperature sensor
  • - Disassembling the intake manifolds
  • - Refitting the intake manifolds
  • - Removing the side caps
  • - Removing the valve covers
  • - Refitting the valve covers
  • - Removing the camshafts
  • - Checking camshafts
  • - Checking the oil seals
  • - Checking the circlips
  • - Checking the bearings
  • - Refitting the camshafts
  • - Refitting the cam covers
  • 4.4 - HEAD UNIT: VALVES - ROCKER ARMS
  • - Disassembling the engine heads
  • - Overhauling the head parts
  • - Reassembling the head
  • 5 - CYLINDER / PISTON ASSEMBLY
  • - Removing cylinder / piston assy
  • - Overhauling the cylinder / piston assy
  • - Refitting cylinder / piston assy
  • 6.1 - CLUTCH UNIT: CLUTCH
  • - Clutch unit
  • - Disassembling the clutch
  • - Checking and overhauling the clutch unit
  • - Reassembling the clutch
  • 6.2 - CLUTCH UNIT: CLUTCH COVER
  • - Removing the clutch cover
  • - Disassembling the clutch cover
  • - Reassembling the clutch cover
  • - Refitting the clutch cover
  • 6.3 - CLUTCH UNIT: PRIMARY GEARS
  • - Disassembling the primary drive gears
  • - Fitting the primary drive gear and checking meshing play
  • 7.1 - GEARBOX ASSEMBLY: GEAR SELECTOR LEVERS
  • - Removing the gear selector levers
  • - Disassembling the gear selector levers
  • - Removing the gear stopper and ratchet
  • - Reassembling gear stopper and ratchet
  • - Reassembling the gear selector lever
  • - Reassembling the gear selector lever
  • 7.2 - GEARBOX ASSEMBLY: GEARBOX SHAFTS
  • - Removing the gearbox
  • - Disassembling the gearbox shafts
  • - Overhauling the gearbox
  • - Reassembling the gearbox shafts
  • - Inspecting the gear selector forks
  • - Inspecting the fork selector drum
  • - Reassembling the gearbox
  • 8 - FLYWHEEL - GENERATOR
  • - Removing the generator cover
  • - Disassembling the generator cover
  • - Removing the flywheel - generator assembly
  • - Checking the flywheel - generator assembly
  • - Refitting flywheel/ generator assembly
  • - Reassembling generator cover
  • - Checking the engine sensor air gap
  • 9.1 - CASING UNIT: OUTER COMPONENTS
  • - Removing outer components
  • - Reassembling the outer parts
  • - Removing the timing lay gear
  • - Reassembling the timing lay gear
  • - Removing the starter motor driven gear
  • - Refitting the starter motor driven gear
  • 9.2 - CASING UNIT: CRANKCASES
  • - Opening the casings
  • - Overhauling the casings
  • - Main bearings
  • - Reassembling the casings
  • - Shimming the shafts
  • - Closing the casings
  • 9.3 - CASING UNIT: CONNECTING RODS
  • - Removing the connecting rods
  • - Disassembling the connecting rods
  • - Overhauling the connecting rods
  • - Reassembling the connecting rods
  • - Refitting the connecting rod unit
  • P - Electric system
  • 1 - WIRING DIAGRAM
  • - Wiring diagram key
  • - Wire color coding - wiring diagram
  • - Legend of fuse box
  • - Arrangement of wiring on the frame
  • - Diagram A
  • - Diagram B
  • - Diagram C
  • - Diagram D
  • - Diagram E
  • - Diagram F
  • - Diagram G
  • - Diagram H
  • - Diagram J
  • - Diagram K
  • - Diagram L
  • - Diagram M
  • - Diagram N
  • - Diagram P
  • - Diagram Q
  • - Diagram R
  • - Diagram S
  • - Diagram T
  • - Diagram U
  • - Diagram V
  • 2 - CHARGING SYSTEM - BATTERY
  • - Checking the charging system
  • - Recharging the battery
  • - Adding electrolyte
  • - Battery
  • - Battery mount
  • - Generator
  • - Rectifier - regulator
  • 3 - ELECTRIC STARTING
  • - Electric starting system
  • - Starter motor
  • - Starter contactor
  • 4 - LIGHTING DEVICES
  • - Changing light bulbs
  • - Beam setting
  • 5 - INDICATORS AND LIGHTING SYSTEM
  • - Checking the indicators and lighting system components
  • - Changing light bulbs
  • 6 - PROTECTION AND SAFETY DEVICES
  • - Checking protection and safety devices components
  • - Checking the fuses
  • 7 - WARNING LIGHTS AND INDICATORS
  • - Instrument panel
  • 8 - IMMOBILIZER AND TRANSPONDER
  • 9 - DIAGNOSIS INSTRUMENTS
  • - How-use the multimeter-check electric systems
  • Subject index