• -$10.00
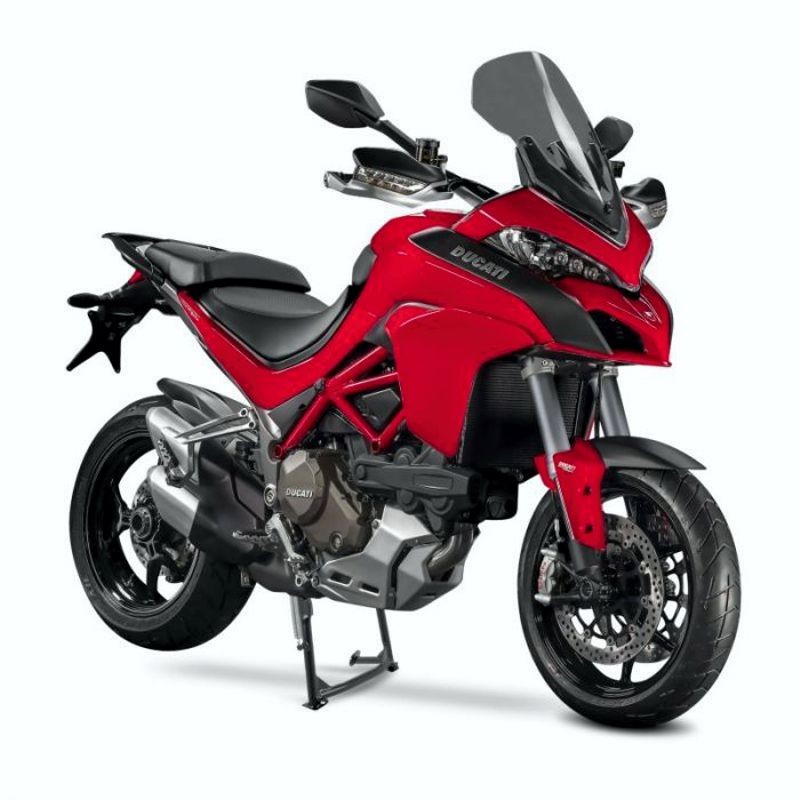
Ducati Multistrada 1200 S ABS - Service Repair Manual - Manuel de Reparation Atelier
search
  • Ducati Multistrada 1200 S ABS - Service Repair Manual - Manuel de Reparation Atelier

Ducati Multistrada 1200 S ABS - Service Repair Manual - Manuel de Reparation Atelier

$29.95
$19.95 Save $10.00
No tax
Quantity

YOUTUBE Official Channel @SoloPDFcom (+18,000 subs). Trusted by mechanics worldwide using professional workshop manuals and wiring diagrams.

Ducati Multistrada 1200 S ABS - Service Repair Manual - Manuel de Reparation Atelier

This digital manual for Ducati Multistrada 1200 S ABS includes sections on Product specifications, General maintenance indications, 2 - MODEL-SPECIFIC INFORMATION. The complete contents are listed below.
Manual contents

  • 1 - GENERAL
  • - 1 - How-use this manual
  • - How-use this manual
  • - Layout of the manual
  • - 2 - Symbols - Abbreviations - References
  • - Product specifications
  • - 3 - Hazardous Products - Warnings
  • - General safety rules
  • - General maintenance indications
  • 2 - MODEL-SPECIFIC INFORMATION
  • - 1 - Identification data
  • - Multistrada 1200 ABS identification data
  • 3 - TECHNICAL DATA
  • - 1.1 - Technical specifications
  • - General
  • - Colours
  • - Transmission
  • - Timing system/valves
  • - Crankshaft
  • - Cylinder/Piston
  • - Gearbox
  • - Cooling system
  • - Front wheel
  • - Front suspension (1200 ASB)
  • - Front suspension (1200 S ASB)
  • - Rear wheel
  • - Rear suspension (1200 ASB)
  • - Rear suspension (1200 S ASB)
  • - Hydraulic brakes
  • - Charging system/alternator
  • - Injection-ignition system
  • - Fuel system
  • - Injection system
  • - Lights/instrument panel
  • - 1.2 - Dimensions
  • - 2 - Fuel, lubricants and other fluids
  • - 3 - Torque settings
  • - Frame torque settings
  • - Engine torque settings
  • - 4 - Service tools
  • - Specific tools for the engine
  • - Specific tools for the frame
  • 4 - MAINTENANCE OPERATIONS
  • - 1 - Vehicle pre-delivery
  • - 2 - Scheduled maintenance chart
  • - Operations-be carried out by the dealer
  • - List of operations-be performed at 1000 km
  • - Operations-be carried out by the dealer
  • - List of operations-be performed every 12000 km / year (first limit reached)
  • - Operations-be carried out by the customer
  • - List of operations-be performed every 1000 km
  • - 3 - Maintenance operations
  • - Reading of the error memory with DDS on the engine control units, vehicle and ABS
  • - Checking the engine oil level
  • - Changing the engine oil and filter cartridge
  • - Checking valve clearances
  • - Renew the timing belts
  • - Spark plugs replacement
  • - Changing and cleaning the air filters
  • - Checking the coolant level
  • - Change the coolant
  • - Changing the brake fluid
  • - Draining the brake circuit
  • - Filling the brake system with fluid
  • - Changing the clutch fluid
  • - Draining the clutch hydraulic circuit
  • - Filling the clutch circuit
  • - Adjusting the steering head bearings
  • - Adjusting the chain tension
  • - Checking brake pad wear and changing brake pads
  • - Adjusting the throttle cable
  • - Adjusting the clutch lever and front brake lever
  • - Adjusting the position of the gear change and rear brake pedals
  • - Front fork adjustment (MTS 1200 ABS)
  • - Rear shock absorber adjustment (MTS 1200 ABS)
  • - Adjusting the rear ride set-up
  • 5 - FAIRINGS
  • - 1 - Rear-view mirrors
  • - Removing the panel
  • - Refitting the panel
  • - Removing the headlight fairing
  • - Refit the headlight fairing
  • - 2 - Fairings
  • - Removing the front half-fairing
  • - Refitting the front half-fairing
  • - Removal of the fuel tank fairings
  • - Refitting the fuel tank fairings
  • - 3 - Seat - seat cowling and side panels
  • - Removal of the seat
  • - Removal of the side panels and seat cowling
  • - Refitting the side panels and seat cowling
  • - Refitting the seat
  • - 4 - Front mudguard
  • - Removal of the front mudguard
  • - Refitting the front mudguard
  • - Fitting the front semi mudguard
  • - Removing the oil sump guard
  • - 5 - Rear mudguard - Splash guard
  • - Removing the rear mudguard
  • - Refitting the rear mudguard
  • - Fitting the long rear mudguard
  • - Removing the splash guard
  • - Refitting the splash guard
  • 6 - ELECTRIC SYSTEM AND ENGINE CONTROL SYSTEM
  • - 1 - Wiring diagram
  • - Wiring diagram 1200 S ABS - Key
  • - Wiring diagram 1200 S ABS - Key
  • - Wiring diagram colour codes
  • - Key of front fuse box
  • - Key of rear fuse box
  • - Routing of wiring on frame
  • - Table A
  • - Table B
  • - Table C
  • - Table D
  • - Table E -1
  • - Table E-2
  • - Table F
  • - Table G
  • - Table H
  • - Table I
  • - Table J
  • - Table K
  • - Table L
  • - Table M
  • - Table N
  • - Table O
  • - Table P
  • - Table Q
  • - Table R
  • - Table S
  • - Table T
  • - 2 - Battery charging system
  • - Checking the battery charging system
  • - Recharging the battery
  • - Topping up the electrolyte
  • - Battery
  • - Alternator
  • - Rectifier-regulator
  • - 3 - Electric starting system
  • - Electric starting system
  • - Starter motor
  • - Solenoid starter
  • - 4 - Lights and indicating devices
  • - Replacing bulbs
  • - Headlight aim
  • - 5 - Indicating devices
  • - Checking the indicating system components
  • - Water temperature sensor
  • - Checking operation of the fan relay
  • - Changing light bulbs
  • - 6 - Protection and safety devices
  • - Checking protection and safety device components
  • - Checking the fuses
  • - 7 - Instruments
  • - Instrument panel
  • - Instrument panel system (DASHBOARD)
  • - Display settings and functions
  • - 8 - “Hands free” system
  • - Hands free system Key-On and Key-Off
  • - Key-On/Key-Off using the red key on the handlebar with the active key
  • - Key-On/Key-Off using the key on the Hands free lock with the active key
  • - Key-On/Key-Off using the red key on the handlebar with the passive key
  • - Key-On/Key-Off using the key on the Hands free lock with the passive key
  • - Key-On/Key-Off using the pin code (immobilizer release)
  • - Entering PIN CODE function for vehicle release
  • - 9 - immobilizer and transponder
  • - 10 - Description of the system
  • - Injection and ignition
  • - 11 - Fuel injection-ignition system
  • - 12 - System components
  • - Positioning of the control system components on the vehicle
  • - Control unit support removing
  • - Refitting the control unit support
  • - Fuel injectors
  • - Air pressure sensor
  • - Engine temperature sensor
  • - Air temperature sensor
  • - Removing the coils
  • - Throttle valve operation engine
  • - Rpm/timing sensor
  • - Injection relay
  • - CAN Line
  • - 13 - Diagnostic instruments
  • - Using a multimeter-check the electrical systems
  • - Description of the diagnosis instrument (DDS)
  • - Tester power supply
  • - DDS diagnosis instrument
  • - Checking and adjusting timing belt tension
  • - Check the engine oil pressure
  • - Cylinder compression test
  • - Fuel pressure test
  • - immobilizer override procedure
  • - Guided diagnosis
  • - Testing the battery charging system
  • - Deactivating the “service” indication on the instrument panel
  • - Icons table
  • 7 - CHASSIS
  • - 1 - Front wheel
  • - Removal of the front wheel
  • - Overhauling the front wheel
  • - Refitting the front wheel
  • - 2 - Rear wheel
  • - Removing of the rear wheel
  • - Overhauling the rear wheel
  • - Refitting the rear wheel
  • - 3 - Front brake control
  • - Removal of the front brake master cylinder
  • - Refitting the front brake master cylinder
  • - Maintenance operations
  • - Removal of the front brake system
  • - Removal of the brake disks
  • - Overhauling the front brake components
  • - Refitting the brake disks
  • - Refitting the front brake system
  • - 4 - Rear brake
  • - Removing of the rear brake control
  • - Disassembly of the rear brake control
  • - Refitting the rear brake control
  • - Removal of the rear brake calliper
  • - Removal of the rear brake disc
  • - Refitting the rear brake calliper
  • - 5 - ABS system information
  • - Operating principle
  • - ABS system operating information
  • - ABS system deactivation
  • - 6 - System components
  • - Replacing the front phonic wheel sensor
  • - Replacing the rear phonic wheel sensor
  • - Removing of the ABS control unit
  • - Refitting the ABS control unit
  • - Flexible wiring/hoses positioning
  • - Table A
  • - Table B
  • - Table C
  • - 7 - ABS components maintenance
  • - Adjusting of the AIR-GAP phonic wheel sensor
  • - Bleeding of the ABS hydraulic system
  • - 8.1 - Handlebar assembly - Hand guards - Rear-view mirrors - Throttle grip
  • - Removal of the rear-view mirrors
  • - Refitting the rear-view mirrors
  • - Removing of the hand guards
  • - Refitting the hand guards
  • - Removal of the handlebar
  • - Refitting the handlebar
  • - Adjusting the throttle cable
  • - Removal of the throttle twistgrip
  • - Refitting the throttle twistgrip
  • - 8.2 - Handlebar unit: clutch hydraulic control
  • - Removal of the clutch master cylinder assembly
  • - Refitting the clutch master cylinder assembly
  • - Removal of the clutch transmission unit
  • - Refitting the clutch transmission unit
  • - 9 - Gearchange mechanism
  • - Removal of the gearchange control
  • - Disassembly of the gearchange mechanism
  • - Refitting the gearchange mechanism
  • - 10.1 - Fork - Steering head: front fork (1200 ABS)
  • - Refitting the front fork (1200 ABS)
  • - Overhauling the front fork (1200 ABS)
  • - Refit the front fork (1200 ABS)
  • - 10.2 - Front fork - Steering head: front fork (1200 S ABS)
  • - Removal of the front fork (1200 S ABS)
  • - Overhauling the fork
  • - Refit the fork (1200 S ABS)
  • - 10.3 - Fork - Steering head: yoke
  • - Adjusting the steering head bearings
  • - Steering angle adjustment
  • - Removal of the steering head components
  • - Refitting the steering head components
  • - 12 - Rear shock absorber assembly
  • - Rear suspension system
  • - Removal of the rear shock absorber
  • - Overhauling the rear shock absorber
  • - Refitting the rear suspension
  • - 13 - Swingarm
  • - Removal of the rear wheel eccentric hub and rear wheel axle
  • - Refitting the rear wheel eccentric hub and rear wheel axle
  • - Removal of the swingarm
  • - Inspecting the swingarm pivot shaft
  • - Overhauling the rear swingarm
  • - Refitting the swingarm
  • - 14 - Final drive
  • - Inspecting the final drive
  • - Removing of the front sprocket
  • - Refitting the front sprocket
  • - Replacing of the rear sprocket
  • - Refitting the rear sprocket
  • - Washing the chain
  • - Lubricating the chain
  • - 15 - Footrest brackets
  • - Removal of the front footrests
  • - Refitting the front footrests
  • - Removing of the rear footrests
  • - Refitting the rear footrests
  • - 16 - Stands
  • - Removing of the sidestand
  • - Refitting the sidestand
  • - 17 - Frame inspection
  • - Disassembly of structural components and the frame
  • - Removing of the headlight assembly
  • - Refitting the headlight assembly
  • - Checking the frame
  • - Reassembly of structural components and the frame
  • - 18 - Licence plate holder
  • - Removal of the licence plate holder
  • - Refitting the licence plate holder
  • 8 - FUEL SYSTEM / EXHAUST SYSTEM
  • - 2 - Fuel tank
  • - Removal of the fuel tank
  • - Removing the filler plug unit
  • - Refitting the filler plug unit
  • - Renewal of the fuel tank flange
  • - Refitting the fuel tank flange
  • - Refitting the fuel tank
  • - 6 - Airbox - Throttle Body
  • - Removal the airbox and throttle body
  • - Refitting the airbox and throttle body
  • - 7 - Air intake
  • - Removal of the air filters
  • - Refitting the air filters
  • - 8 - Exhaust system
  • - Removal of the exhaust system
  • - Refitting the exhaust system
  • - 10 - Evaporative emissions canister
  • - Evaporative emissions canister system (USA versions only)
  • - Removal of the evaporative emissions canister
  • - Refitting the evaporative emissions canister
  • 9 - ENGINE
  • - 1 - Removal-refitting of the engine assembly
  • - Removal of the engine
  • - Refitting the engine
  • - 2.1 - Lubrication system: oil pump
  • - Removal of the oil pump
  • - Disassembly of the oil pump
  • - Reassembly of the oil pump
  • - Refitting the oil pump
  • - 2.2 - Lubrication system: oil cooler
  • - Removal of the lubrication system
  • - Oil cooler inspection
  • - Refitting the lubrication system
  • - 2.3 - Lubrication system: oil breather tank
  • - Refitting the oil breather tank
  • - Refitting the oil breather tank
  • - 3.1 - Cooling system: coolant expansion tank
  • - Removal of the expansion tank
  • - Refitting the expansion tank
  • - 3.2 - Cooling system: radiator
  • - Removal of the radiator
  • - Renewal of the cooling fan
  • - Refitting the radiator
  • - Removal of the cooling system hoses and unions
  • - Refitting the cooling system hoses and unions
  • - 3.3 - Cooling system: water pump
  • - Removal of the water pump
  • - Refitting the water pump
  • - 4.1 - Cylinder head assemblies: checks and adjustments
  • - Checking and adjusting the valve clearances
  • - Checking valve lift
  • - Checking the engine timing
  • - 4.2 - Cylinder head assemblies: timing system
  • - Removal of the timing belt covers
  • - Removal of the movable tensioner/timing belt
  • - Removing of the cylinder head pulley/fixed tensioner
  • - Removal of the tensioner and idler pulley mounting studs
  • - Disassembly of the camshaft pulleys
  • - Removing the timing belt driveshaft pulleys
  • - Refitting the timing belt driveshaft pulleys
  • - Refitting the idler and tensioner pulley mounting studs
  • - Reassembly of the timing pulleys
  • - Refitting the cylinder heads pulleys/fixed tensioners
  • - Refitting the timing belts
  • - Refitting the timing covers
  • - 4.4 - Cylinder head assemblies: camshafts
  • - Removal of the camshafts
  • - Checking the camshafts and supports
  • - Refitting the camshafts
  • - Removal of the intake manifold and coolant union
  • - Refitting the intake manifold and coolant union
  • - 4.5 - Cylinder head assemblies: valves - rocker arms
  • - Removal of the cylinder heads
  • - Removing the valves
  • - Removing the valve rocker arms
  • - Overhaul of cylinder head components
  • - Reassembly of the cylinder head
  • - Refitting the cylinder head assemblies
  • - 5 - Cylinder/piston assemblies
  • - Removal of the cylinder/piston assembly
  • - Overhaul of the cylinder barrel/piston components
  • - Refitting the cylinder/piston assembly
  • - 6.1 - Clutch assembly: clutch
  • - Description of the clutch assembly
  • - Removal of the clutch
  • - Checking and overhauling the components
  • - Reassembling the clutch
  • - 6.2 - Clutch assembly: clutch-side crankcase cover
  • - Removal of the clutch-side crankcase cover
  • - Disassembly of the clutch-side crankcase cover
  • - Reassembly of the clutch-side crankcase cover
  • - Refitting the clutch-side crankcase cover
  • - 6.3 - Clutch assembly: primary drive gears
  • - Removal of the primary drive gear
  • - Refitting the primary drive gears and checking backlash
  • - 7.1 - Gearbox assembly: gearchange mechanism
  • - Removal of the gear selector lever
  • - Disassembly of gear interlock plunger and pawl assembly
  • - Refitting the gear interlock plunger and pawl assembly
  • - Refitting the gear selector lever
  • - 7.2 - Gearbox assembly: gearbox shafts
  • - Removal of the gearbox assembly
  • - Disassembly of the gearbox shafts
  • - Overhaul of the gearbox
  • - Inspection of the gear selector forks
  • - Inspection of the gear selector drum
  • - Reassembly of the gearbox shafts
  • - Reassembly of the gearbox
  • - 8 - Flywheel - alternator
  • - Removal of the alternator-side crankcase cover
  • - Disassembly of the alternator-side crankcase cover
  • - Removing the flywheel - generator assembly
  • - Overhaul of the flywheel-alternator assembly
  • - Refitting the flywheel-alternator assembly
  • - Refitting the alternator-side crankcase cover
  • - 9.1 - Crankcase assembly: external components
  • - Removing outer components
  • - Refitting the external components
  • - Removal of the timing gears
  • - Refitting the timing gears
  • - Removal of the starter motor idler gear
  • - Refitting the starter motor gear
  • - 9.2 - Crankcase assembly: crankcase halves
  • - Separation of the crankcase halves
  • - Overhaul of the crankcase halves
  • - Main bearings
  • - Reassembly of the crankcase halves
  • - Shimming the shafts
  • - Reassembly of the crankcase halves
  • - 9.3 - Crankcase assembly: crankshaft/connecting rods assembly
  • - Removal of the crankshaft/connecting rods assembly
  • - Disassembly of the crankshaft/connecting rods assembly
  • - Overhaul of the connecting rods
  • - Reassembly of the connecting rods
  • - Refitting the crankshaft/connecting rod assembly