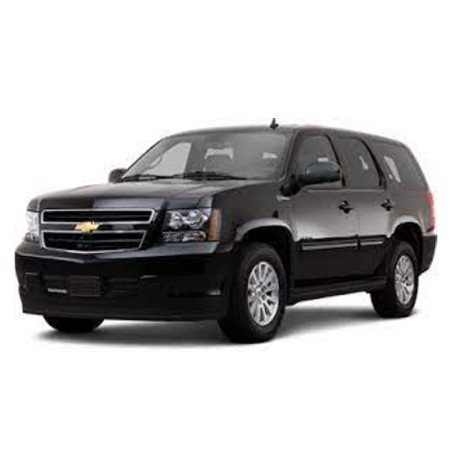
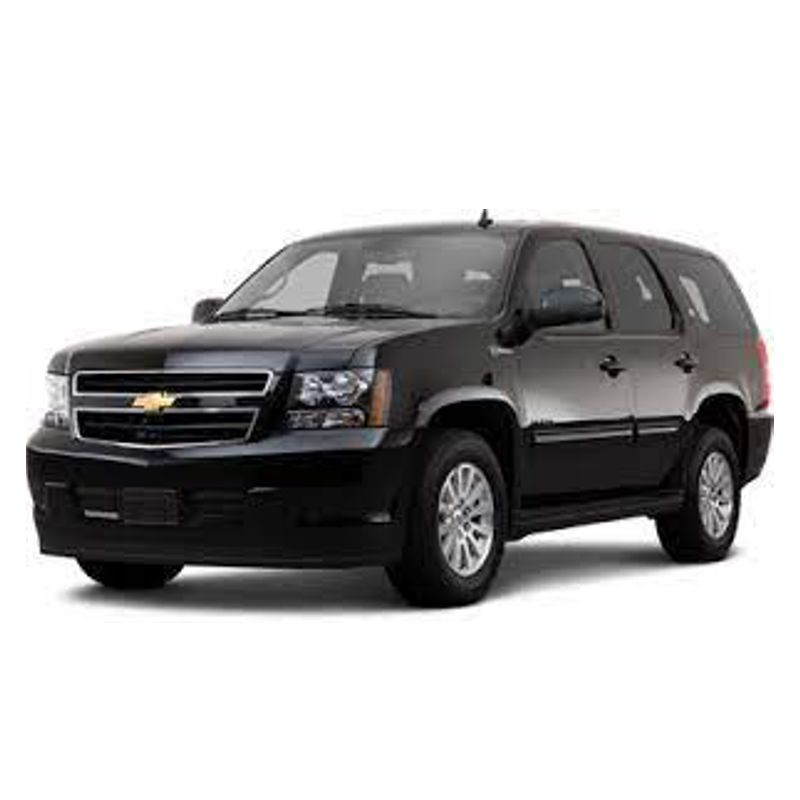
Chevrolet Tahoe GMT-900 - Wiring Diagrams and Components Locator
Digital technical documentation with sections on ELECTRICAL WIRING DIAGRAMS, - 1: Automatic A/C Circuit, Except Hybrid (1 of 4), - 2: Automatic A/C Circuit, Except Hybrid (2 of 4). Review the complete contents below for the systems and procedures covered.
Manual contents
- ELECTRICAL WIRING DIAGRAMS
- Chevrolet Tahoe
- - 1: Automatic A/C Circuit, Except Hybrid (1 of 4)
- - 2: Automatic A/C Circuit, Except Hybrid (2 of 4)
- - 3: Automatic A/C Circuit, Except Hybrid (3 of 4)
- - 4: Automatic A/C Circuit, Except Hybrid (4 of 4)
- - 5: Automatic A/C Circuit, Hybrid (1 of 4)
- - 6: Automatic A/C Circuit, Hybrid (2 of 4)
- - 7: Automatic A/C Circuit, Hybrid (3 of 4)
- - 8: Automatic A/C Circuit, Hybrid (4 of 4)
- - 9: Manual A/C Circuit (1 of 4)
- - 10: Manual A/C Circuit (2 of 4)
- - 11: Manual A/C Circuit (3 of 4)
- - 12: Manual A/C Circuit (4 of 4)
- - 13: Anti Lock Brake Circuit, Hybrid (1 of 2)
- - 14: Anti Lock Brake Circuit, Hybrid (2 of 2)
- - 15: Anti Lock Brake Circuit, W/ JD9 (1 of 2)
- - 16: Anti Lock Brake Circuit, W/ JD9 (2 of 2)
- - 17: Anti Lock Brake Circuit, W/O JD9 (1 of 2)
- - 18: Anti Lock Brake Circuit, W/O JD9 (2 of 2)
- - 19: Trailer ABS Circuit
- - 20: Anti-theft Circuit
- - 21: Body Control Modules Circuit (1 of 3)
- - 22: Body Control Modules Circuit (2 of 3)
- - 23: Body Control Modules Circuit (3 of 3)
- - 24: Computer Data Lines Circuit, Except Hybrid (1 of 2)
- - 25: Computer Data Lines Circuit, Except Hybrid (2 of 2)
- - 26: Computer Data Lines Circuit, Hybrid (1 of 3)
- - 27: Computer Data Lines Circuit, Hybrid (2 of 3)
- - 28: Computer Data Lines Circuit, Hybrid (3 of 3)
- - 29: 5.3L VIN 0, Cooling Fan Circuit
- - 30: 6.0L VIN J, Cooling Fan Circuit
- - 31: 6.0L VIN J, Hybrid Cooling Fan Circuit
- - 32: Cruise Control Circuit (1 of 2)
- - 33: Cruise Control Circuit (2 of 2)
- - 34: Heated Mirrors Circuit
- - 35: Rear Defogger Circuit
- - 36: Electronic Power Steering Circuit
- - 37: Electronic Suspension Circuit (1 of 2)
- - 38: Electronic Suspension Circuit (2 of 2)
- - 39: 5.3L VIN 0, Engine Performance Circuit (1 of 6)
- - 40: 5.3L VIN 0, Engine Performance Circuit (2 of 6)
- - 41: 5.3L VIN 0, Engine Performance Circuit (3 of 6)
- - 42: 5.3L VIN 0, Engine Performance Circuit (4 of 6)
- - 43: 5.3L VIN 0, Engine Performance Circuit (5 of 6)
- - 44: 5.3L VIN 0, Engine Performance Circuit (6 of 6)
- - 45: 6.0L VIN J, Engine Controls Circuit (1 of 6)
- - 46: 6.0L VIN J, Engine Controls Circuit (2 of 6)
- - 47: 6.0L VIN J, Engine Controls Circuit (3 of 6)
- - 48: 6.0L VIN J, Engine Controls Circuit (4 of 6)
- - 49: 6.0L VIN J, Engine Controls Circuit (5 of 6)
- - 50: 6.0L VIN J, Engine Controls Circuit (6 of 6)
- - 51: 6.0L VIN J, Hybrid System Circuit (1 of 5)
- - 52: 6.0L VIN J, Hybrid System Circuit (2 of 5)
- - 53: 6.0L VIN J, Hybrid System Circuit (3 of 5)
- - 54: 6.0L VIN J, Hybrid System Circuit (4 of 5)
- - 55: 6.0L VIN J, Hybrid System Circuit (5 of 5)
- - 56: Backup Lamps Circuit
- - 57: Beacon Lamp Circuit
- - 58: Exterior Lamps Circuit (1 of 2)
- - 59: Exterior Lamps Circuit (2 of 2)
- - 60: Trailer Tow Circuit
- - 61: Ground Distribution Circuit (1 of 6)
- - 62: Ground Distribution Circuit (2 of 6)
- - 63: Ground Distribution Circuit (3 of 6)
- - 64: Ground Distribution Circuit (4 of 6)
- - 65: Ground Distribution Circuit (5 of 6)
- - 66: Ground Distribution Circuit (6 of 6)
- - 67: Headlights Circuit
- - 68: Horn Circuit
- - 69: Instrument Cluster Circuit (1 of 2)
- - 70: Instrument Cluster Circuit (2 of 2)
- - 71: Courtesy Lamps Circuit
- - 72: Instrument Illumination Circuit
- - 73: Adjustable Pedal Circuit
- - 74: Driver"s Memory Seat Circuit (1 of 2)
- - 75: Driver"s Memory Seat Circuit (2 of 2)
- - 76: Memory Mirrors Circuit (1 of 2)
- - 77: Memory Mirrors Circuit (2 of 2)
- - 78: Blind Spot Monitoring Circuit
- - 79: Navigation Circuit, W/ UYS, UQA & W/O Y91 (1 of 4)
- - 80: Navigation Circuit, W/ UYS, UQA & W/O Y91 (2 of 4)
- - 81: Navigation Circuit, W/ UYS, UQA & W/O Y91 (3 of 4)
- - 82: Navigation Circuit, W/ UYS, UQA & W/O Y91 (4 of 4)
- - 83: Navigation Circuit, W/ UYS, Y91 & UQA (1 of 4)
- - 84: Navigation Circuit, W/ UYS, Y91 & UQA (2 of 4)
- - 85: Navigation Circuit, W/ UYS, Y91 & UQA (3 of 4)
- - 86: Navigation Circuit, W/ UYS, Y91 & UQA (4 of 4)
- - 87: Navigation Circuit, W/ Y91 & W/ UQA (1 of 4)
- - 88: Navigation Circuit, W/ Y91 & W/ UQA (2 of 4)
- - 89: Navigation Circuit, W/ Y91 & W/ UQA (3 of 4)
- - 90: Navigation Circuit, W/ Y91 & W/ UQA (4 of 4)
- - 91: Navigation Circuit, W/O UQS & UQA (1 of 3)
- - 92: Navigation Circuit, W/O UQS & UQA (2 of 3)
- - 93: Navigation Circuit, W/O UQS & UQA (3 of 3)
- - 94: Navigation Circuit, W/O UYS W/ UQS (1 of 4)
- - 95: Navigation Circuit, W/O UYS W/ UQS (2 of 4)
- - 96: Navigation Circuit, W/O UYS W/ UQS (3 of 4)
- - 97: Navigation Circuit, W/O UYS W/ UQS (4 of 4)
- - 98: Navigation Circuit, W/O UYS, Y91 & W/ UQA (1 of 3)
- - 99: Navigation Circuit, W/O UYS, Y91 & W/ UQA (2 of 3)
- - 100: Navigation Circuit, W/O UYS, Y91 & W/ UQA (3 of 3)
- - 101: Parking Assistant Circuit
- - 102: Rear View Camera Circuit, W/ One Piece Liftgate
- - 103: Rear View Camera Circuit, W/ SPO Accessory
- - 104: Rear View Camera Circuit, W/O One Piece Liftgate
- - 105: Power Distribution Circuit (1 of 8)
- - 106: Power Distribution Circuit (2 of 8)
- - 107: Power Distribution Circuit (3 of 8)
- - 108: Power Distribution Circuit (4 of 8)
- - 109: Power Distribution Circuit (5 of 8)
- - 110: Power Distribution Circuit (6 of 8)
- - 111: Power Distribution Circuit (7 of 8)
- - 112: Power Distribution Circuit (8 of 8)
- - 113: Power Door Locks Circuit
- - 114: Electrochromic Mirror Circuit
- - 115: Adjustable Pedal Circuit
- - 116: Climate Control Seats Circuit (1 of 2)
- - 117: Climate Control Seats Circuit (2 of 2)
- - 118: Driver Power Seat Circuit
- - 119: Front Heated Seats Circuit, W/ SPO Heated Seats (1 of 2)
- - 120: Front Heated Seats Circuit, W/ SPO Heated Seats (2 of 2)
- - 121: Front Heated Seats Circuit, W/O SPO Heated Seats (1 of 2)
- - 122: Front Heated Seats Circuit, W/O SPO Heated Seats (2 of 2)
- - 123: Heated Steering Wheel Circuit
- - 124: Passenger Power Seat Circuit, W/ Bucket Seats
- - 125: Passenger Power Seat Circuit, W/O Bucket Seats
- - 126: Rear Folding Seat Circuit
- - 127: Rear Heated Seats Circuit
- - 128: Sunroof Circuit
- - 129: Power Windows Circuit
- - 130: Dual DVD Headrest Circuit
- - 131: Radio Circuit, W/ UQA, W/O UYS & Y91 (1 of 3)
- - 132: Radio Circuit, W/ UQA, W/O UYS & Y91 (2 of 3)
- - 133: Radio Circuit, W/ UQA, W/O UYS & Y91 (3 of 3)
- - 134: Radio Circuit, W/ UQS (1 of 4)
- - 135: Radio Circuit, W/ UQS (2 of 4)
- - 136: Radio Circuit, W/ UQS (3 of 4)
- - 137: Radio Circuit, W/ UQS (4 of 4)
- - 138: Radio Circuit, W/ UYS, UQA & W/O Y91 (1 of 4)
- - 139: Radio Circuit, W/ UYS, UQA & W/O Y91 (2 of 4)
- - 140: Radio Circuit, W/ UYS, UQA & W/O Y91 (3 of 4)
- - 141: Radio Circuit, W/ UYS, UQA & W/O Y91 (4 of 4)
- - 142: Radio Circuit, W/ UYS, Y91 & UQA (1 of 4)
- - 143: Radio Circuit, W/ UYS, Y91 & UQA (2 of 4)
- - 144: Radio Circuit, W/ UYS, Y91 & UQA (3 of 4)
- - 145: Radio Circuit, W/ UYS, Y91 & UQA (4 of 4)
- - 146: Radio Circuit, W/ Y91 & UQA, W/O UYS (1 of 4)
- - 147: Radio Circuit, W/ Y91 & UQA, W/O UYS (2 of 4)
- - 148: Radio Circuit, W/ Y91 & UQA, W/O UYS (3 of 4)
- - 149: Radio Circuit, W/ Y91 & UQA, W/O UYS (4 of 4)
- - 150: Radio Circuit, W/O UQS & UQA (1 of 3)
- - 151: Radio Circuit, W/O UQS & UQA (2 of 3)
- - 152: Radio Circuit, W/O UQS & UQA (3 of 3)
- - 153: Video Splitter Circuit
- - 154: Shift Interlock Circuit
- - 155: Charging Circuit
- - 156: Starting Circuit
- - 157: Supplemental Restraints Circuit (1 of 3)
- - 158: Supplemental Restraints Circuit (2 of 3)
- - 159: Supplemental Restraints Circuit (3 of 3)
- - 160: 5.3L VIN 0, A/T Circuit (1 of 2)
- - 161: 5.3L VIN 0, A/T Circuit (2 of 2)
- - 162: 5.3L VIN 0, Transfer Case Circuit
- - 163: 6.0L VIN J, A/T Circuit (1 of 2)
- - 164: 6.0L VIN J, A/T Circuit (2 of 2)
- - 165: 6.0L VIN J, Transfer Case Circuit
- - 166: Liftgate Release Circuit
- - 167: Power Liftgate Circuit
- - 168: Retractable Running Boards Circuit
- - 169: Warning Systems Circuit
- - 170: Front Wiper/Washer Circuit
- - 171: Rear Wiper/Washer Circuit
- Chevrolet Tahoe LS
- - 1: Automatic A/C Circuit, Except Hybrid (1 of 4)
- - 2: Automatic A/C Circuit, Except Hybrid (2 of 4)
- - 3: Automatic A/C Circuit, Except Hybrid (3 of 4)
- - 4: Automatic A/C Circuit, Except Hybrid (4 of 4)
- - 5: Automatic A/C Circuit, Hybrid (1 of 4)
- - 6: Automatic A/C Circuit, Hybrid (2 of 4)
- - 7: Automatic A/C Circuit, Hybrid (3 of 4)
- - 8: Automatic A/C Circuit, Hybrid (4 of 4)
- - 9: Manual A/C Circuit (1 of 4)
- - 10: Manual A/C Circuit (2 of 4)
- - 11: Manual A/C Circuit (3 of 4)
- - 12: Manual A/C Circuit (4 of 4)
- - 13: Anti Lock Brake Circuit, Hybrid (1 of 2)
- - 14: Anti Lock Brake Circuit, Hybrid (2 of 2)
- - 15: Anti Lock Brake Circuit, W/ JD9 (1 of 2)
- - 16: Anti Lock Brake Circuit, W/ JD9 (2 of 2)
- - 17: Anti Lock Brake Circuit, W/O JD9 (1 of 2)
- - 18: Anti Lock Brake Circuit, W/O JD9 (2 of 2)
- - 19: Trailer ABS Circuit
- - 20: Anti-theft Circuit
- - 21: Body Control Modules Circuit (1 of 3)
- - 22: Body Control Modules Circuit (2 of 3)
- - 23: Body Control Modules Circuit (3 of 3)
- - 24: Computer Data Lines Circuit, Except Hybrid (1 of 2)
- - 25: Computer Data Lines Circuit, Except Hybrid (2 of 2)
- - 26: Computer Data Lines Circuit, Hybrid (1 of 3)
- - 27: Computer Data Lines Circuit, Hybrid (2 of 3)
- - 28: Computer Data Lines Circuit, Hybrid (3 of 3)
- - 29: 5.3L VIN 0, Cooling Fan Circuit
- - 30: 6.0L VIN J, Cooling Fan Circuit
- - 31: 6.0L VIN J, Hybrid Cooling Fan Circuit
- - 32: Cruise Control Circuit (1 of 2)
- - 33: Cruise Control Circuit (2 of 2)
- - 34: Heated Mirrors Circuit
- - 35: Rear Defogger Circuit
- - 36: Electronic Power Steering Circuit
- - 37: Electronic Suspension Circuit (1 of 2)
- - 38: Electronic Suspension Circuit (2 of 2)
- - 39: 5.3L VIN 0, Engine Performance Circuit (1 of 6)
- - 40: 5.3L VIN 0, Engine Performance Circuit (2 of 6)
- - 41: 5.3L VIN 0, Engine Performance Circuit (3 of 6)
- - 42: 5.3L VIN 0, Engine Performance Circuit (4 of 6)
- - 43: 5.3L VIN 0, Engine Performance Circuit (5 of 6)
- - 44: 5.3L VIN 0, Engine Performance Circuit (6 of 6)
- - 45: 6.0L VIN J, Engine Controls Circuit (1 of 6)
- - 46: 6.0L VIN J, Engine Controls Circuit (2 of 6)
- - 47: 6.0L VIN J, Engine Controls Circuit (3 of 6)
- - 48: 6.0L VIN J, Engine Controls Circuit (4 of 6)
- - 49: 6.0L VIN J, Engine Controls Circuit (5 of 6)
- - 50: 6.0L VIN J, Engine Controls Circuit (6 of 6)
- - 51: 6.0L VIN J, Hybrid System Circuit (1 of 5)
- - 52: 6.0L VIN J, Hybrid System Circuit (2 of 5)
- - 53: 6.0L VIN J, Hybrid System Circuit (3 of 5)
- - 54: 6.0L VIN J, Hybrid System Circuit (4 of 5)
- - 55: 6.0L VIN J, Hybrid System Circuit (5 of 5)
- - 56: Backup Lamps Circuit
- - 57: Beacon Lamp Circuit
- - 58: Exterior Lamps Circuit (1 of 2)
- - 59: Exterior Lamps Circuit (2 of 2)
- - 60: Trailer Tow Circuit
- - 61: Ground Distribution Circuit (1 of 6)
- - 62: Ground Distribution Circuit (2 of 6)
- - 63: Ground Distribution Circuit (3 of 6)
- - 64: Ground Distribution Circuit (4 of 6)
- - 65: Ground Distribution Circuit (5 of 6)
- - 66: Ground Distribution Circuit (6 of 6)
- - 67: Headlights Circuit
- - 68: Horn Circuit
- - 69: Instrument Cluster Circuit (1 of 2)
- - 70: Instrument Cluster Circuit (2 of 2)
- - 71: Courtesy Lamps Circuit
- - 72: Instrument Illumination Circuit
- - 73: Adjustable Pedal Circuit
- - 74: Driver"s Memory Seat Circuit (1 of 2)
- - 75: Driver"s Memory Seat Circuit (2 of 2)
- - 76: Memory Mirrors Circuit (1 of 2)
- - 77: Memory Mirrors Circuit (2 of 2)
- - 78: Blind Spot Monitoring Circuit
- - 79: Navigation Circuit, W/ UQA, W/O UYS & Y91 (1 of 4)
- - 80: Navigation Circuit, W/ UQA, W/O UYS & Y91 (2 of 4)
- - 81: Navigation Circuit, W/ UQA, W/O UYS & Y91 (3 of 4)
- - 82: Navigation Circuit, W/ UQA, W/O UYS & Y91 (4 of 4)
- - 83: Navigation Circuit, W/ UQS W/O UYS (1 of 4)
- - 84: Navigation Circuit, W/ UQS W/O UYS (2 of 4)
- - 85: Navigation Circuit, W/ UQS W/O UYS (3 of 4)
- - 86: Navigation Circuit, W/ UQS W/O UYS (4 of 4)
- - 87: Navigation Circuit, W/ UYS, UQA & W/O Y91 (1 of 4)
- - 88: Navigation Circuit, W/ UYS, UQA & W/O Y91 (2 of 4)
- - 89: Navigation Circuit, W/ UYS, UQA & W/O Y91 (3 of 4)
- - 90: Navigation Circuit, W/ UYS, UQA & W/O Y91 (4 of 4)
- - 91: Navigation Circuit, W/ UYS, Y91 & UQA (1 of 4)
- - 92: Navigation Circuit, W/ UYS, Y91 & UQA (2 of 4)
- - 93: Navigation Circuit, W/ UYS, Y91 & UQA (3 of 4)
- - 94: Navigation Circuit, W/ UYS, Y91 & UQA (4 of 4)
- - 95: Navigation Circuit, W/ Y91 & UQA, W/O UYS (1 of 4)
- - 96: Navigation Circuit, W/ Y91 & UQA, W/O UYS (2 of 4)
- - 97: Navigation Circuit, W/ Y91 & UQA, W/O UYS (3 of 4)
- - 98: Navigation Circuit, W/ Y91 & UQA, W/O UYS (4 of 4)
- - 99: Navigation Circuit, W/O UQS & UQA (1 of 3)
- - 100: Navigation Circuit, W/O UQS & UQA (2 of 3)
- - 101: Navigation Circuit, W/O UQS & UQA (3 of 3)
- - 102: Parking Assistant Circuit
- - 103: Rear View Camera Circuit, W/ One Piece Liftgate
- - 104: Rear View Camera Circuit, W/ SPO Accessory
- - 105: Rear View Camera Circuit, W/O One Piece Liftgate or SPO Accessory
- - 106: Power Distribution Circuit (1 of 8)
- - 107: Power Distribution Circuit (2 of 8)
- - 108: Power Distribution Circuit (3 of 8)
- - 109: Power Distribution Circuit (4 of 8)
- - 110: Power Distribution Circuit (5 of 8)
- - 111: Power Distribution Circuit (6 of 8)
- - 112: Power Distribution Circuit (7 of 8)
- - 113: Power Distribution Circuit (8 of 8)
- - 114: Power Door Locks Circuit
- - 115: Electrochromic Mirror Circuit
- - 116: Adjustable Pedal Circuit
- - 117: Climate Control Seats Circuit (1 of 2)
- - 118: Climate Control Seats Circuit (2 of 2)
- - 119: Driver Power Seat Circuit
- - 120: Front Heated Seats Circuit, W/ Memory (1 of 2)
- - 121: Front Heated Seats Circuit, W/ Memory (2 of 2)
- - 122: Front Heated Seats Circuit, W/O Memory (1 of 2)
- - 123: Front Heated Seats Circuit, W/O Memory (2 of 2)
- - 124: Heated Steering Wheel Circuit
- - 125: Passenger Power Seat Circuit, Except Hybrid W/ Bucket Seats
- - 126: Passenger Power Seat Circuit, Hybrid W/ Bucket Seats
- - 127: Passenger Power Seat Circuit, W/O Bucket Seats
- - 128: Rear Folding Seat Circuit
- - 129: Rear Heated Seats Circuit
- - 130: Power Top/Sunroof Circuit
- - 131: Power Windows Circuit
- - 132: Dual DVD Headrest Circuit
- - 133: Radio Circuit, W/ UQA, W/O UYS & Y91 (1 of 4)
- - 134: Radio Circuit, W/ UQA, W/O UYS & Y91 (2 of 4)
- - 135: Radio Circuit, W/ UQA, W/O UYS & Y91 (3 of 4)
- - 136: Radio Circuit, W/ UQA, W/O UYS & Y91 (4 of 4)
- - 137: Radio Circuit, W/ UYS, UQA & W/O Y91 (1 of 4)
- - 138: Radio Circuit, W/ UYS, UQA & W/O Y91 (2 of 4)
- - 139: Radio Circuit, W/ UYS, UQA & W/O Y91 (3 of 4)
- - 140: Radio Circuit, W/ UYS, UQA & W/O Y91 (4 of 4)
- - 141: Radio Circuit, W/ UYS, Y91 & UQA (1 of 4)
- - 142: Radio Circuit, W/ UYS, Y91 & UQA (2 of 4)
- - 143: Radio Circuit, W/ UYS, Y91 & UQA (3 of 4)
- - 144: Radio Circuit, W/ UYS, Y91 & UQA (4 of 4)
- - 145: Radio Circuit, W/ Y91 & UQA, W/O UYS (1 of 4)
- - 146: Radio Circuit, W/ Y91 & UQA, W/O UYS (2 of 4)
- - 147: Radio Circuit, W/ Y91 & UQA, W/O UYS (3 of 4)
- - 148: Radio Circuit, W/ Y91 & UQA, W/O UYS (4 of 4)
- - 149: Radio Circuit, W/O UQS & UQA (1 of 3)
- - 150: Radio Circuit, W/O UQS & UQA (2 of 3)
- - 151: Radio Circuit, W/O UQS & UQA (3 of 3)
- - 152: Video Splitter Circuit
- - 153: Shift Interlock Circuit
- - 154: Charging Circuit
- - 155: Starting Circuit
- - 156: Supplemental Restraints Circuit (1 of 3)
- - 157: Supplemental Restraints Circuit (2 of 3)
- - 158: Supplemental Restraints Circuit (3 of 3)
- - 159: 5.3L VIN 0, A/T Circuit (1 of 2)
- - 160: 5.3L VIN 0, A/T Circuit (2 of 2)
- - 161: 5.3L VIN 0, Transfer Case Circuit
- - 162: 6.0L VIN J, A/T Circuit (1 of 2)
- - 163: 6.0L VIN J, A/T Circuit (2 of 2)
- - 164: 6.0L VIN J, Transfer Case Circuit
- - 165: Liftgate Release Circuit
- - 166: Power Liftgate Circuit
- - 167: Retractable Running Boards Circuit
- - 168: Warning Systems Circuit
- - 169: Front Wiper/Washer Circuit
- - 170: Rear Wiper/Washer Circuit
- AND MORE....
- ELECTRICAL COMPONENTS LOCATOR
- - 1: Front Of Dash (Except Tahoe & Escalade)
- - 2: Under Left Side Of Dash
- - 3: Front Of Dash (Tahoe & Escalade)
- - 4: Left Rear Of Engine Compartment
- - 5: Steering Column
- - 6: Right Front Floor Of Vehicle
- - 7: Front Chassis
- - 8: Left Rear Frame Rail
- - 9: Rear Chassis
- - 10: Left Rear Of Engine Compartment
- - 11: Automatic Transmission (4L60-E/4L65-E/4L70-E)
- - 12: Left Side Of Automatic Transmission (4L60-E/4L65-E/4L70-E)
- - 13: Transfer Case
- - 14: Automatic Transmission (4L80-E/4L85-E)
- - 15: Automatic Transmission (6L50/6L80/6L90)
- - 16: Rear Of Dash
- - 17: Top Of Dash
- - 18: Left Front Floor & Center Console
- - 19: Front Of Roof
- - 20: Top Front Of Roof
- - 21: Left Front Door
- - 22: Right Front Door
- - 23: Right Rear Door
- - 24: Left Rear Door
- - 25: Right "C" Pillar
- - 26: Below Left Side Of Dash
- - 27: Dash & Kick Panels (Base)
- - 28: Rear Chassis (Short Wheel Base)
- - 29: Rear Chassis (Long Wheel Base)
- - 30: Right Side Of Engine
- - 31: Rear Chassis (Short Wheel Base)
- - 32: Rear Chassis (Long Wheel Base)
- - 33: Rear Chassis
- - 34: Top Of Engine
- - 35: Front Of Engine
- - 36: Right Rear Of Engine Compartment
- - 37: Front Of Engine Compartment
- - 38: Rear Of Roof
- - 39: Center Underside Of Vehicle
- - 40: Front Of Engine Compartment
- - 41: Heated Oxygen Sensors
- - 42: Top Center Of Dash
- - 43: Front HVAC Module
- - 44: Above Headliner
- - 45: Rear HVAC Module (Long Wheel Base)
- - 46: Rear HVAC Module (Short Wheel Base)
- - 47: Center Of Roof
- - 48: Front Of Engine Compartment
- - 49: Under Left End Of Dash
- - 50: Front Of Engine Compartment
- - 51: Rear Of Vehicle (Avalanche, Suburban & Tahoe W/One Piece Liftgate)
- - 52: Rear Of Vehicle (Avalanche, Suburban & Tahoe W/Tailgate)
- - 53: Rear Of Vehicle (Tahoe & Escalade W/One Piece Liftgate)
- - 54: Rear Of Vehicle (Tahoe & Escalade W/Tailgate)
- - 55: Rear Of Vehicle (Yukon W/One Piece Liftgate)
- - 56: Driver's Seat
- - 57: Front Passenger's Seat
- - 58: Left "D" Pillar
- - 59: Driver's Seat
- - 60: Front Passenger's Seat
- - 61: Rear Seats
- - 62: Front Of Engine Compartment
- - 63: Vehicle Overview
- - 64: Front Axle
- - 65: Transfer Case
- - 66: Liftgate (One Piece Liftgate W/Lift Glass)
- - 67: Rear Of Vehicle
- - 68: Left Front Corner Of Engine Compartment
- - 69: Front Of Engine Compartment
- - 70: Lower Left Side Of Engine
- - 71: Top Front Of Engine
- - 72: Left Side Of Engine Compartment
- - 73: Front Left Side Of Chassis
- - 74: Vehicle Floor
- - 75: Rear Chassis
- - 76: Rear Chassis
- - 77: Underhood Fuse Block
- - 78: Center Console
- - 79: Front Fascia (Avalanche, Suburban & Tahoe)
- - 80: Front Fascia (Escalade)
- - 81: Front Fascia (Yukon)
- - 82: Engine
- - 83: Engine
- - 84: Engine
- - 85: Left Rear Corner Of Engine Compartment
- - 86: Dash & Kick Panels (Escalade)
- - 87: Under Center Console
- - 88: Driver's Seat
- - 89: Front Passenger's Seat
- - 90: Roof (Except One Piece Liftgate)
- - 91: Roof (Short Wheel Base)
- - 92: Roof (Long Wheel Base)
- - 93: Passenger Compartment (Except One Piece Liftgate)
- - 94: Front Passenger Compartment (Short Wheel Base)
- - 95: Rear Passenger Compartment (Short Wheel Base)
- - 96: Front Passenger Compartment (Long Wheel Base)
- - 97: Rear Passenger Compartment (Long Wheel Base)
- - 98: Chassis (Except One Piece Liftgate)
- - 99: Chassis (Short Wheel Base)
- - 100: Chassis (Long Wheel Base)
- - 101: Liftgate (One Piece Liftgate)
- - 102: Steering Wheel